
Johndill
-
Posts
27 -
Joined
-
Last visited
Content Type
Profiles
Forums
Events
Everything posted by Johndill
-

Alienware M17 (2018-2019) 144hz upgrade
Johndill replied to Johndill's topic in Alienware 13 / 15 / 17 / 51m (2015-2020)
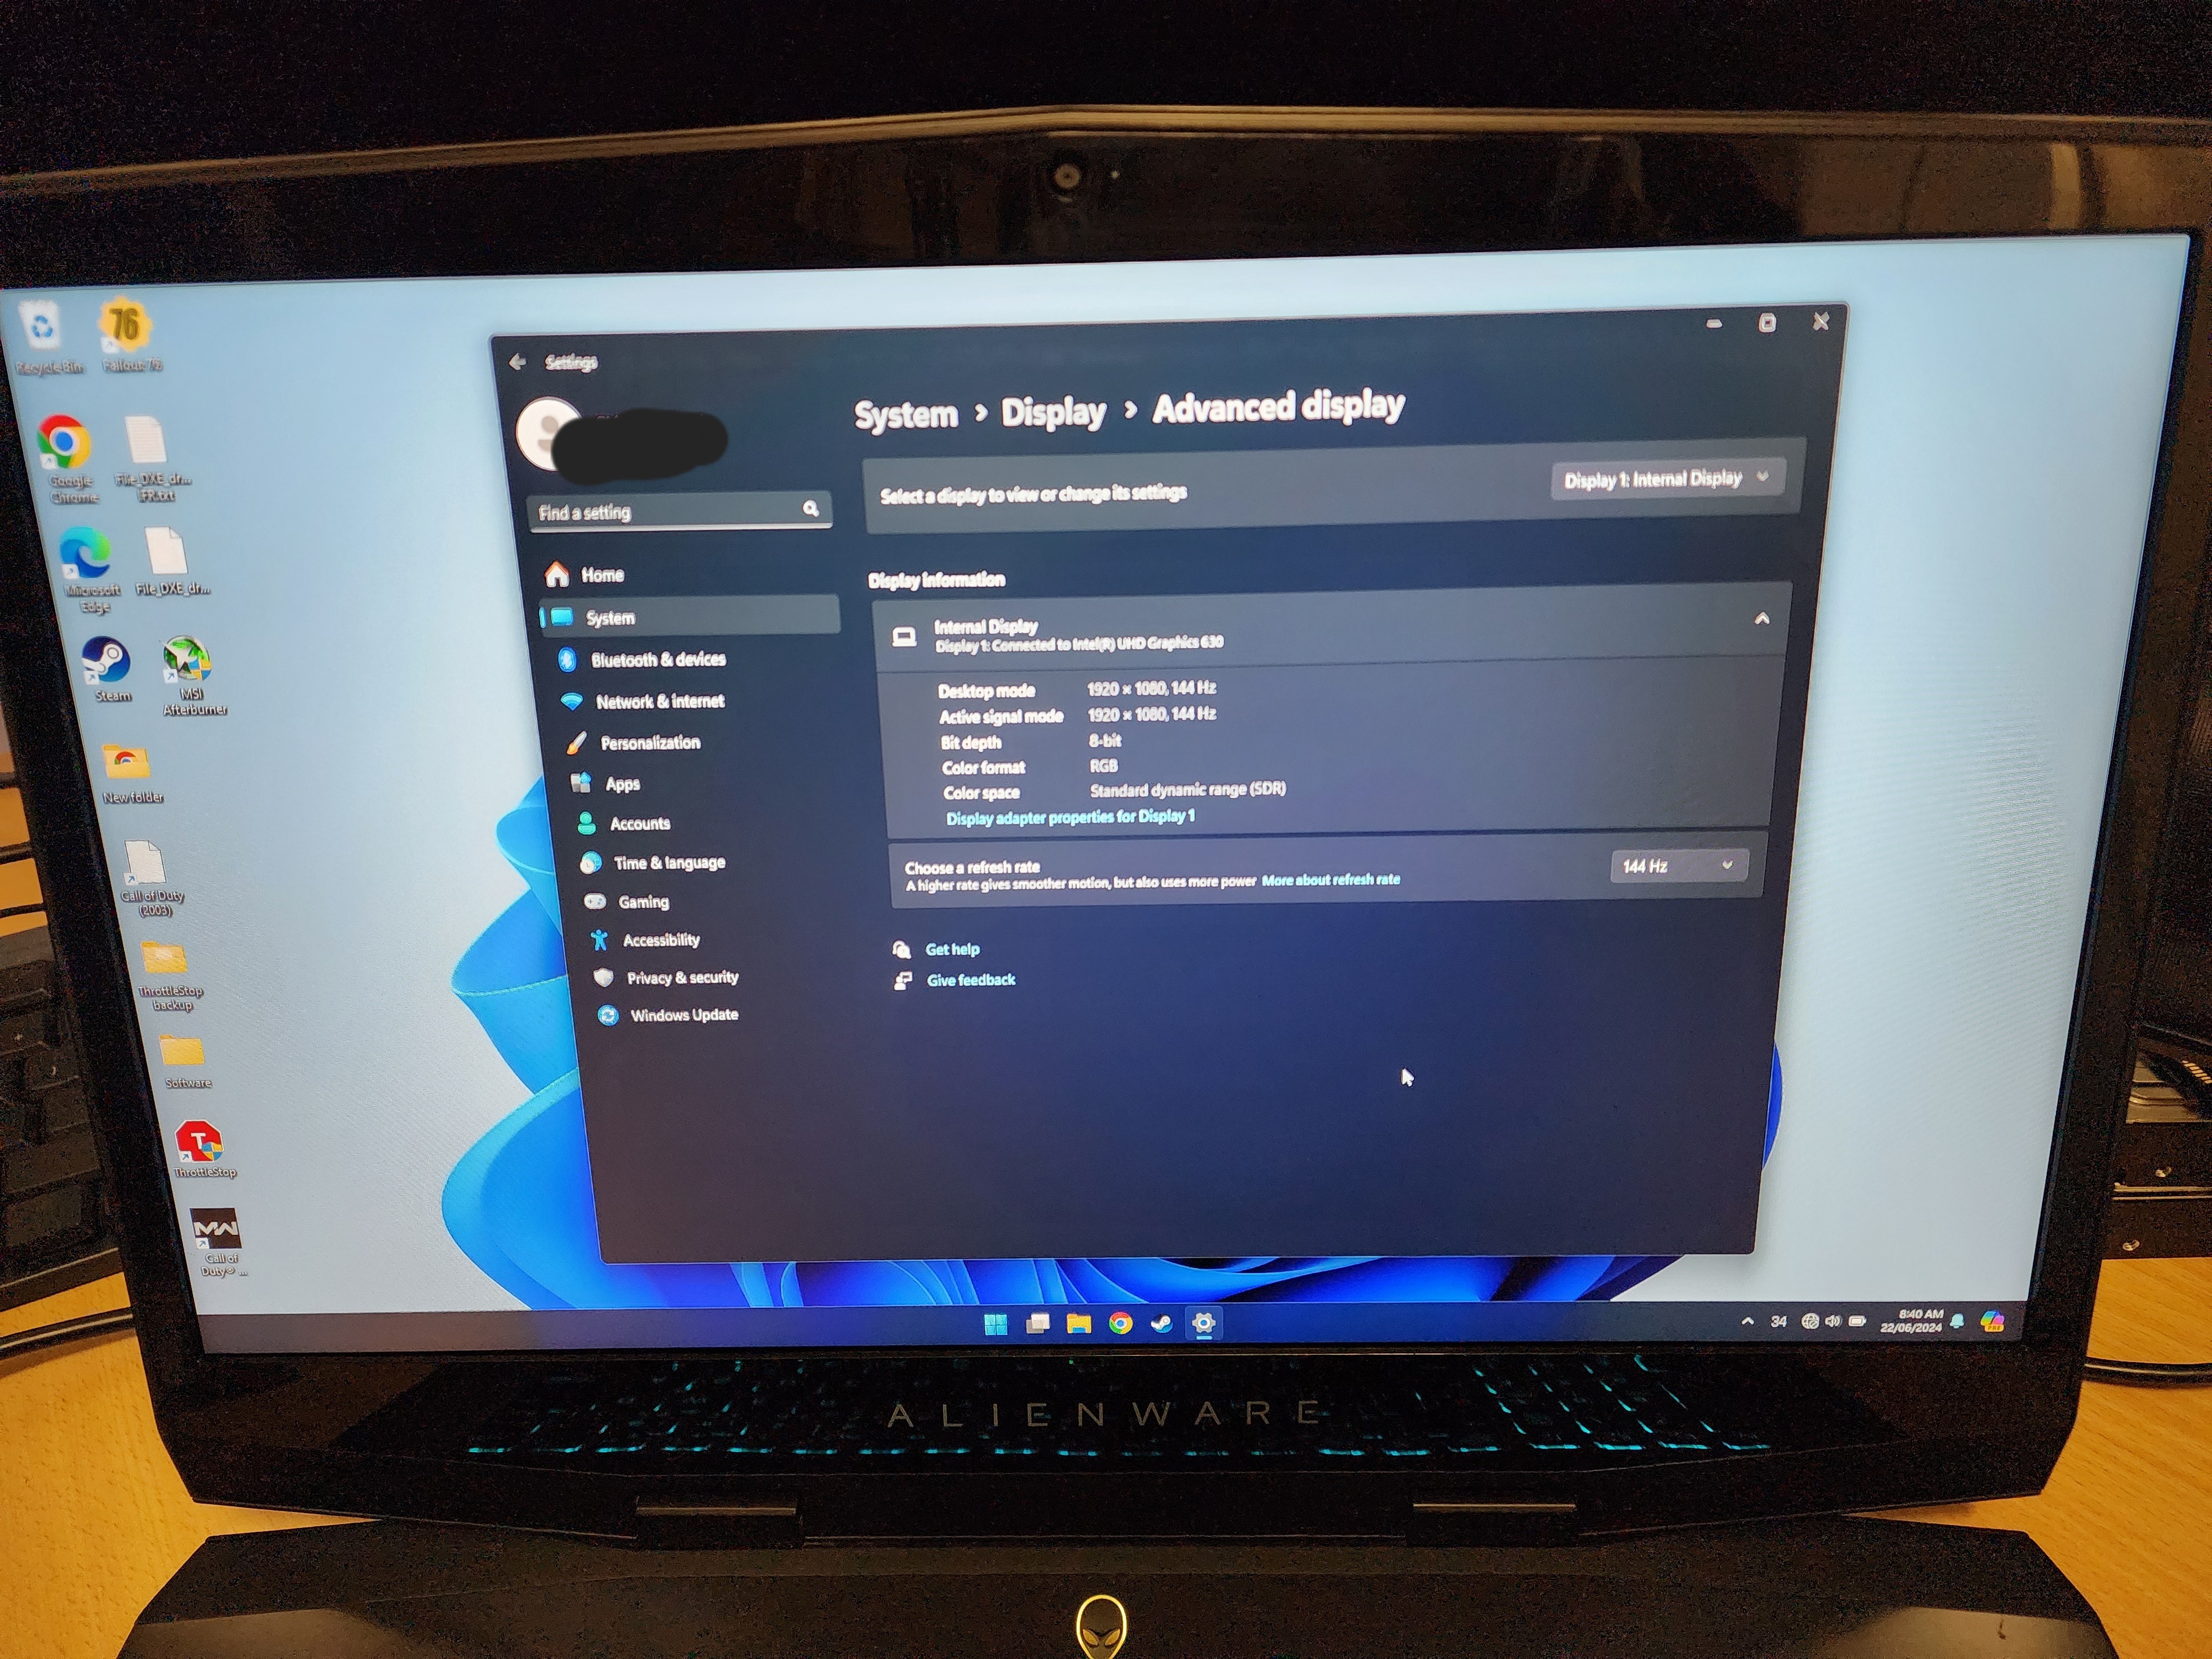
Been a while since my last post but finally found a seller on Aliexpress who had the exact panel model in stock &... upgrade success!! 1080p, 144hz with 5ms response time, butter smooth. Parts used: LG "LP173WFG-SPD2" 5ms 144hz panel. Dell P/N: 0MHTJN 30pin to 40pin display cable (If you have the 4K panel then you already have a 30pin to 40pin cable). I have also unlocked the bios overclocking so I could undervolt the CPU & it runs much cooler now.
-
Alienware M17 (2018-2019) 144hz upgrade
Johndill replied to Johndill's topic in Alienware 13 / 15 / 17 / 51m (2015-2020)
Purchased the M17 last weekend for $900 AUD. 🙂 The 60hz screen it came with is (in my opinion) completely unusable in games. It has a 25ms response time according to panelook & is sooo blurry with gaming movement it's un-playable. 🤮 I'm surprised it was even accepted as a gaming laptop panel. I've searched panelook & found the LG "LP173WFG-SPD2" which is 5ms response time, 144hz & 40pin so needs the cable P/N: 0MHTJN. It's the only panel with the connector on the correct side & panel screw mounts, all other panels are slim models for the M17 R2 & up which have the connector on the wrong side & no screw mounts. -
Alienware M17 (2018-2019) 144hz upgrade
Johndill replied to Johndill's topic in Alienware 13 / 15 / 17 / 51m (2015-2020)
I have found the original cable installed with the 60hz panel is 30pin & the cable provided with the 4K panels is a 40pin cable P/N: 0MHTJN -
Alienware M17 (2018-2019) 144hz upgrade
Johndill replied to Johndill's topic in Alienware 13 / 15 / 17 / 51m (2015-2020)
That is true, they do share the same board so board wise is good to go. I've read info on the 17 R4 where the same upgrade was done but he had to swap a 40pin (board side) to 30pin (panel side) stock display cable with the 60hz panel, to a 40pin to 40pin cable for the 144hz panel, but can't find if that is the case yet. -
Hi, I'm looking at buying an M17 (2018-2019) with i7 8750H & RTX 2070 but in my research I've found the M17 apparently never had an official 144hz option? only 60hz. Has anyone upgraded their M17 to 144hz? I can see plenty of 17" 144hz panels available on ebay but confirming one has been done would make me feel better before purchasing. 🙂
-
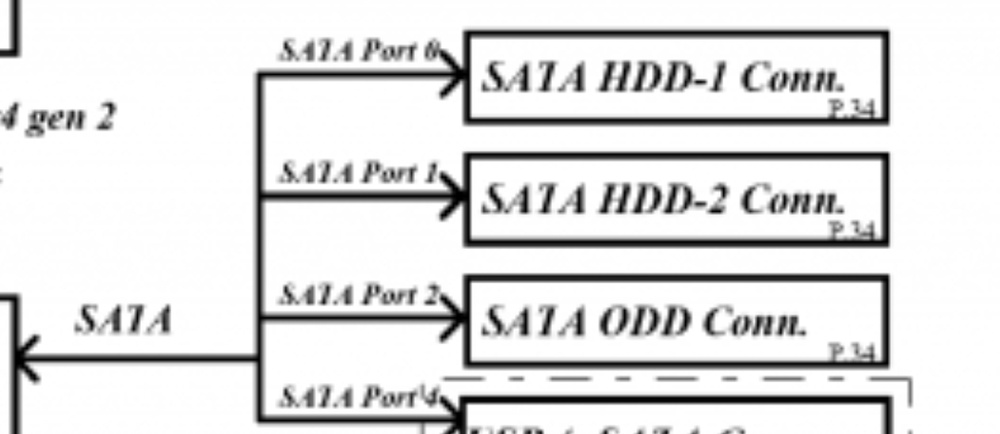
From checking the M18x R1 schematics, the board is only wired for 2x SATA ports, so you will require Dell part No: 9JP9M HDD ribbon & No: KFNTK for the HDD cage. You can also replace the DVD optical drive with an Orico L127SS ODD to SATA adapter.
-
Alienware 17 Rager GTX 970M upgrade 8 beeps
Johndill replied to Johndill's topic in Alienware 17 and M17x
Final update, got a full refund & purchased from another seller double checking they were sending me the blue PCB card. Recieved a Blue PCB GTX 970M & worked stright away. 🙂 Thank you very much guys for your diagnosis help. 🙂 -
Alienware 17 Rager GTX 970M upgrade 8 beeps
Johndill replied to Johndill's topic in Alienware 17 and M17x
I decided to contact the seller & explained the situation & they are happy for a return & refund thankfully. 🙂 @Maxware79 Ah ok, $300AUD was the cheapest I could find on eBay. If you have a few links I'd be very grateful. 🙂 -
Alienware 17 Rager GTX 970M upgrade 8 beeps
Johndill replied to Johndill's topic in Alienware 17 and M17x
Thank you so very much for this info. 🙂 Well, now I have to decide whether I contact the seller & try to get it swapped or refunded. Or just cop the unwanted $300 AUD spend & put it in an LVDS M18x R2 & buy another for the customer. 🤦♂️ -
Alienware 17 Rager GTX 970M upgrade 8 beeps
Johndill replied to Johndill's topic in Alienware 17 and M17x
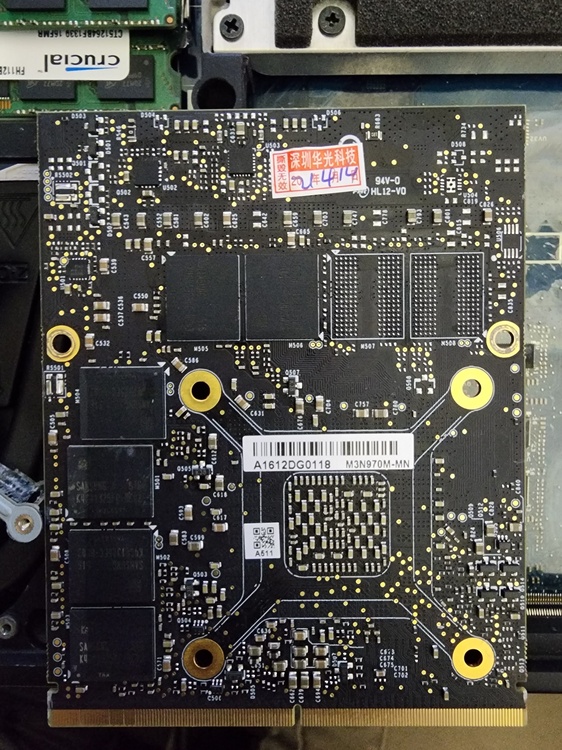
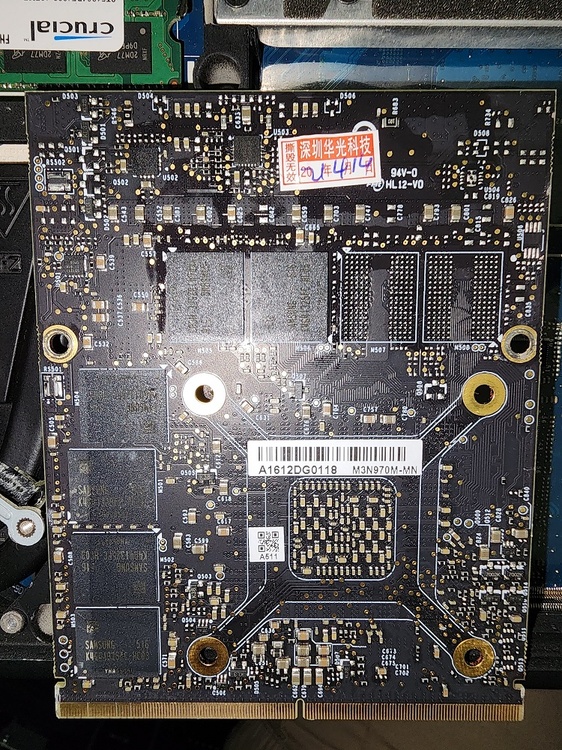
Just found this PDF from the sticker on the back. Aetina M3N970M-MN m3n970mmn.pdf -
Alienware 17 Rager GTX 970M upgrade 8 beeps
Johndill replied to Johndill's topic in Alienware 17 and M17x
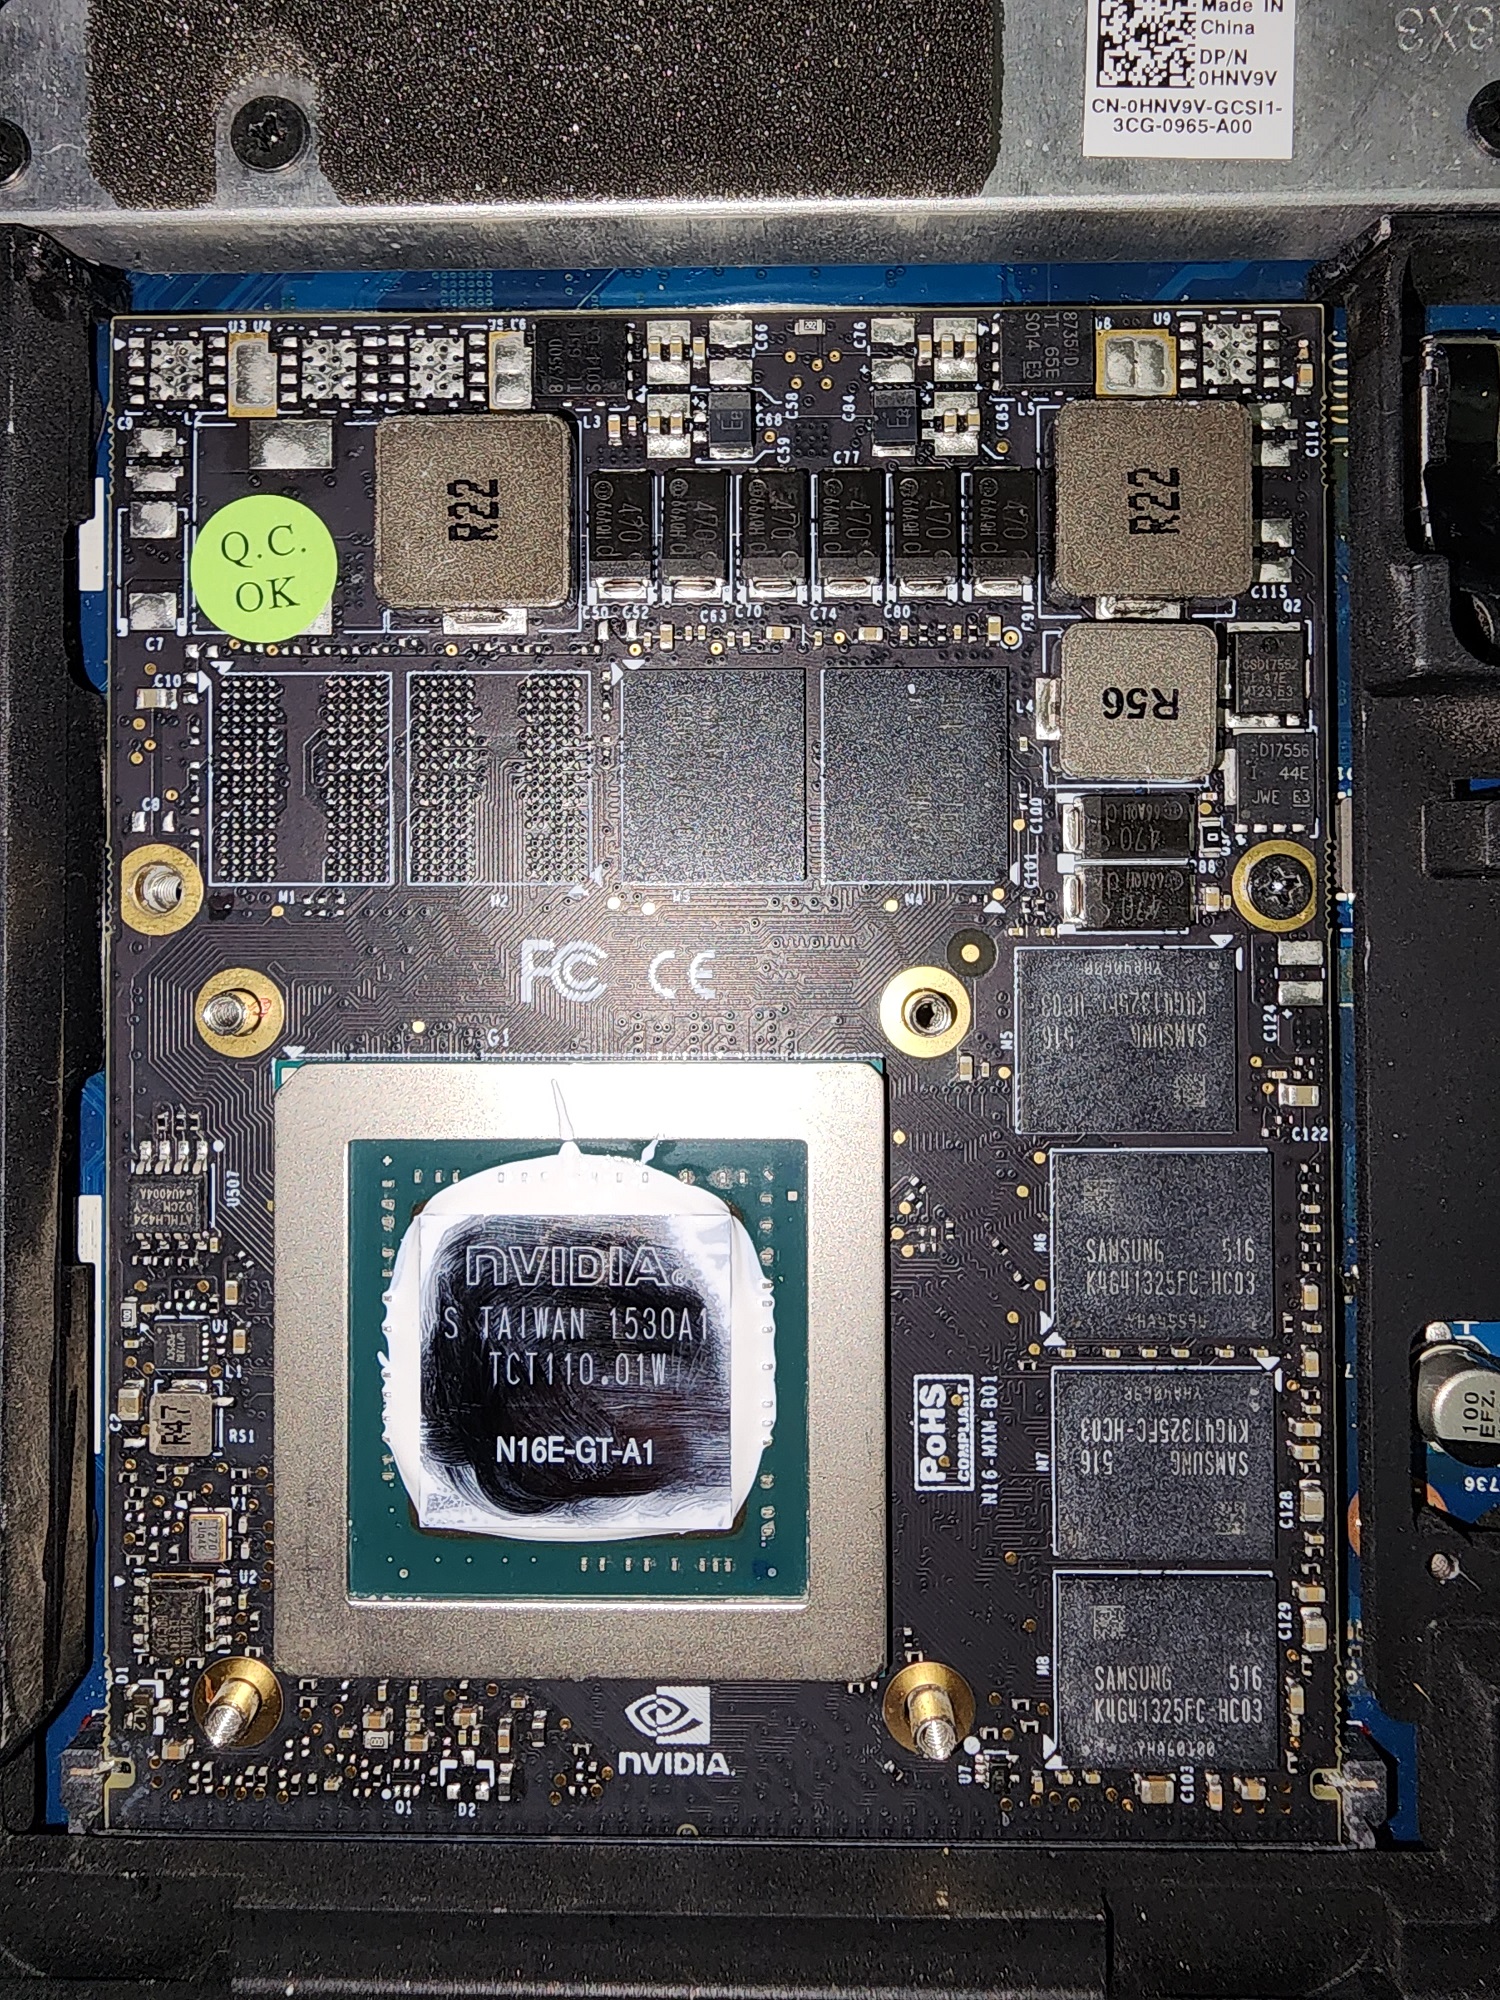
Here's some pics 🙂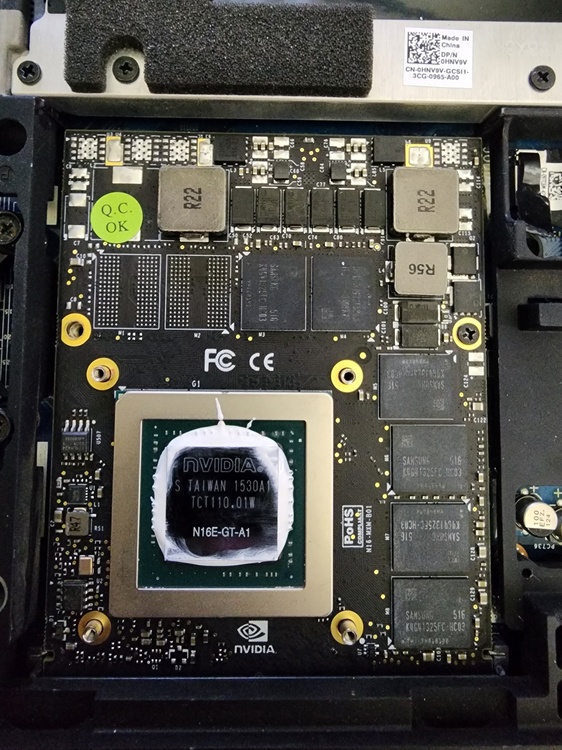

-
Alienware 17 Rager GTX 970M upgrade 8 beeps
Johndill replied to Johndill's topic in Alienware 17 and M17x
Here's the screenshot when it was in my 60hz AW 17R1.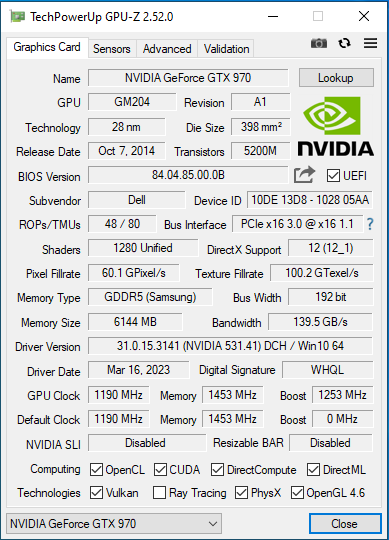
-
Alienware 17 Rager GTX 970M upgrade 8 beeps
Johndill replied to Johndill's topic in Alienware 17 and M17x
I've tested it in another AW 17 R1 with a 60hz panel & the GTX 970m is in working order. I've tried setting the 120hz system to UEFI bios (with a GTX 770m installed) but still get 8 beeps with the 970m. I tried backing up the vbios with GPUz but it says BIOS reading not supported on this device. Tried to backup with nvflash also but get PROGRAMING ERROR: Source block is out of range. Tried to flash another vbios but get: Nothing Changed! Error: The EEPROM on this device is too small to support this firmware update. Edit: I was able to get some sort of dump with red-say's SIV. Attached dump. GeForce GTX 970M [GM204-A]-84.04.85.00.0b.rom -
Hi guys, I've purchased a GTX 970M to upgrade a customers Alienware 17 R1 with a 120hz panel & I get 8 beeps. The ebay listing showed a blue PCB card but I have received a brown PCB card. I have no idea what manufacturer makes the brown PCB. Would I need to flash a supported vbios for it to work in the Rager with 120hz panel? I'll add some photos tomorrow for you. I'll also try it with a 60hz panel. Any help would be appreciated, last 970M Rager upgrade I did was a blue PCB card & it worked out of the box. Thanks 🙂
-
Alienware M18x R2 Cmos battery slot mod
Johndill replied to Johndill's topic in Alienware 18 and M18x
Thanks. 🙂 The chassis is made from some sort of cast metal that is conductive for grounding of the board, however the black paint on the bottom side is quite thick & Non-conductive so it would need to be scratched right down to the base to be conductive so it's very safe. 🙂 The M17x R4 has a socket on the board thankfully. But the M15x does use the spot welded wire ones also, like the M18x R2. 🙂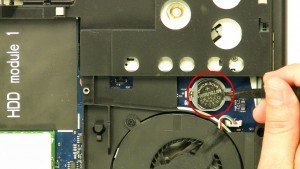
-
Alienware M18x R2 Cmos battery slot mod
Johndill replied to Johndill's topic in Alienware 18 and M18x
No worries. Let us know how it goes & post some pictures when it's complete. 🙂 -
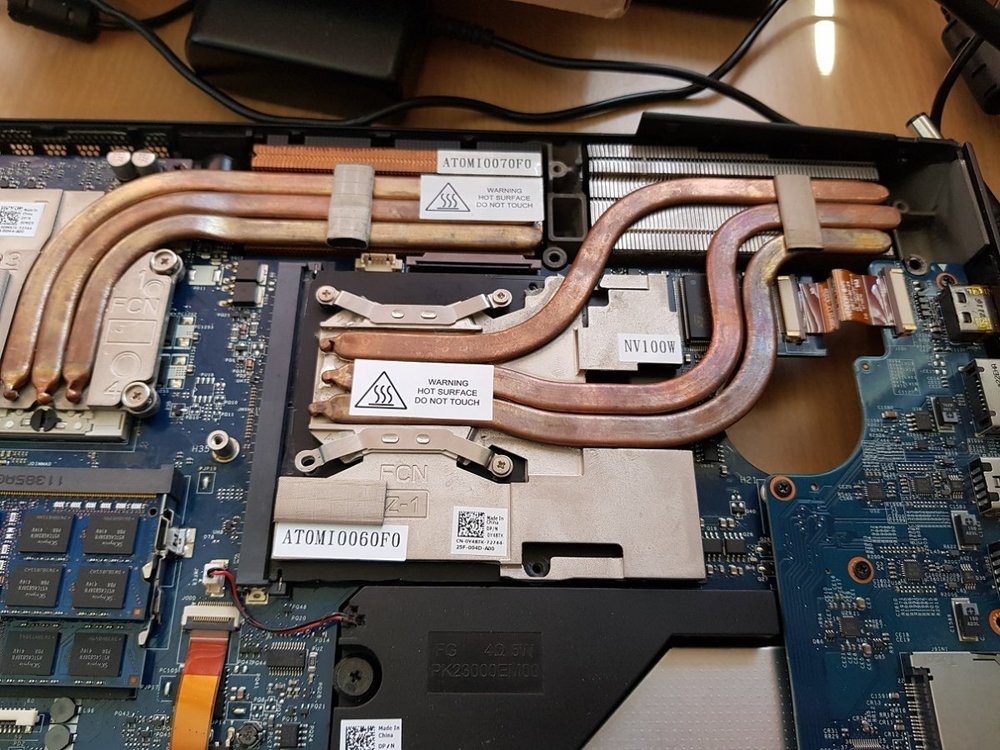
This one looks very interesting, I can see a water inlet & oulet on there too. 🙂
-
Thanks. 🙂 I had a look through my scrap bits & pieces but didn't find an old laptop heat pipe that fits. But I do think that could be possible. 🙂 Have you seen this thing before? Fully built in water cooling loop with pump. 😄 https://www.theverge.com/2012/3/23/2896443/asetek-liquid-cooling-laptop-overclocked-alienware-m18x
-
Alienware M18x R2 Cmos battery slot mod
Johndill replied to Johndill's topic in Alienware 18 and M18x
I don't sell them sorry. 🙂 If you know how to solder or know someone that does, this holder has a ON/OFF switch! Not sure on size though as it may not fit well. 🙂 https://www.ebay.com.au/itm/313835425911?hash=item49120c9077:g:qIsAAOSwxr1fTgV0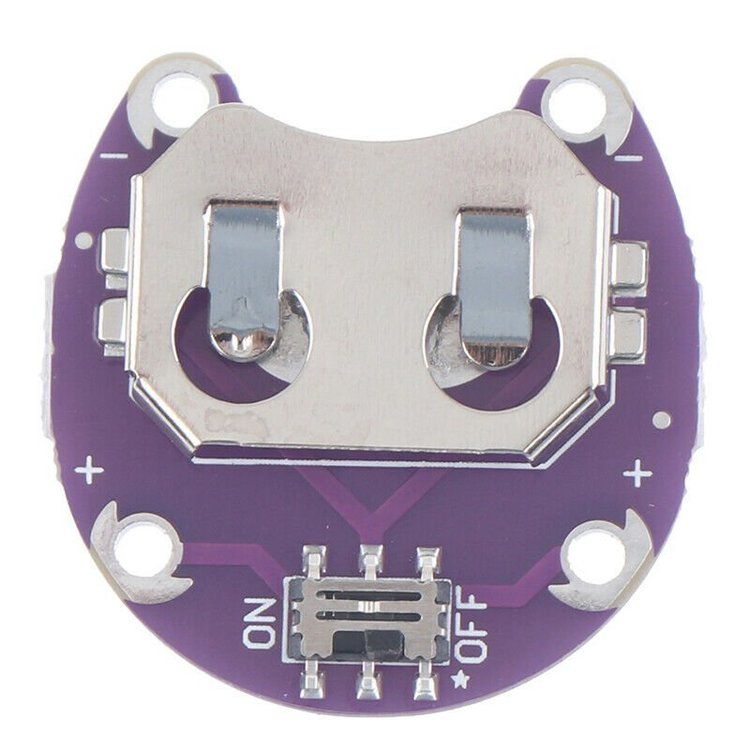
-
Alienware M18x R2 Cmos battery slot mod
Johndill replied to Johndill's topic in Alienware 18 and M18x
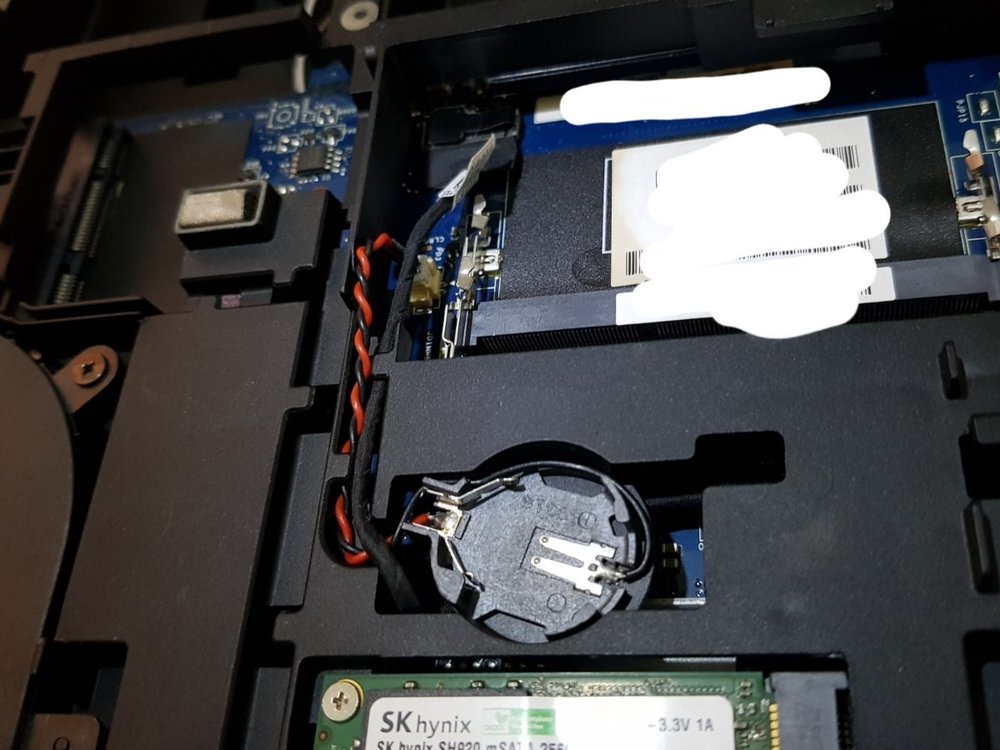
This battery holder is a savlage from a random dead laptop board I had around. 😄 It is a slimmer design than the usual holders you see on laptops, so it fit much easier. I found a holder on ebay here that may fit but you will have to check the dimensions from the listing. Size looks ok? https://www.ebay.com.au/itm/125049195078?hash=item1d1d834a46:g:9FUAAOSw7B9htq0B.thumb.jpg.eb32a3568dd4b7e9612f2c6b0b90bce0.jpg)
-
Domain name suggestion: notebookenthusiast.net Originally suggested by "ssj92" on NBR but I have dropped the "s" on enthusiast, the name flows better without the "s". 🙂
-
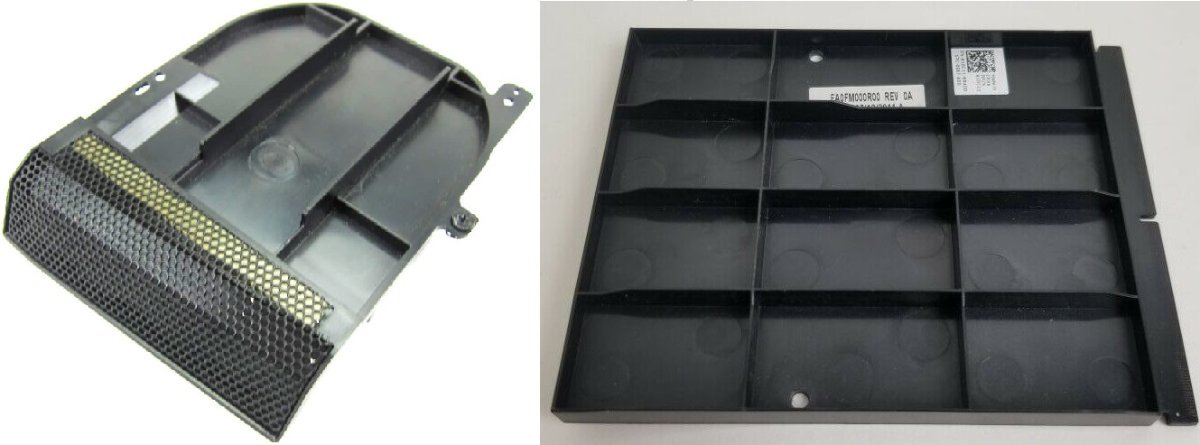
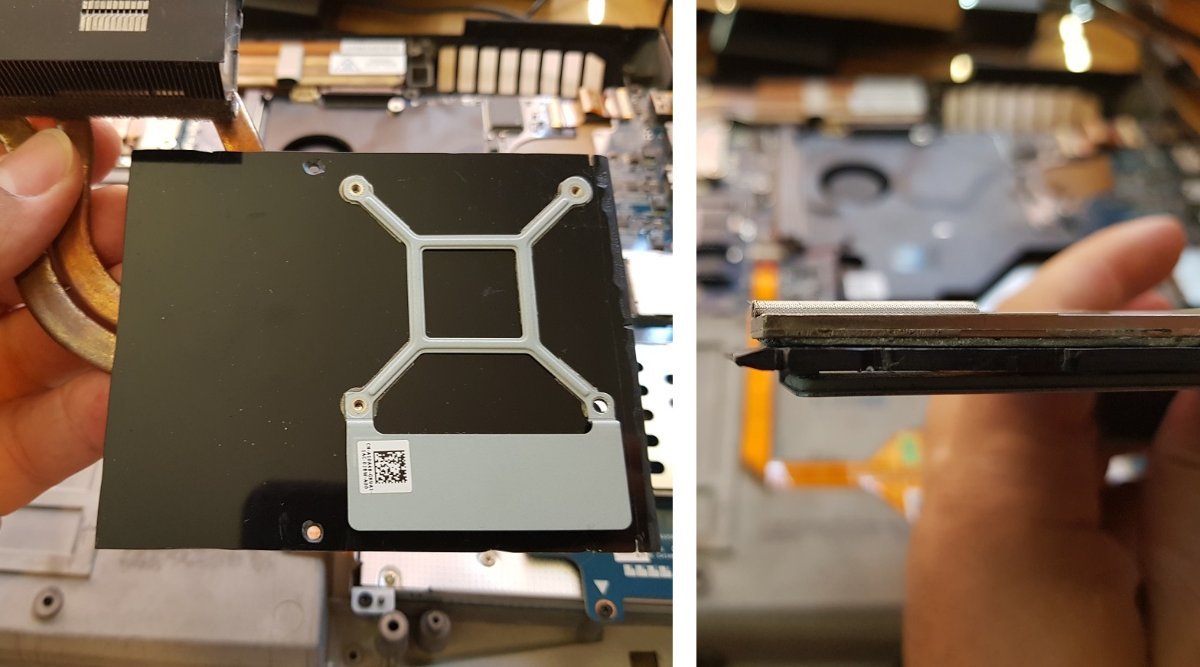
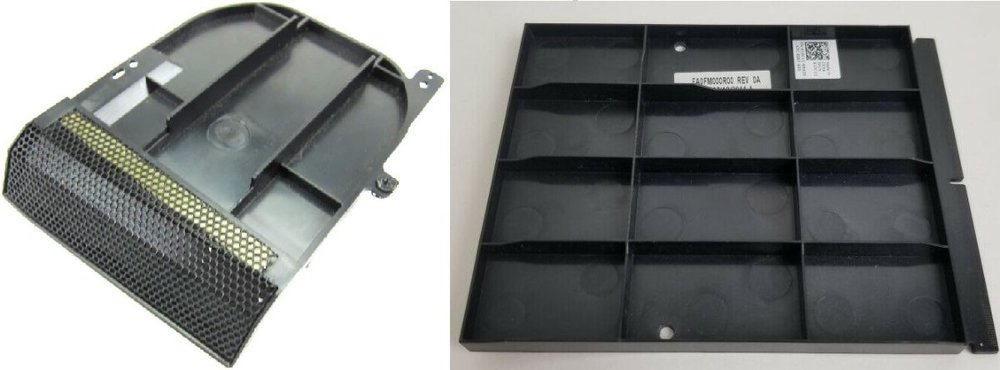
For the small amount of people that bought an M18x R1/R2 new from Dell and only ordered one GPU, the GPU2 space was filled with a fan grill blank and an MXM blanking plate in order to maintain the support under the keyboard and block off an unused vent. P/N: A10C09 and A10C11. Those blanks are hard to find (for me in Australia anyway), as I have upgraded to a single RX 480 4GB card, there is flex on the right side of the keyboard due to having no GPU2 leaving a big empty space. So I made a dummy MXM GPU plate from some scrap plastic which allows the right heatsink to be mounted as normal maintaining the keyboard support and keeping the GPU2 parts with the system so they don't get lost somewhere. Some pictures. Making use of a broken X bracket. The slot end is a V shape so it only rests on the slot without touching/compressing pins. Scrap laptop lid. I was going to add supports to emulate the original blank plate but decided the heatsink was better.


-
Thank you @Hiew & @Reciever for all your hard work on this new home for our community! 🙂 I love the clean look & the way it functions, very simple & refreshing. 🙂 The editor controls are nice & easy! 🙂 Does this forum have a template name? I think I'd like to try it as my local info wiki 😄 Edit: AAAHHH! Sweet, I found the dark mode!!! 😄
-
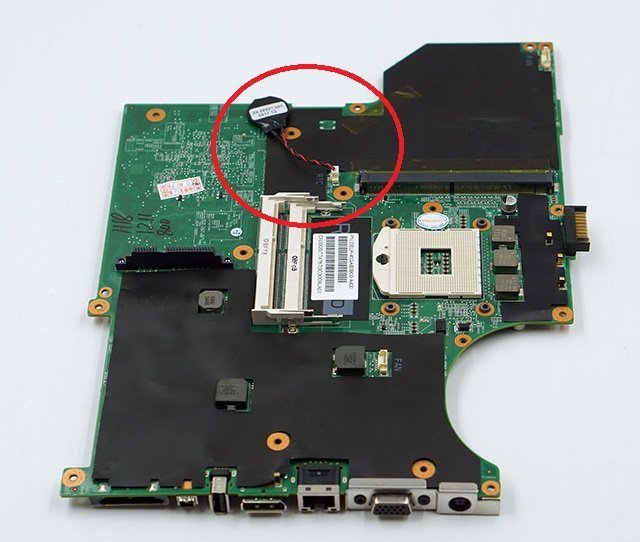
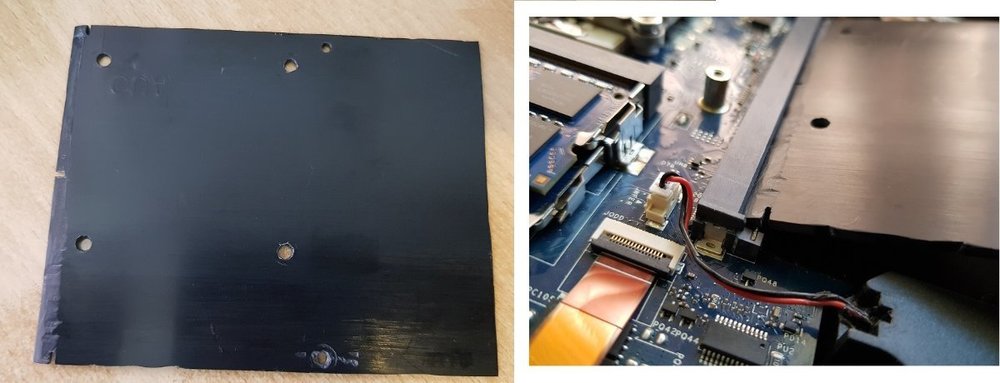
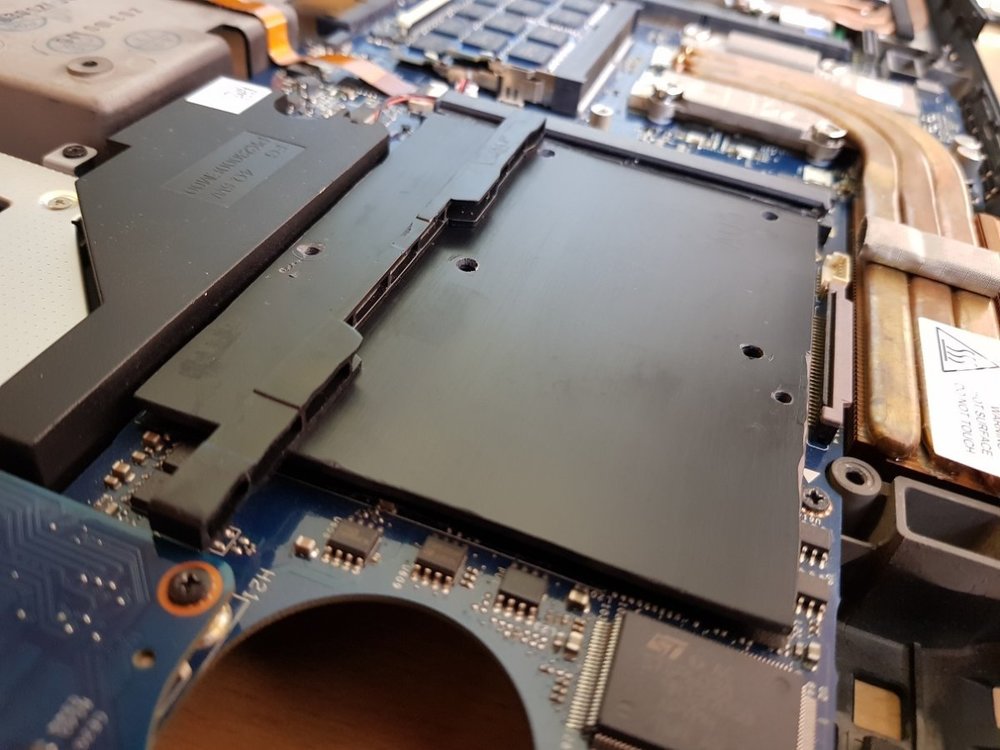
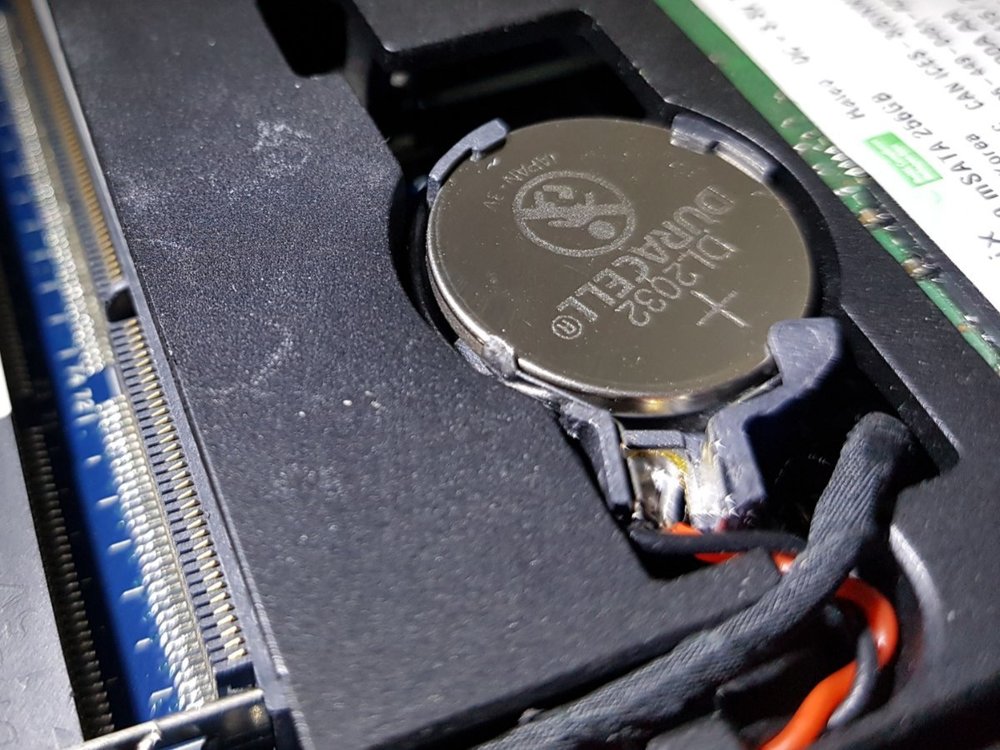
Do you love Cmos resets first thing in the morning? Do you hate having to track down welded wire coin batteries and have to wait for them to arrive in the post? Well look no further! Jokes aside 🙂 I dislike having to find these welded wire coin batteries online and having to wait weeks for it to arrive so for ease of use I made this mod. No longer need to use these batteries: Now you can use normal store bought coin batteries. 🙂 I had to break off one corner of the socket so it would fit and bend down the corner of the contact so the battery is perfectly held in. 🙂


-
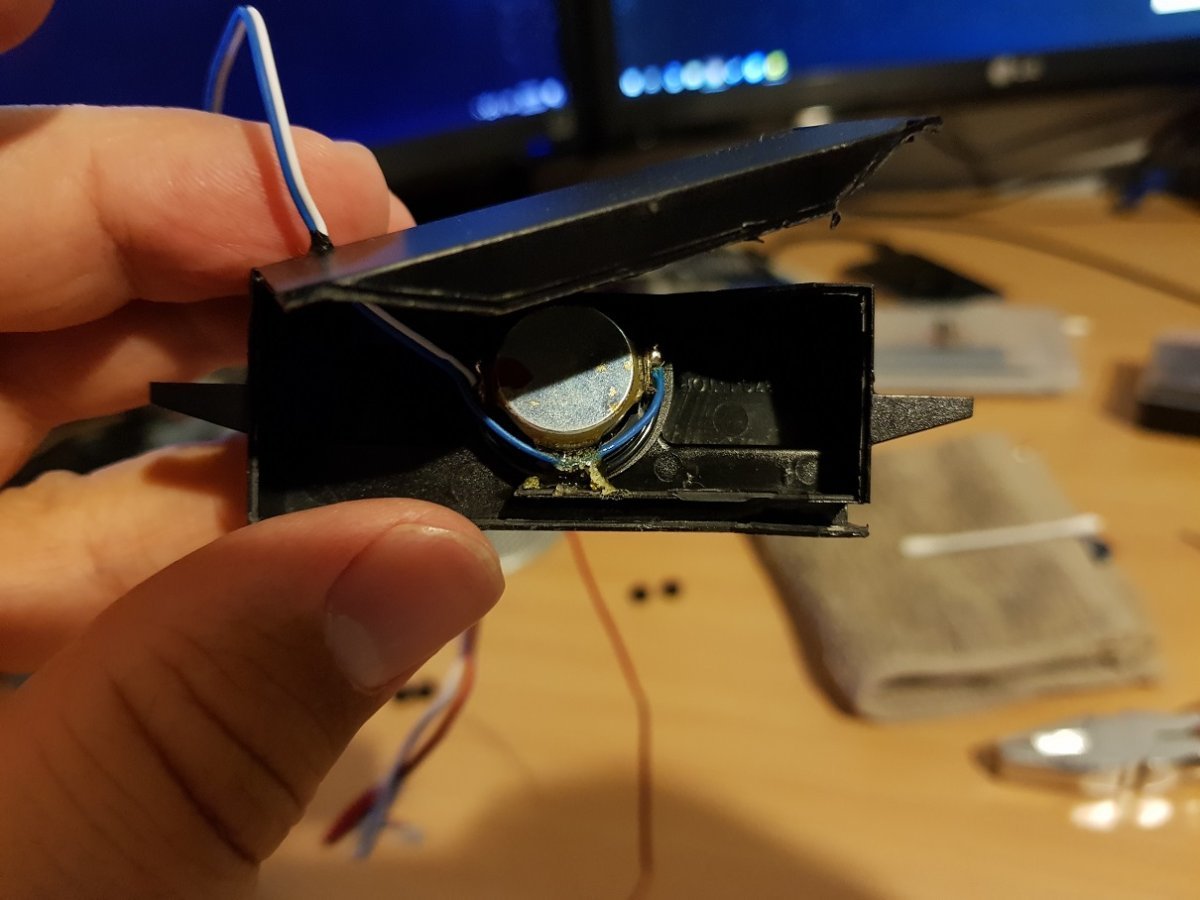
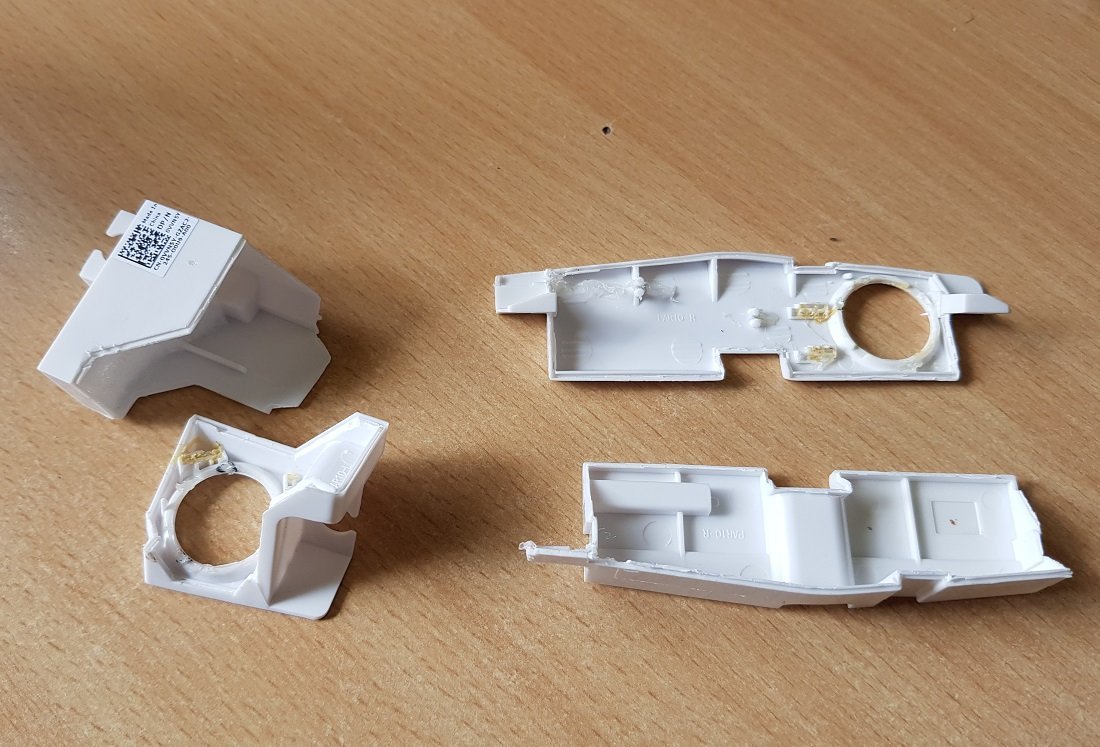
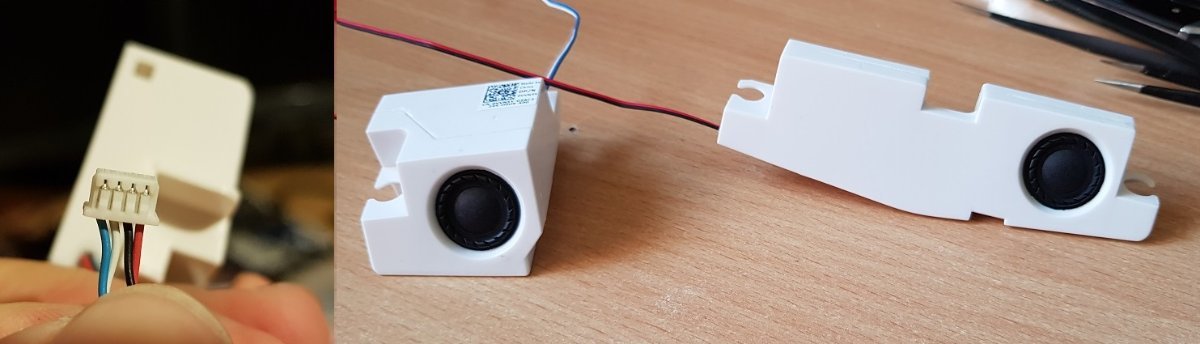
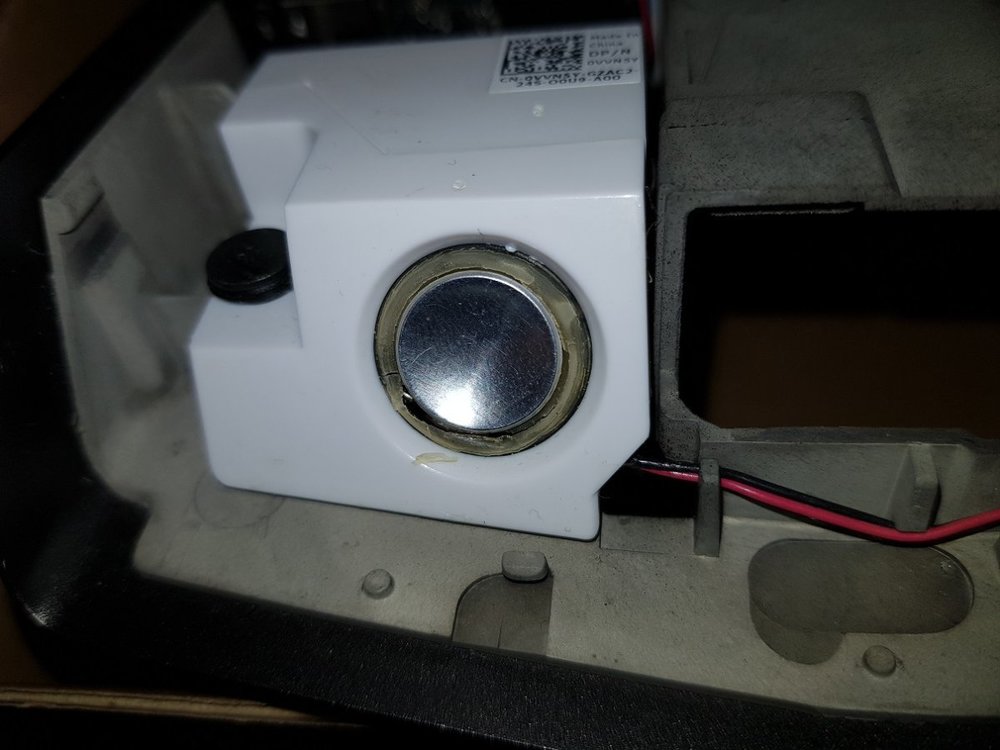
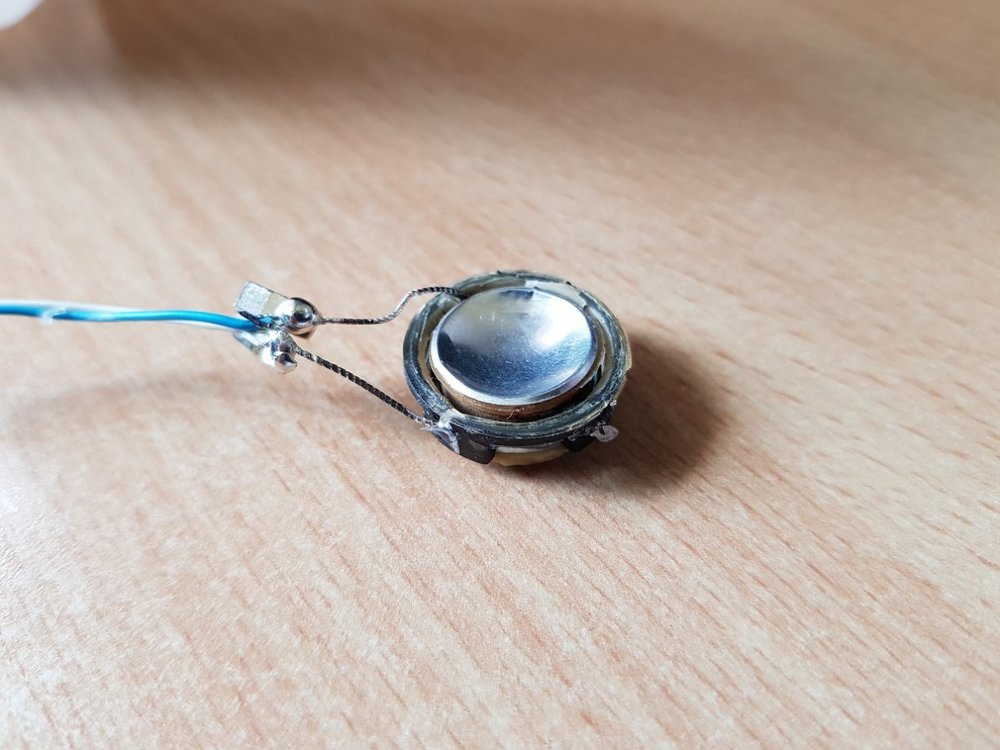
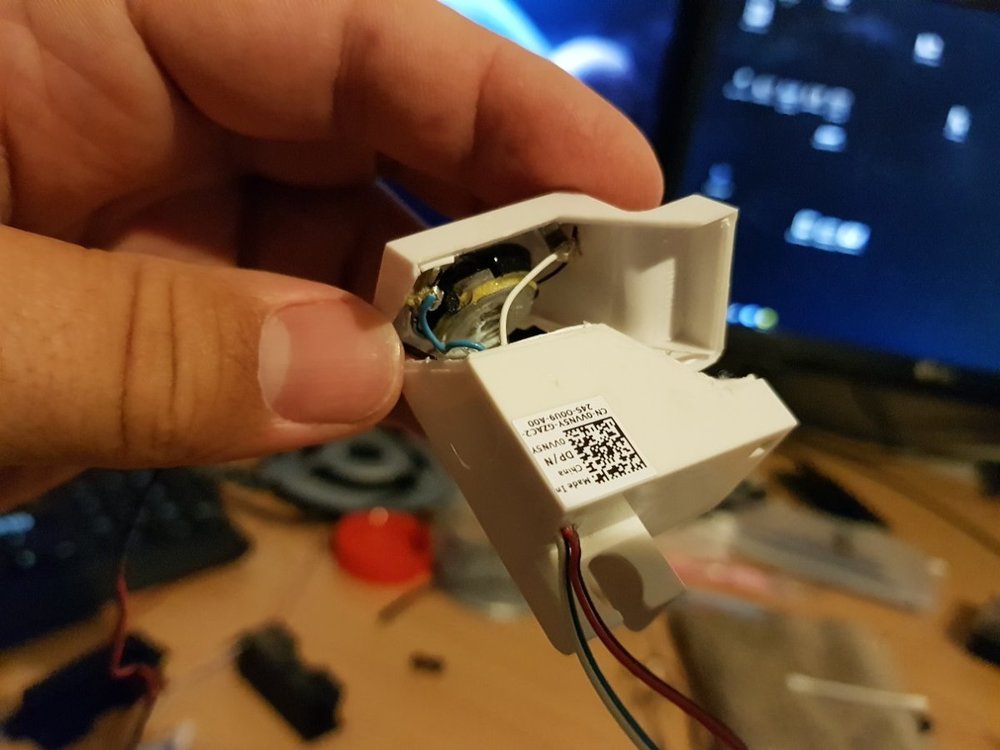
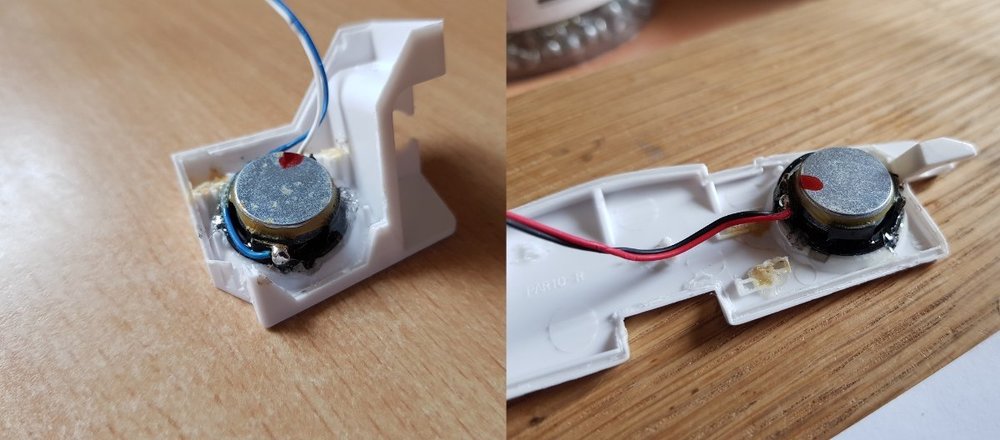
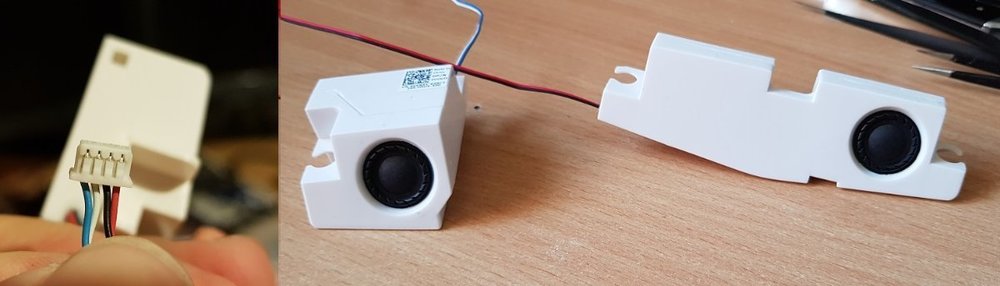
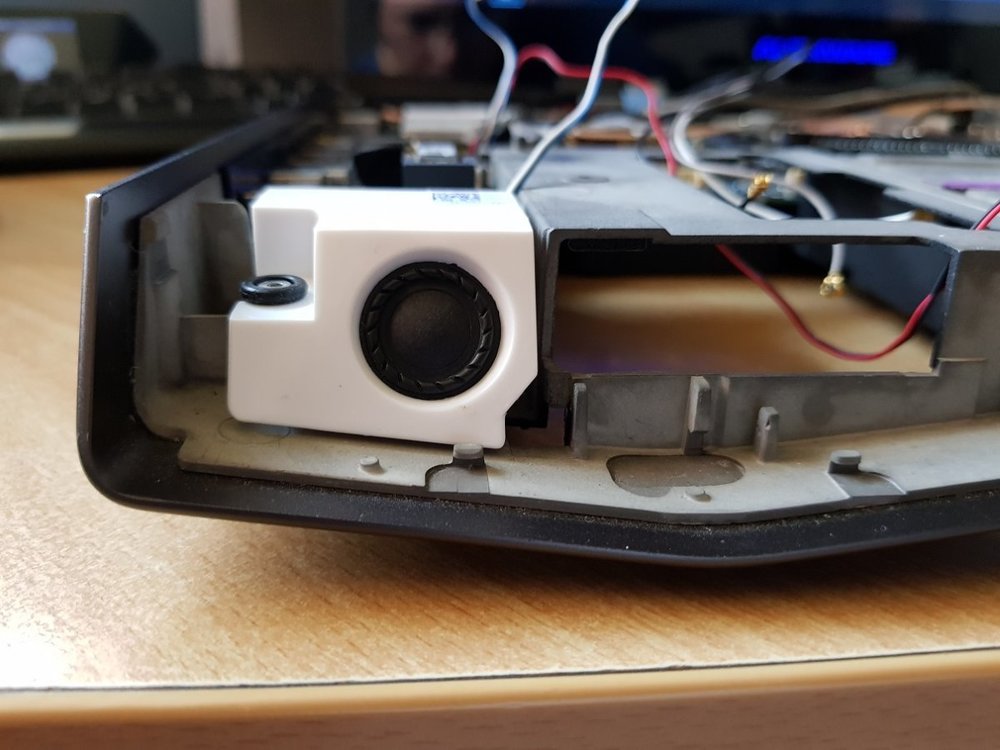
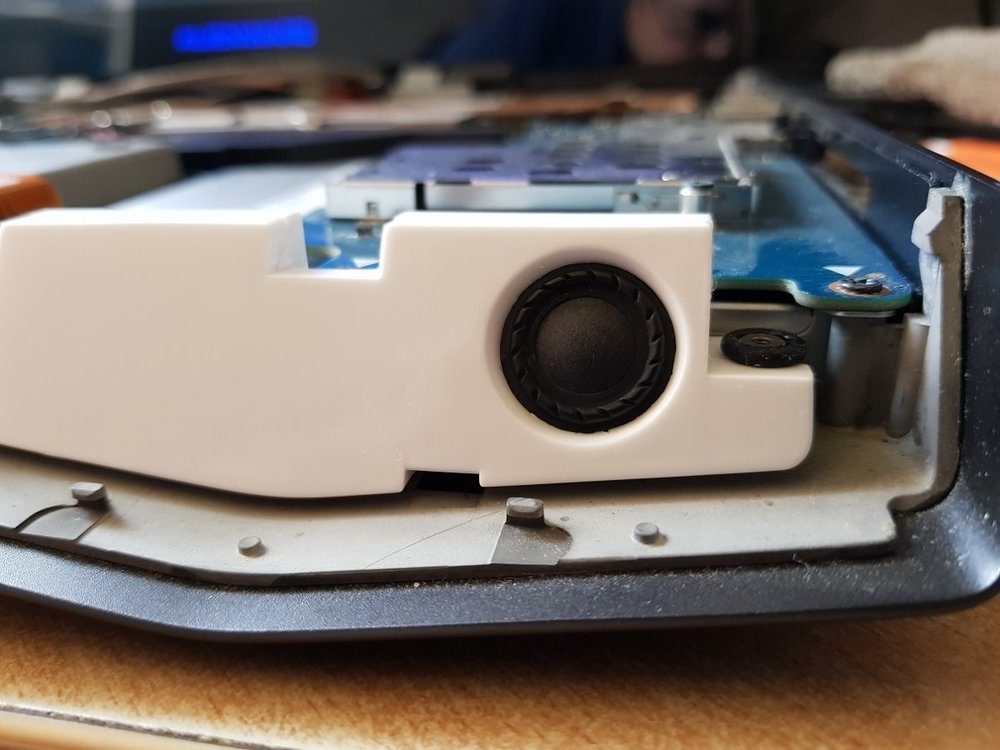
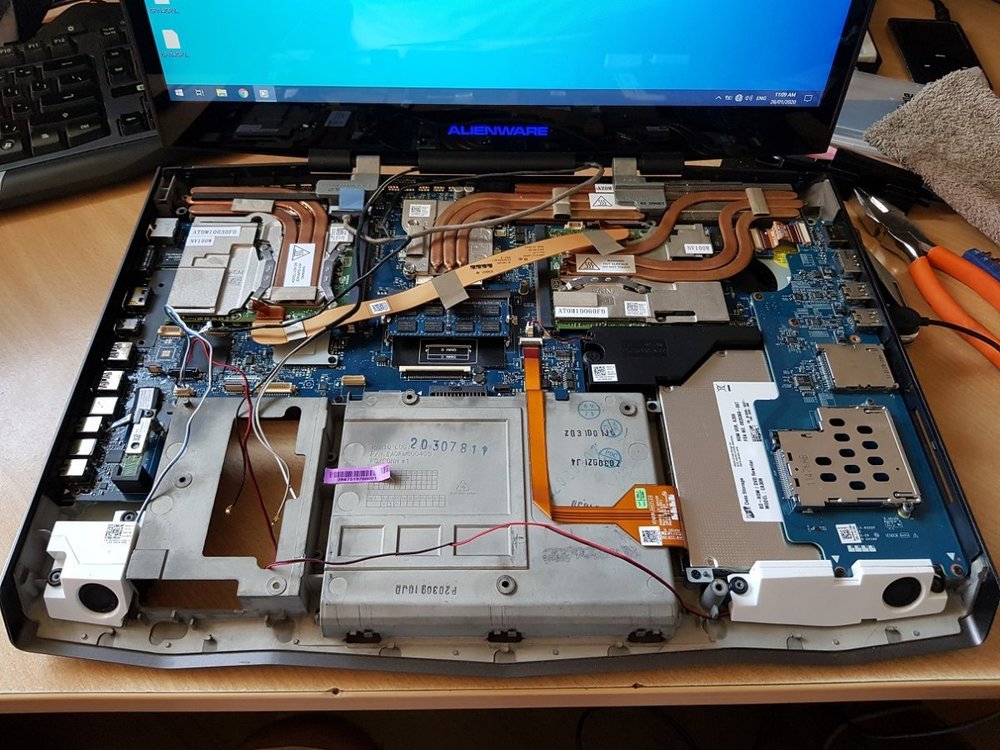
Hi, my M18x r2 speakers recently broke with bad audio distortion due to the rubber membrain drying out & cracking over the years from the previous owner. Rather than buying another second hand set of speakers that may have or will have the same issue again I decided to transplant the speakers from an AW 18 viking into the M18x R2 speaker shells, the idea being to still have a good sounding set of speakers but built with a most likely longer lasting material. It is a very delicate procedure as the speaker membrains are very delicate. In the end they sound great and it works for me. 🙂 Here is the result... Final pictures in second post. The process. AW 18 speakers. AW M18x R2 speaker shells. Gluing in AW 18 speakers. The AW 18 speaker connector is in a different order to the M18x R2 so the connector wires had to be correctly arranged. But after that it's all done.


- 1 reply
-
- 5
-


.jpg.33dd16f1262d7af412732c16486652b2.jpg)