JamieTheAnything
-
Posts
44 -
Joined
-
Last visited
1 Follower

JamieTheAnything's Achievements
")


-
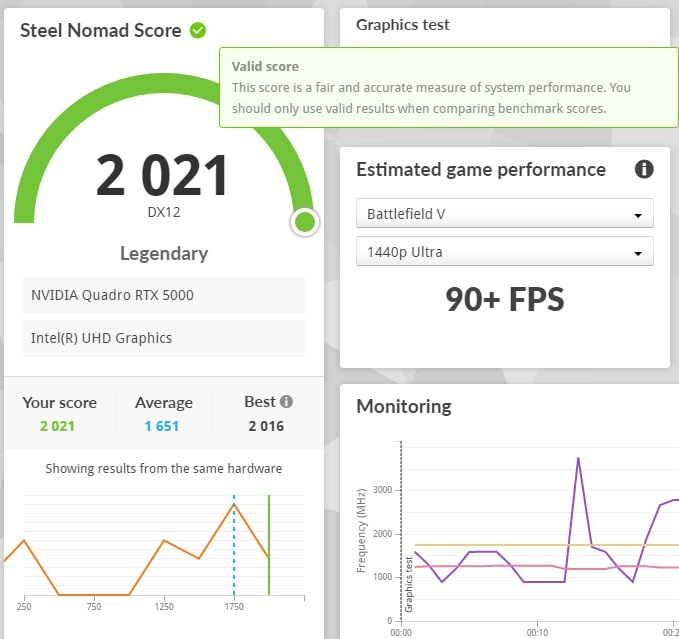
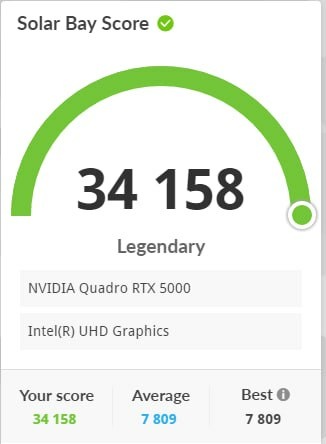
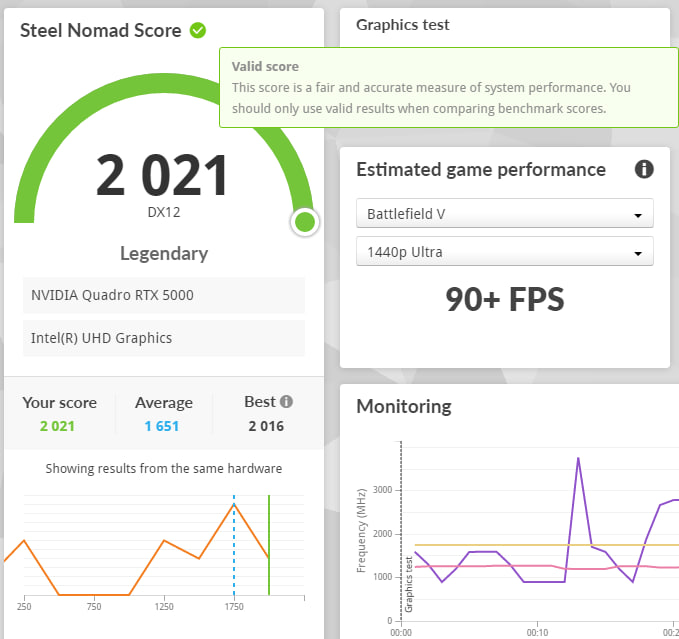
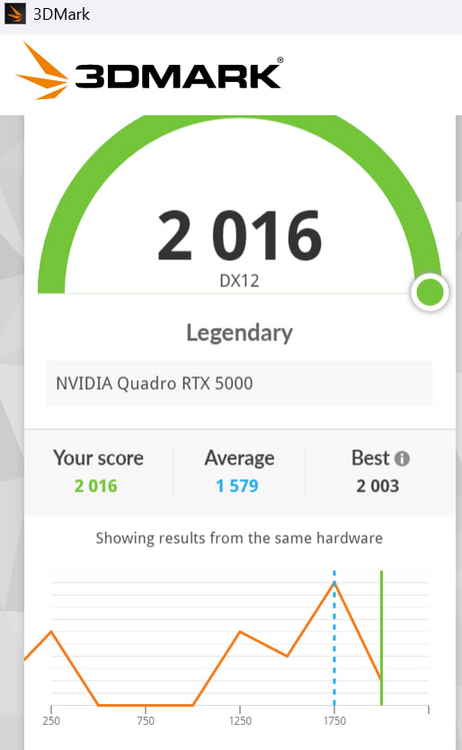
Bow before my monstrosity For I have done it https://www.3dmark.com/3dm/151229648
-
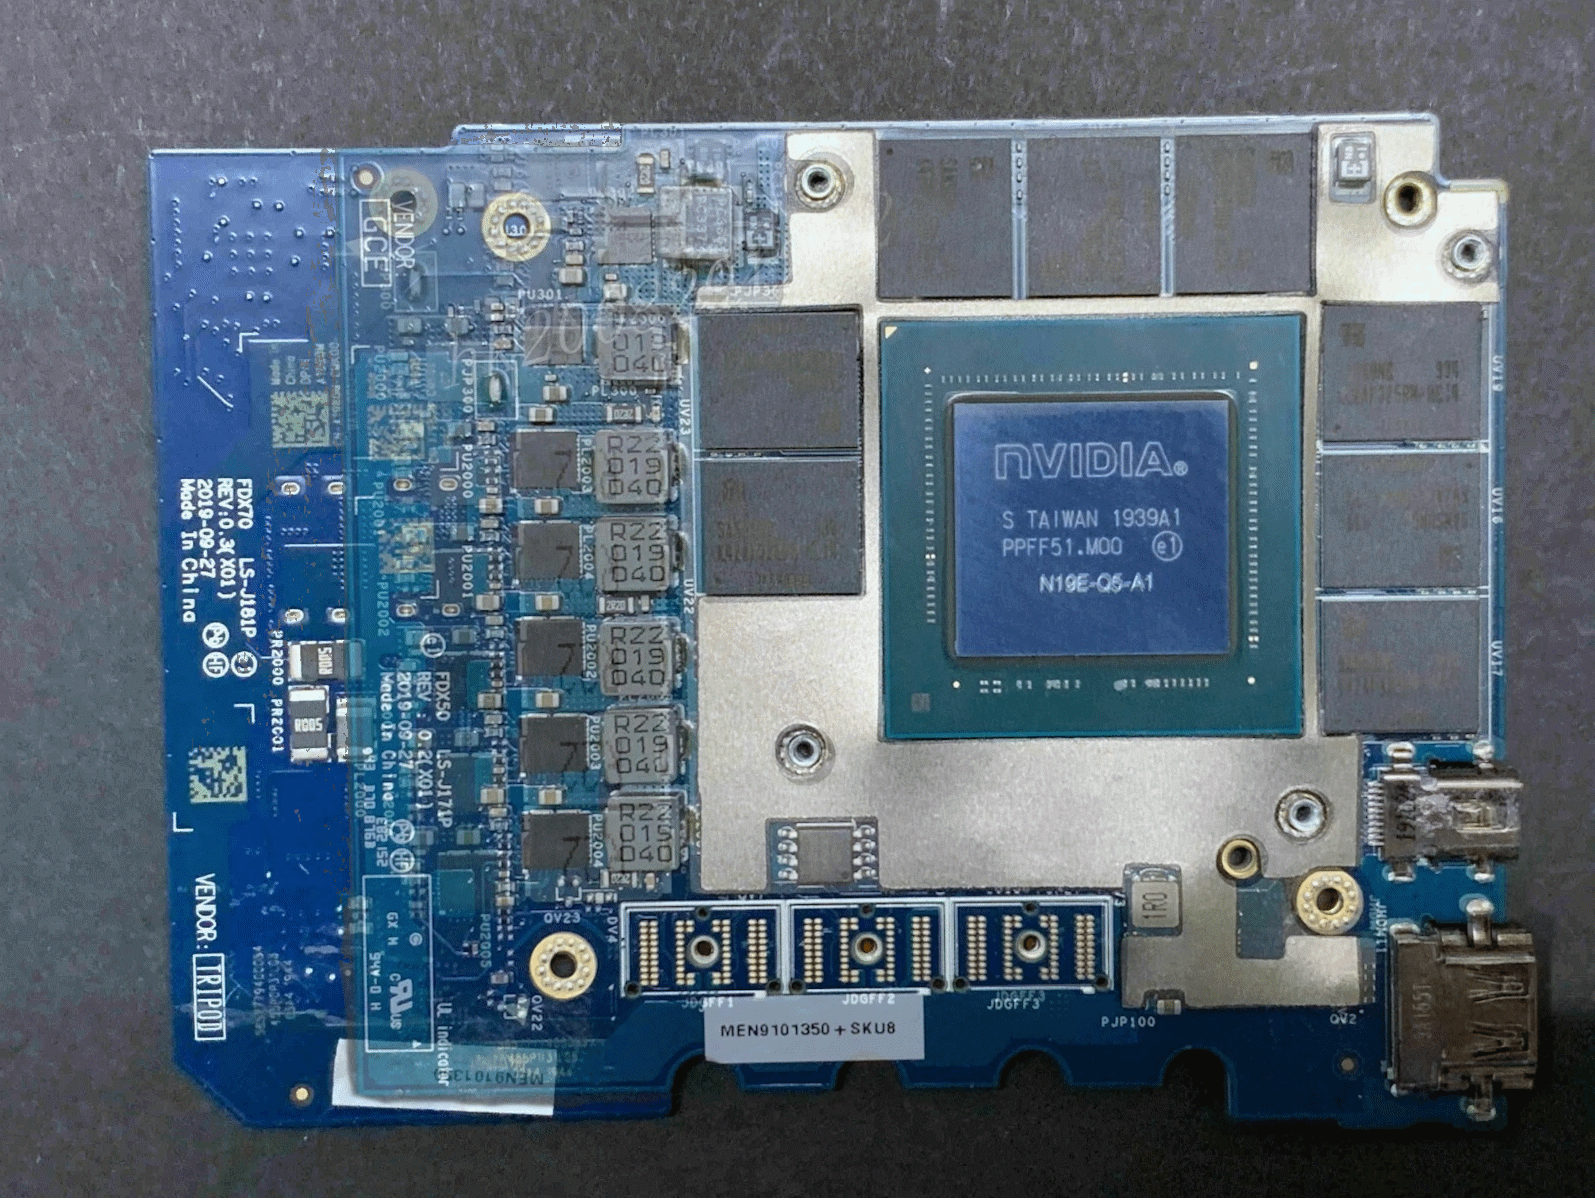
Record setting Precision 7550 with a 7750's 110W Quadro rtx 5000 shoved into it https://www.3dmark.com/3dm/151229648


-
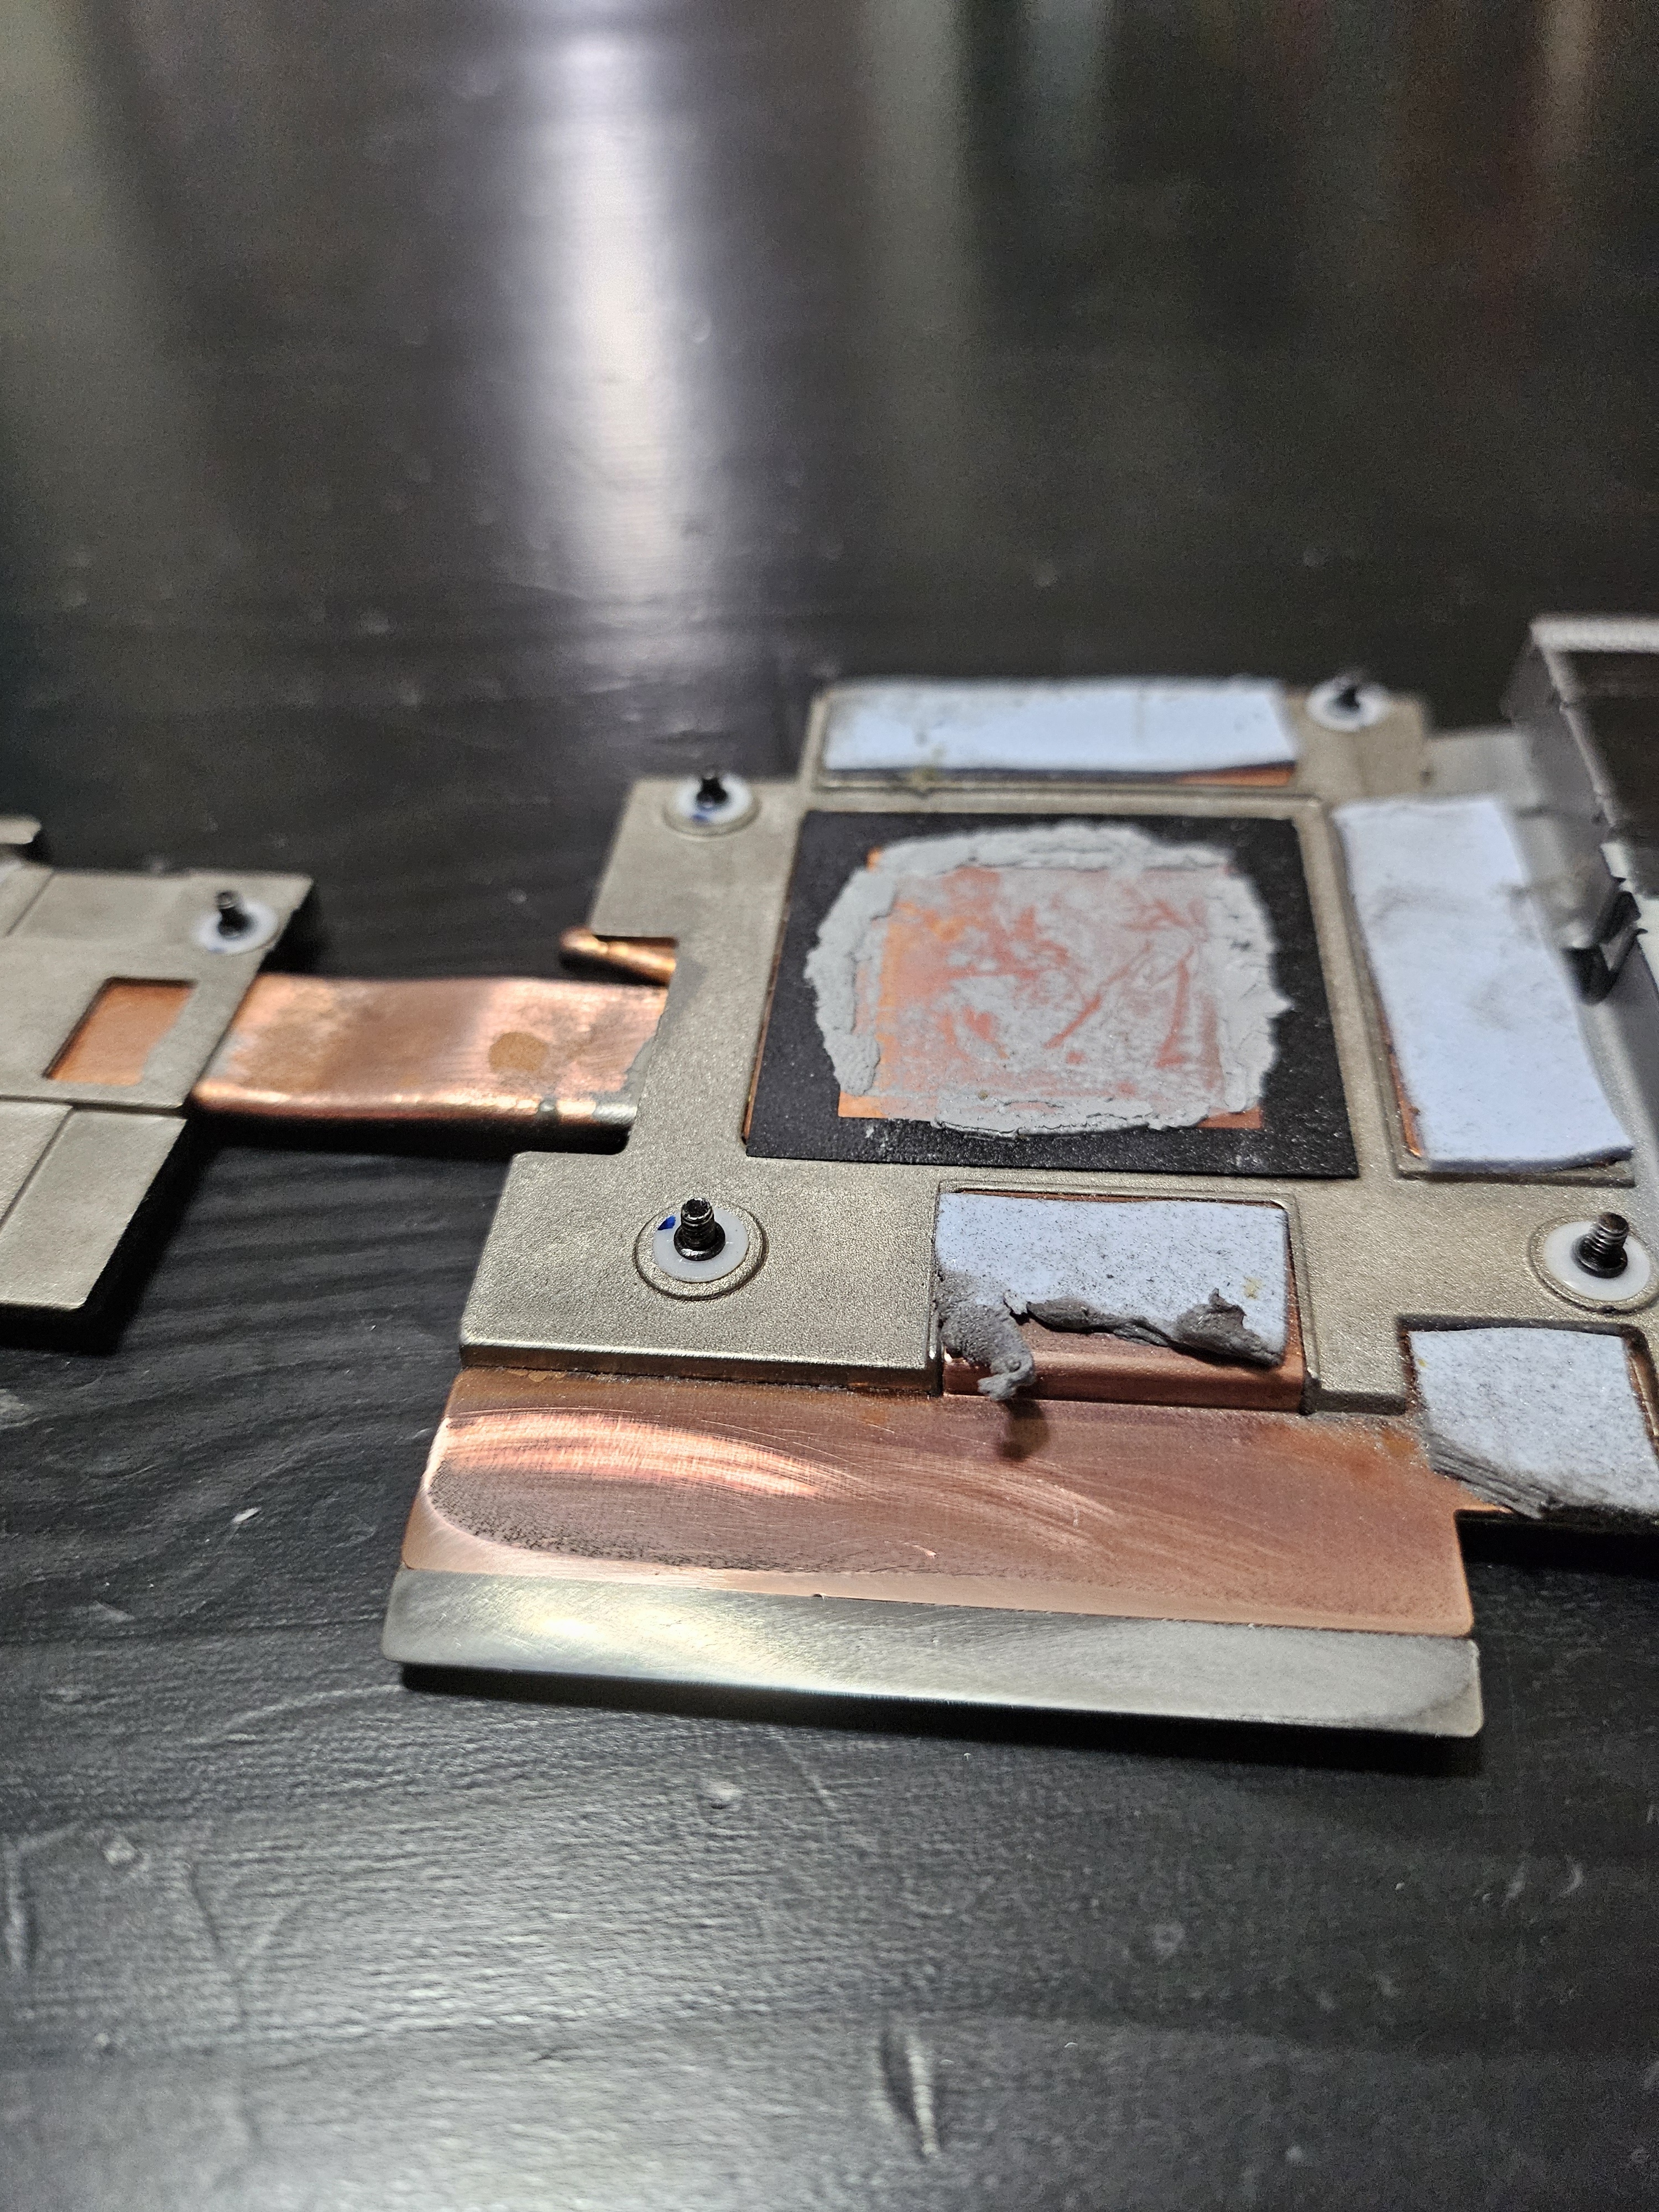
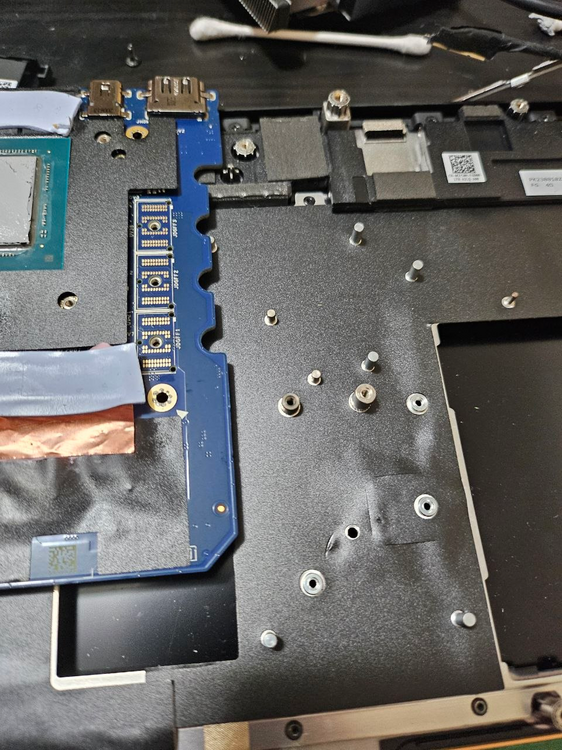
I put 3 copper shims in however I think only one would've worked. Each one of them is .2mm so it's roughly .6mm right now however I was seeing much better results with just one .2mm shim thanks to the losses due to stacking thermal paste->shim->thermal paste too many times. In any case I'm glad that it's working properly and not throttling anymore even with the 105W bios. 3Dmark tests below. Please also note you will have to remove this post in order for the gpu to fit.
-
it works but I need to add a copper shim to better the contact between the heatsink and the GPU die. thankfully based on the thermal paste pattern it looks to be about the sise of the Copper film I already purchased. will update with further developments.
-
So uhhh, developments This card runs too damn hot and i think there is less than a MM gap between the heatsink and the GPU die. However!!!, I can fix this using the copper foil I was using for the mosfets. Even with the MaxQ Vbios flashed onto the card and limited to 85W it was unable to keep the hotspot from creeping past 90 degrees. After that point it throttles down to 300-700Mhz, and makes certain games unplayable.
-
It fits and it works!!! Albeit it need more cooling now 😕
-
Alright so update to the whole project, I'm going to be using a very thin .2mm sheet of copper to connect between the heatsink, the inductor, and the mosfets. The order from top to bottom Heatsink->Paste->CopperShim->Putty->Inductors, and using a Motherboard->Putty->shim->paste->Mosfet sandwich on the mosfet side. Hopefully this will guarantee that the poor mosfets won't dump all of it's heat into the motherboard while also ensuring that the "quickest" path to the heatsink is given to the mosfets.
-
Update: new Heatsink has arrived and has been modified

-
I would rec. a thermal repaste along with replacing the thermal pads with thermal putty. It seems like your machine might not have the entire Die being in contact with the heatsink. at idle it shouldnt be at 100C, even when stressed it should get up to 100 but still be around 4.2-4.3ghz all core under load. (optimized fan preset). With my 7550 I have yet to repaste it since getting it, so it should be using the original paste and that has been my experience. After getting fresh and enhanced paste should improve things dramatically. Most cpu's that have absolutely cracked and dried out paste will show what you're experiencing, repasting it and also replacing the pads for the CPU with putty would be your best bet of getting things under control thermally.
-
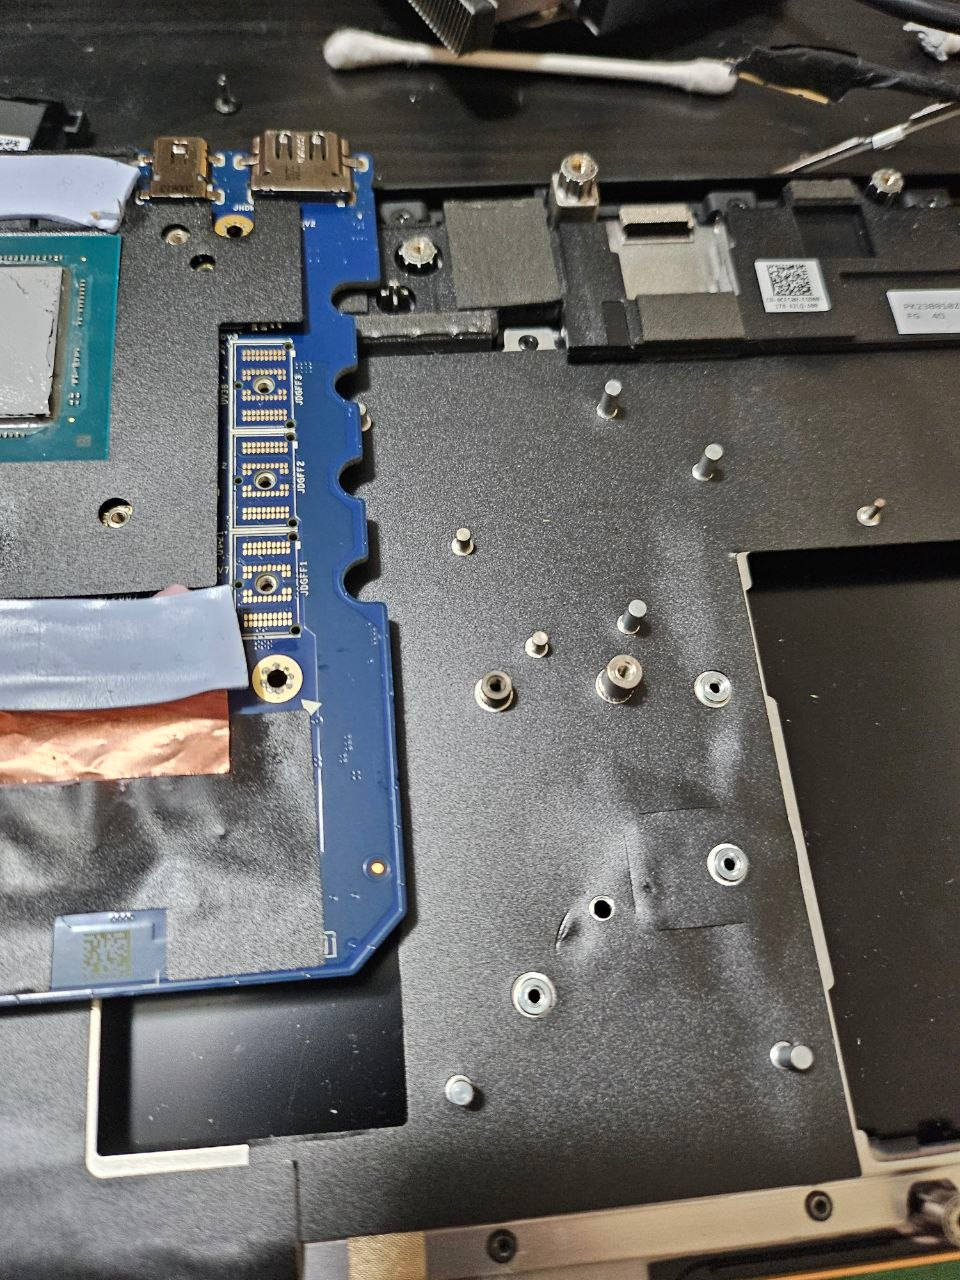
lmfao, based on the board design I'm just gonna flatten out the heatsink and then use the back of the Motherboard as the mosfet heatink lmfao.
-
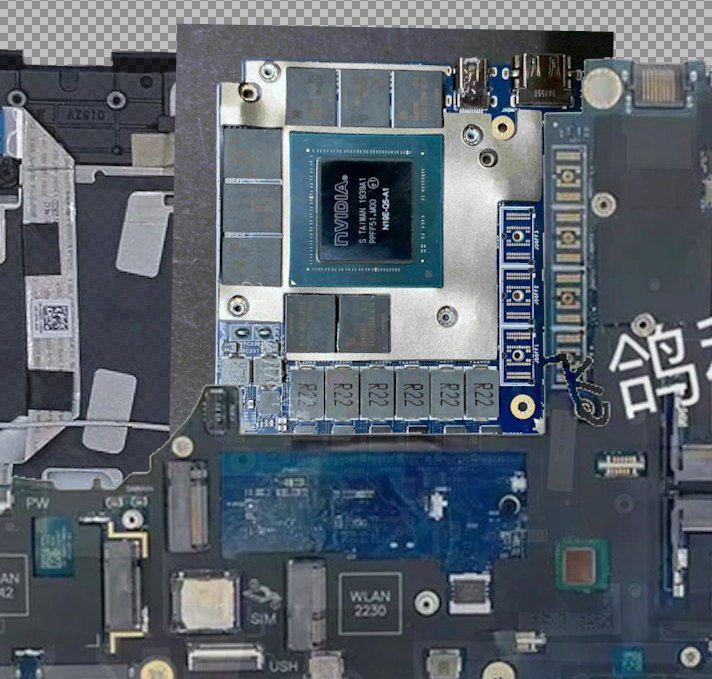
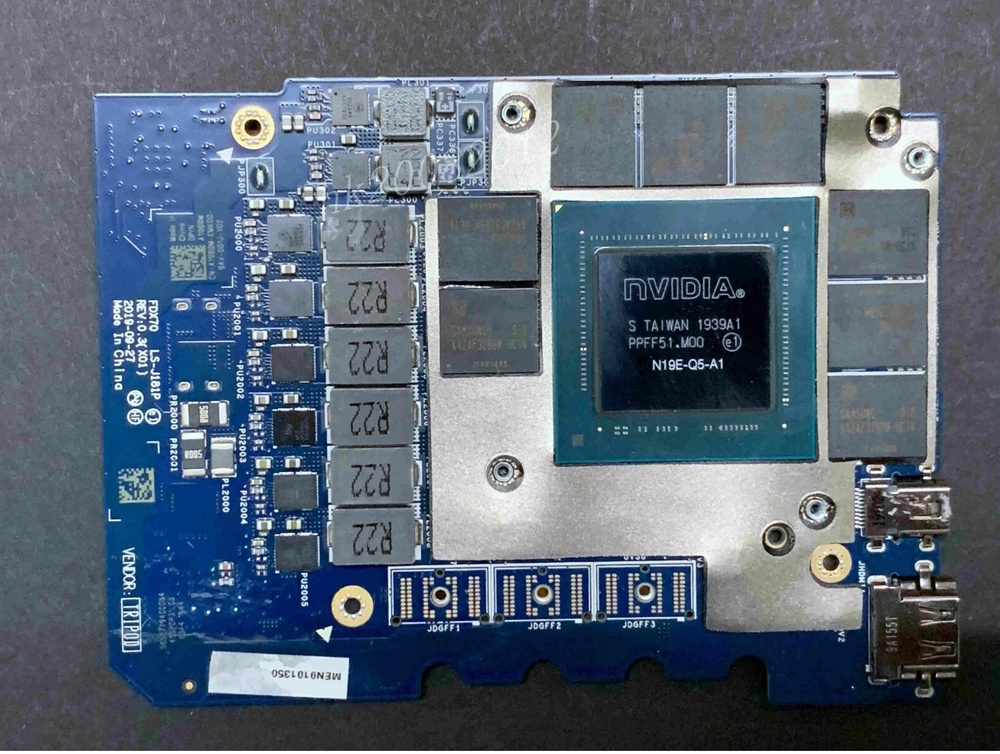
Here's the two cards along with an overlay of both of them for reference.

-
In short, A little bit of the bottom of the palm rest (the bottom part of it which faces up when you stare at the bare GPU, would have to get trimmed to make room for the mosfets/PD of the non-maxQ version. However the non-maxq version is the same length as the p5000 that was supposed to fit the 7540/50, as far as I can tell it's just longer between the two of them. the Width is the same and only one screw mount (related to screwing it to the palmrest) is different, other than that, the palmrest + heatsink modification (flatten it out since the "dip" for the mosfets will be in the wrong place, and then either adding a shim/small bit of aluminum to connect the mosfets to the 7550 heatsink), is all that is needed, and since they both share the same BIOS there shouldn't be a whitelist conflict.
-
Not if you're afraid to make a little modification to the palmrest and the existing heatsink :3 I will make this fit and prove it :3
-
Anyone swap a 7750 GPU into a 7550? Specifically the 110W variants of the RTX4/5000 series?
-
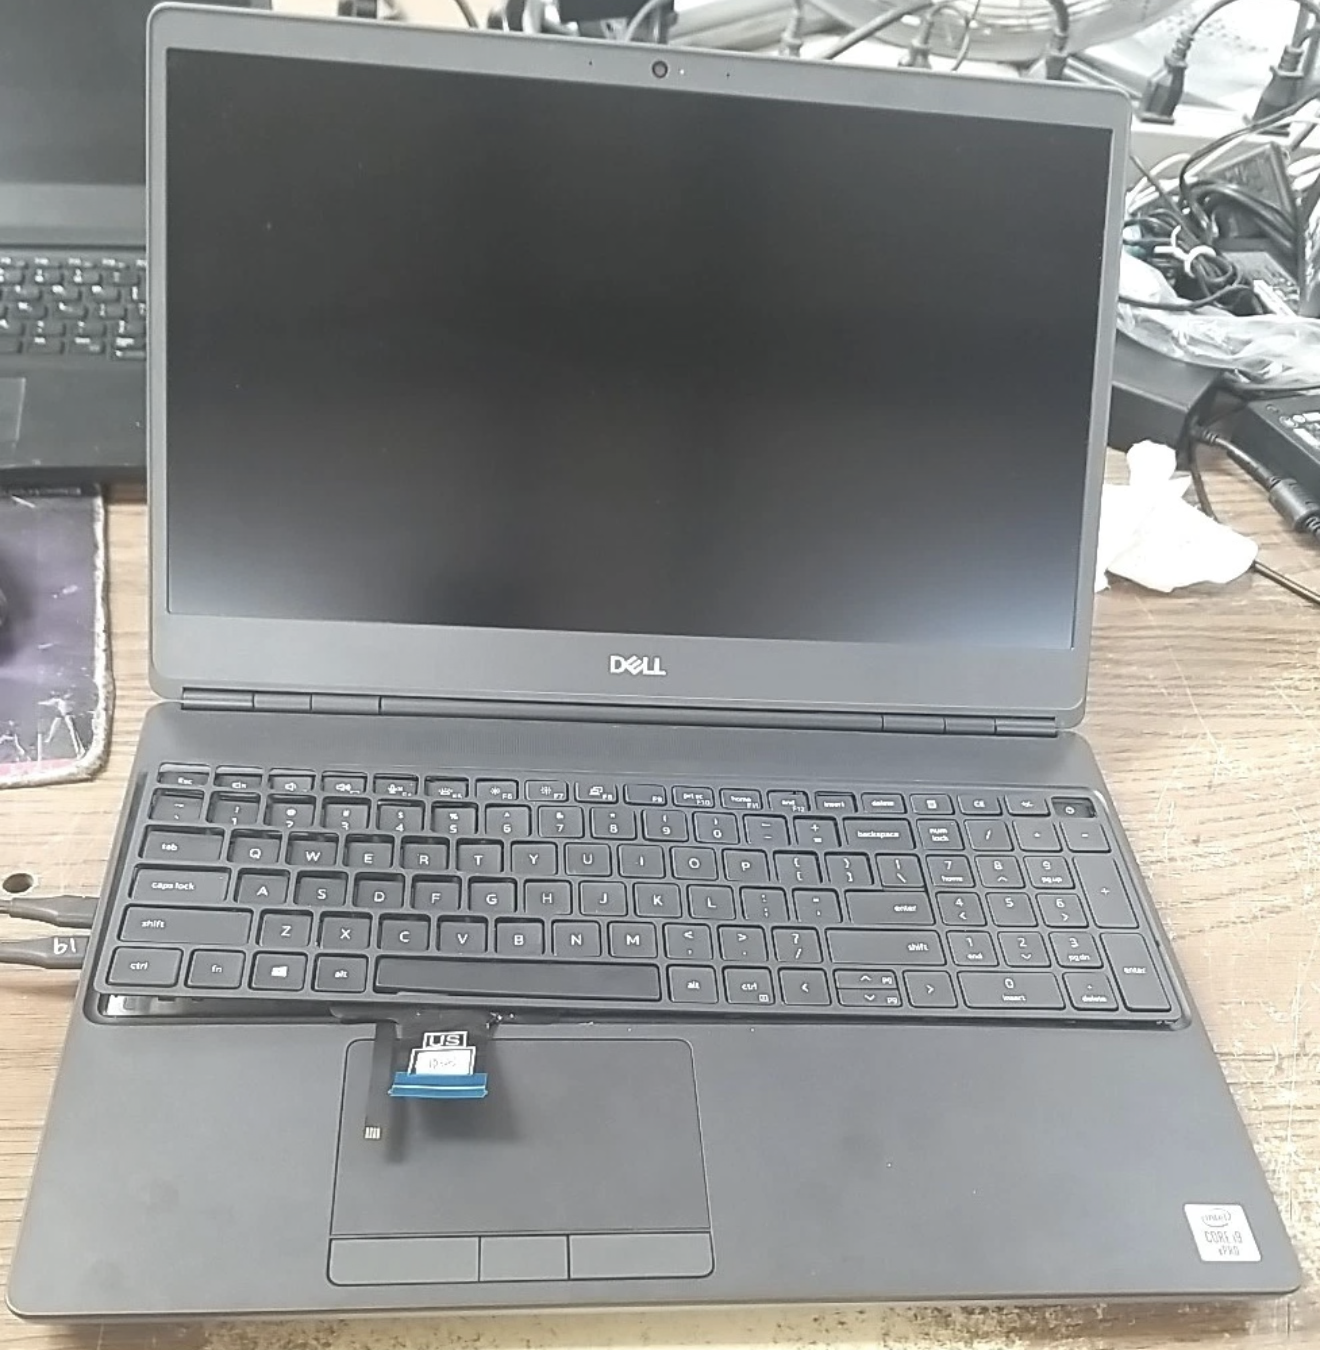
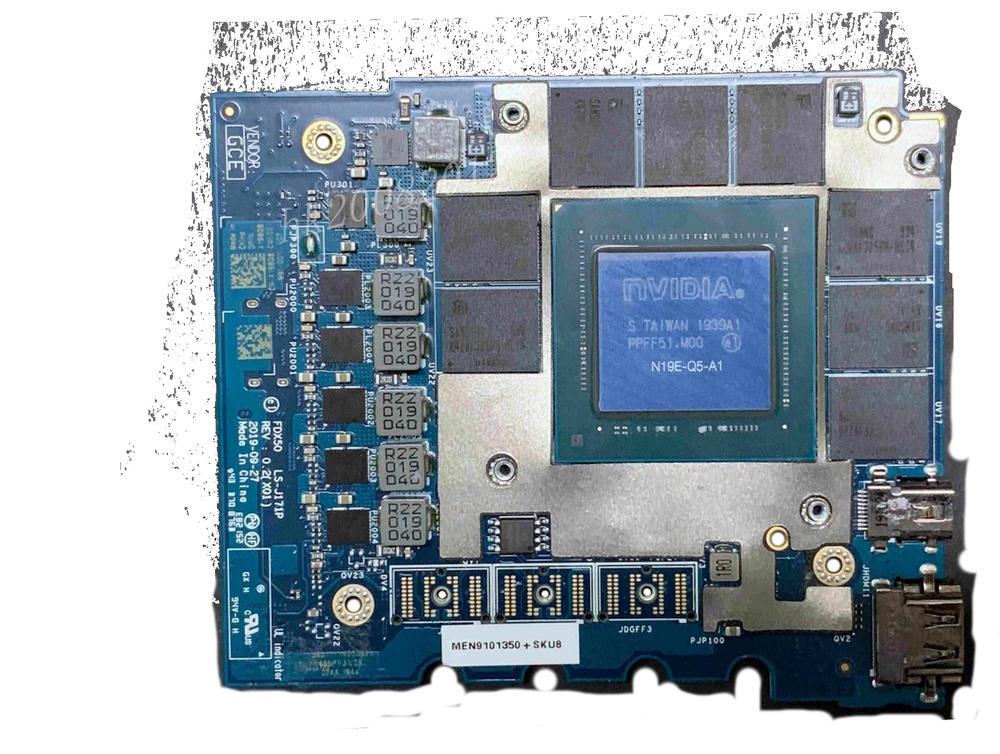
Here’s what the listing photo looked like and the dude was asking 280+40 for shipping. I lowballed and gave him an offer for 100$ and I was actually surprised that he accepted it.