JamieTheAnything
-
Posts
44 -
Joined
-
Last visited
Content Type
Profiles
Forums
Events
Everything posted by JamieTheAnything
-
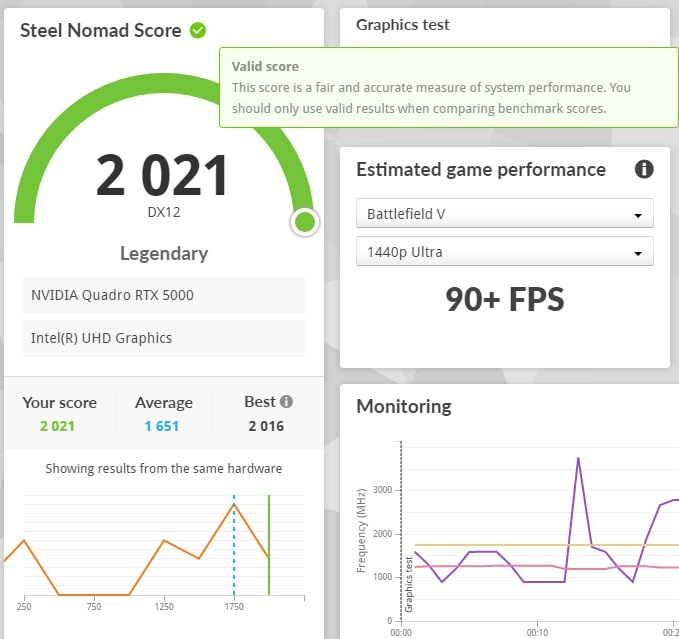
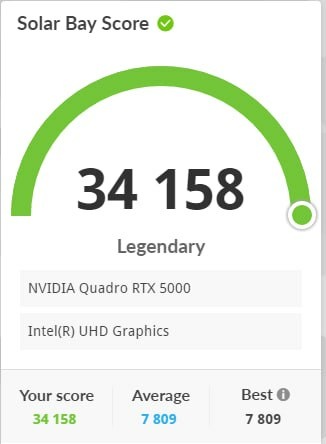
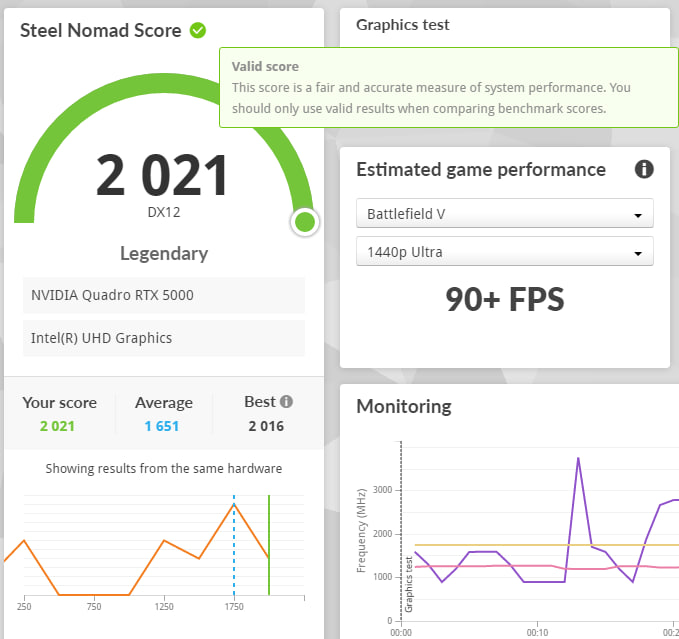
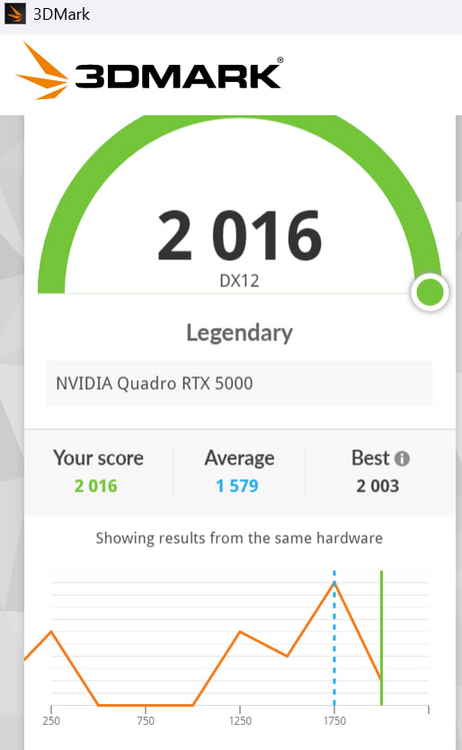
Bow before my monstrosity For I have done it https://www.3dmark.com/3dm/151229648
-
Record setting Precision 7550 with a 7750's 110W Quadro rtx 5000 shoved into it https://www.3dmark.com/3dm/151229648


-
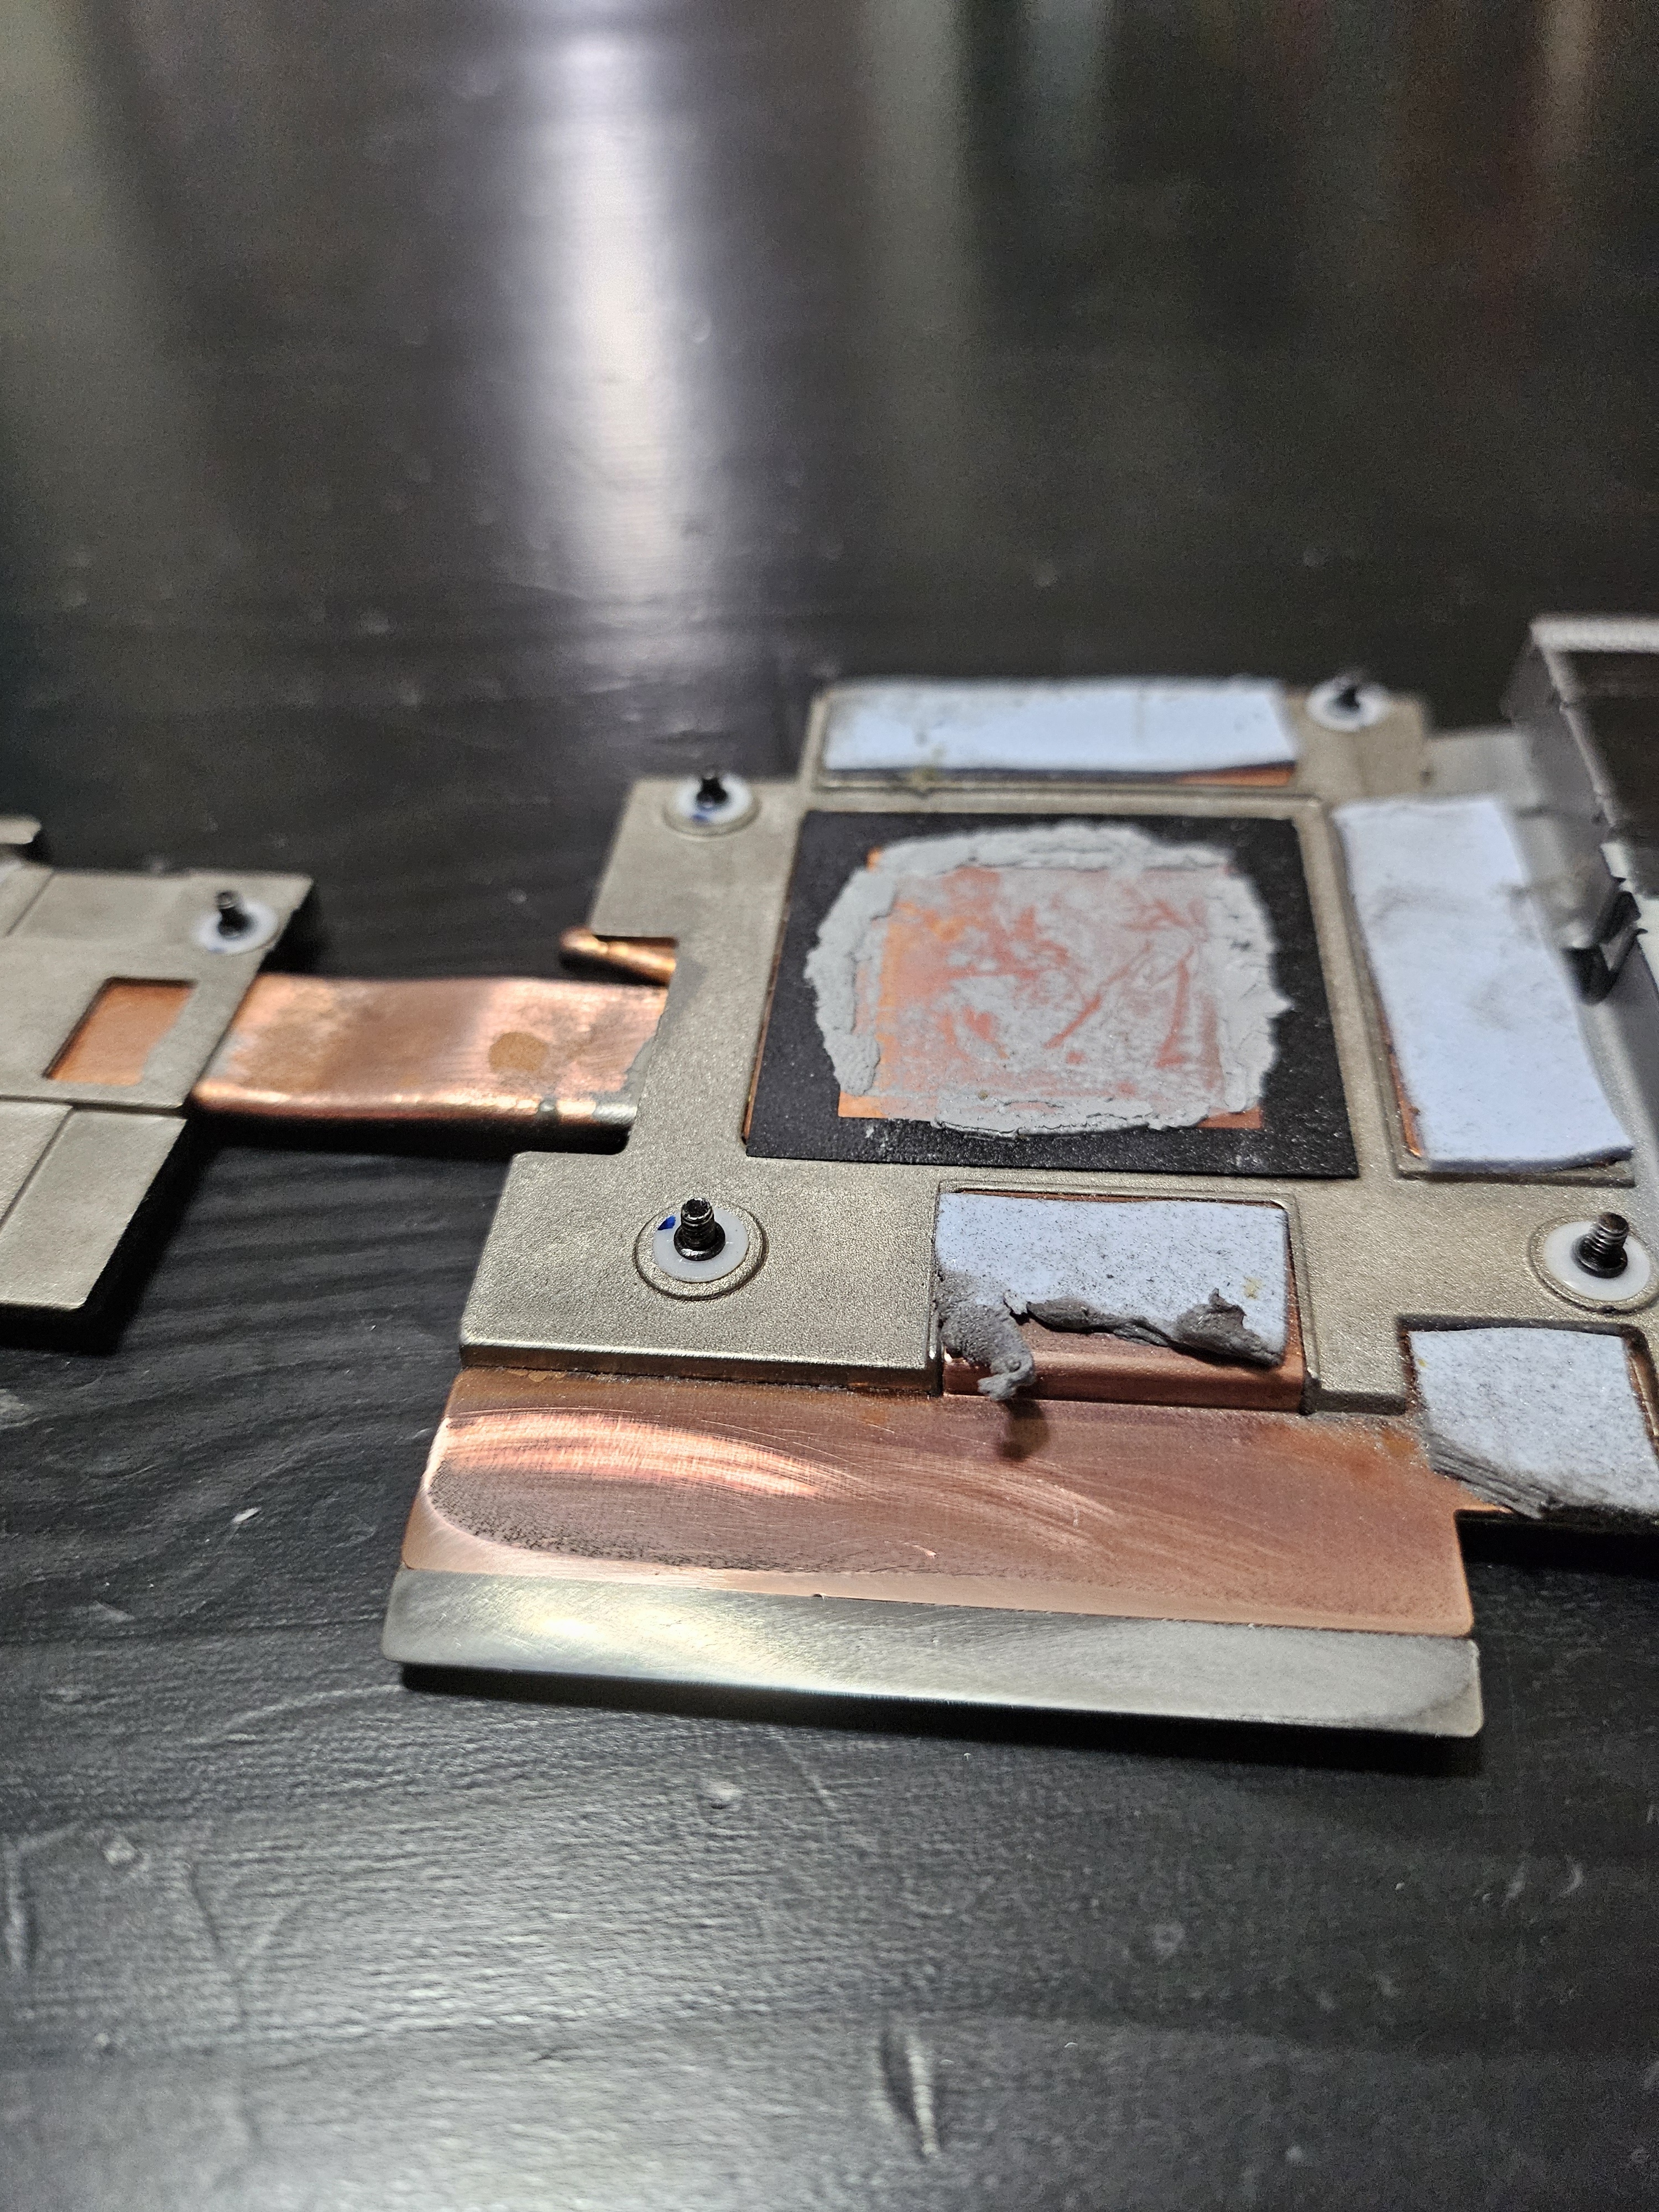
I put 3 copper shims in however I think only one would've worked. Each one of them is .2mm so it's roughly .6mm right now however I was seeing much better results with just one .2mm shim thanks to the losses due to stacking thermal paste->shim->thermal paste too many times. In any case I'm glad that it's working properly and not throttling anymore even with the 105W bios. 3Dmark tests below. Please also note you will have to remove this post in order for the gpu to fit.
-
it works but I need to add a copper shim to better the contact between the heatsink and the GPU die. thankfully based on the thermal paste pattern it looks to be about the sise of the Copper film I already purchased. will update with further developments.
-
So uhhh, developments This card runs too damn hot and i think there is less than a MM gap between the heatsink and the GPU die. However!!!, I can fix this using the copper foil I was using for the mosfets. Even with the MaxQ Vbios flashed onto the card and limited to 85W it was unable to keep the hotspot from creeping past 90 degrees. After that point it throttles down to 300-700Mhz, and makes certain games unplayable.
-
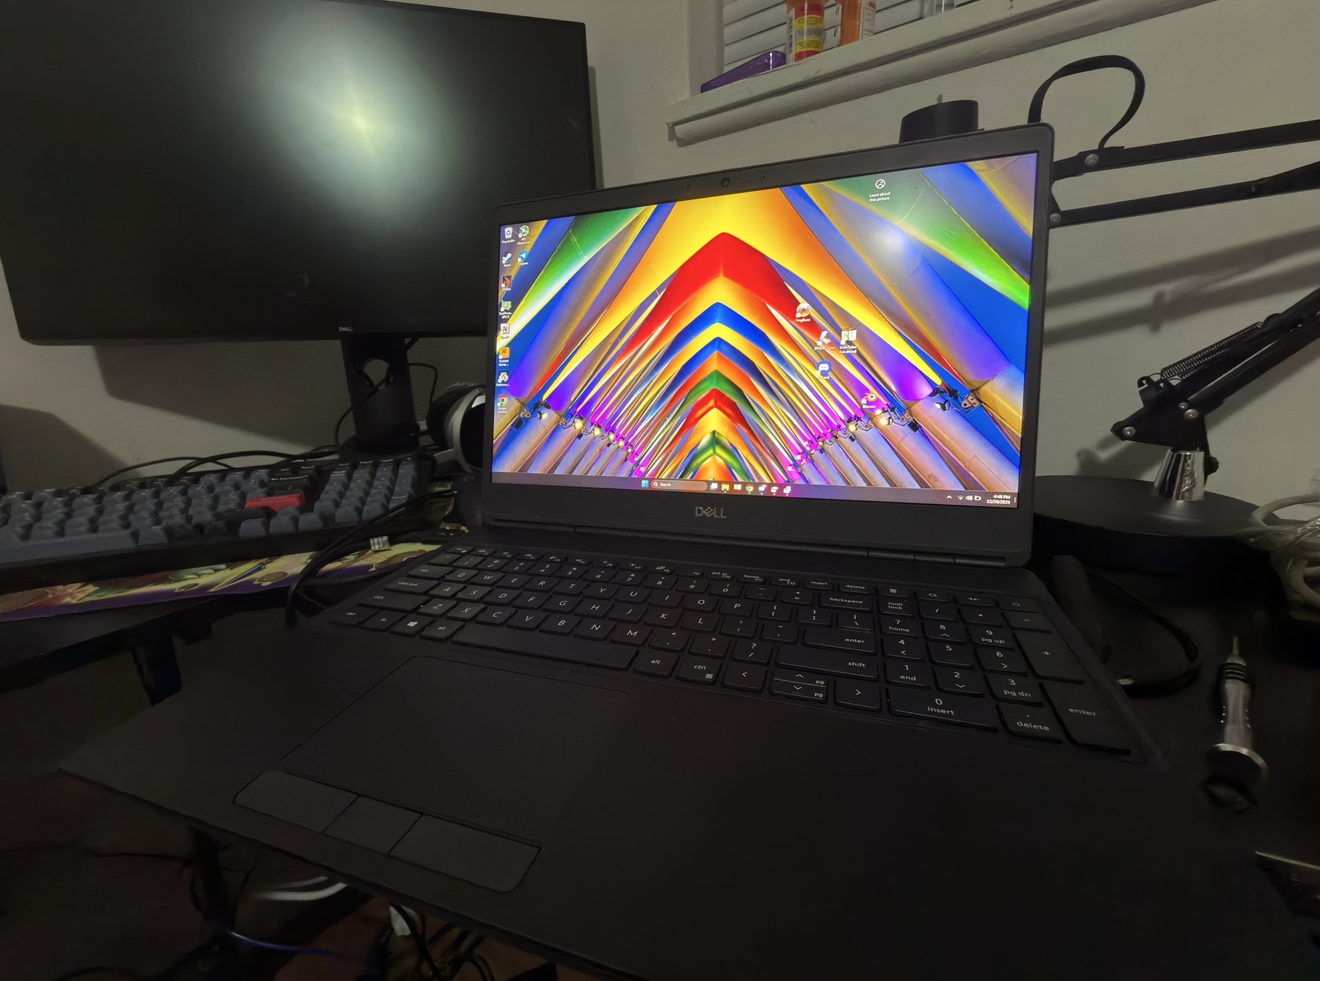
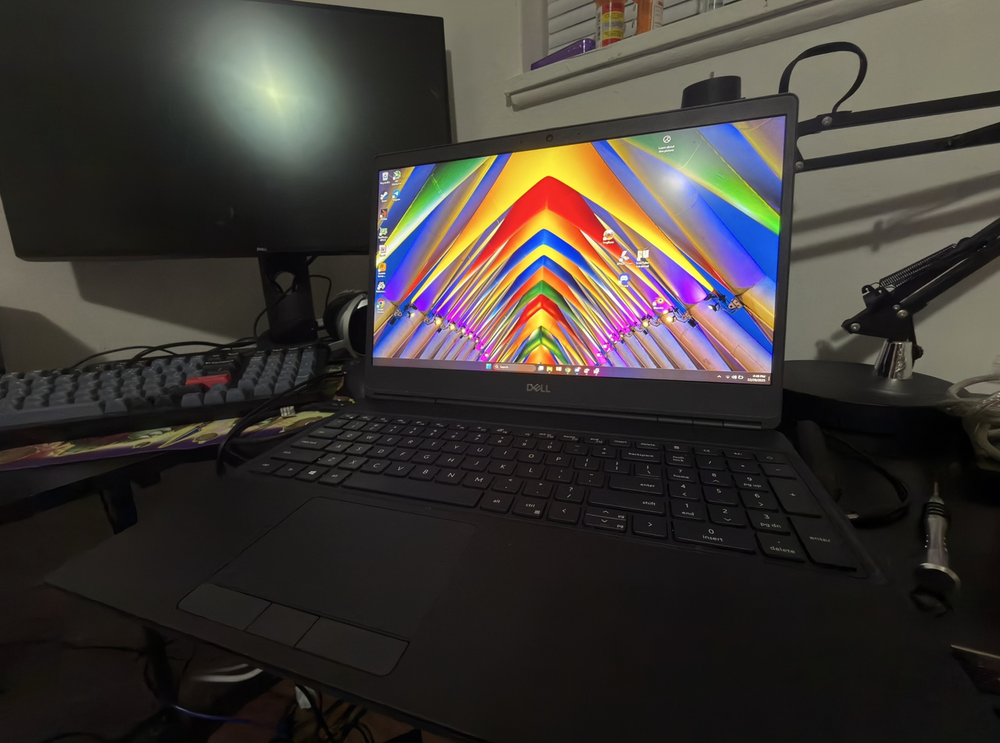
It fits and it works!!! Albeit it need more cooling now 😕
-
Alright so update to the whole project, I'm going to be using a very thin .2mm sheet of copper to connect between the heatsink, the inductor, and the mosfets. The order from top to bottom Heatsink->Paste->CopperShim->Putty->Inductors, and using a Motherboard->Putty->shim->paste->Mosfet sandwich on the mosfet side. Hopefully this will guarantee that the poor mosfets won't dump all of it's heat into the motherboard while also ensuring that the "quickest" path to the heatsink is given to the mosfets.
-
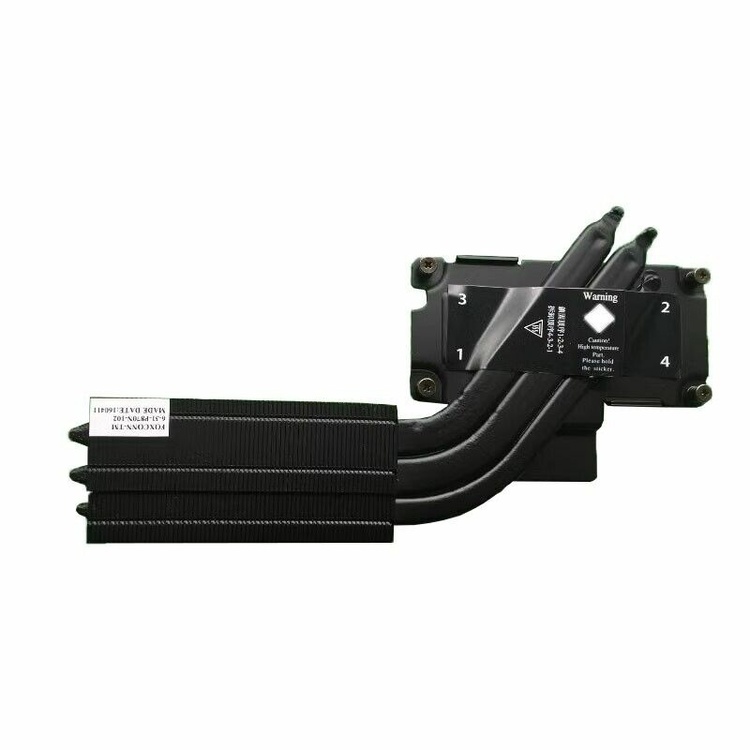
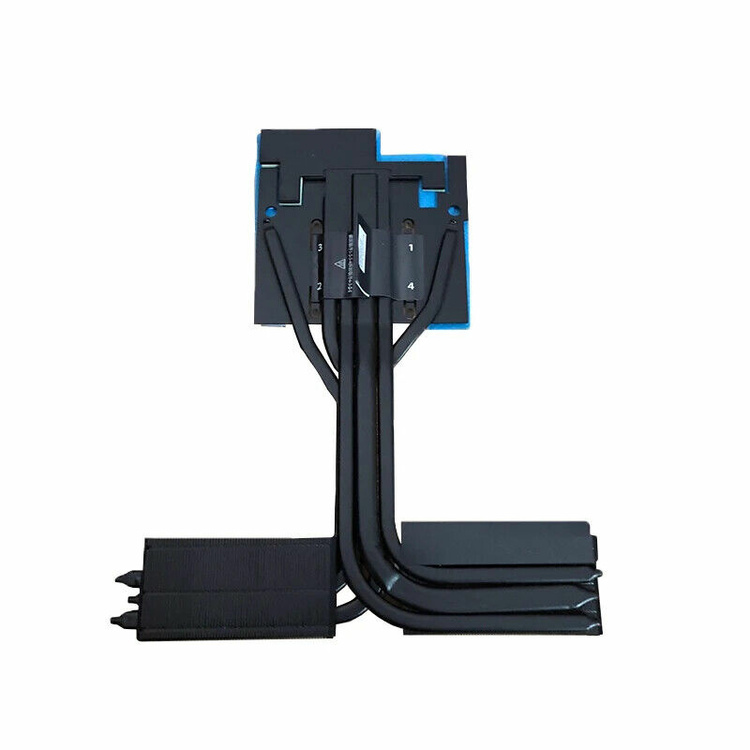
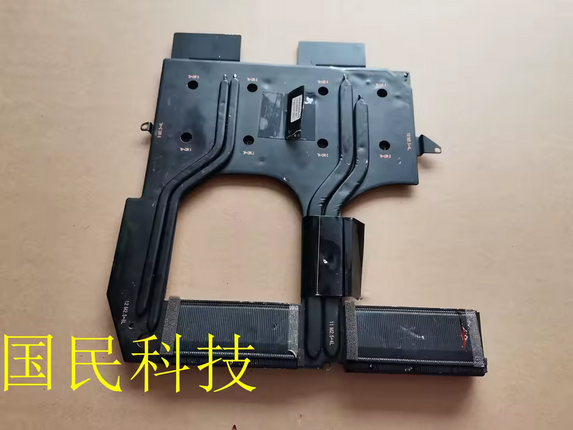
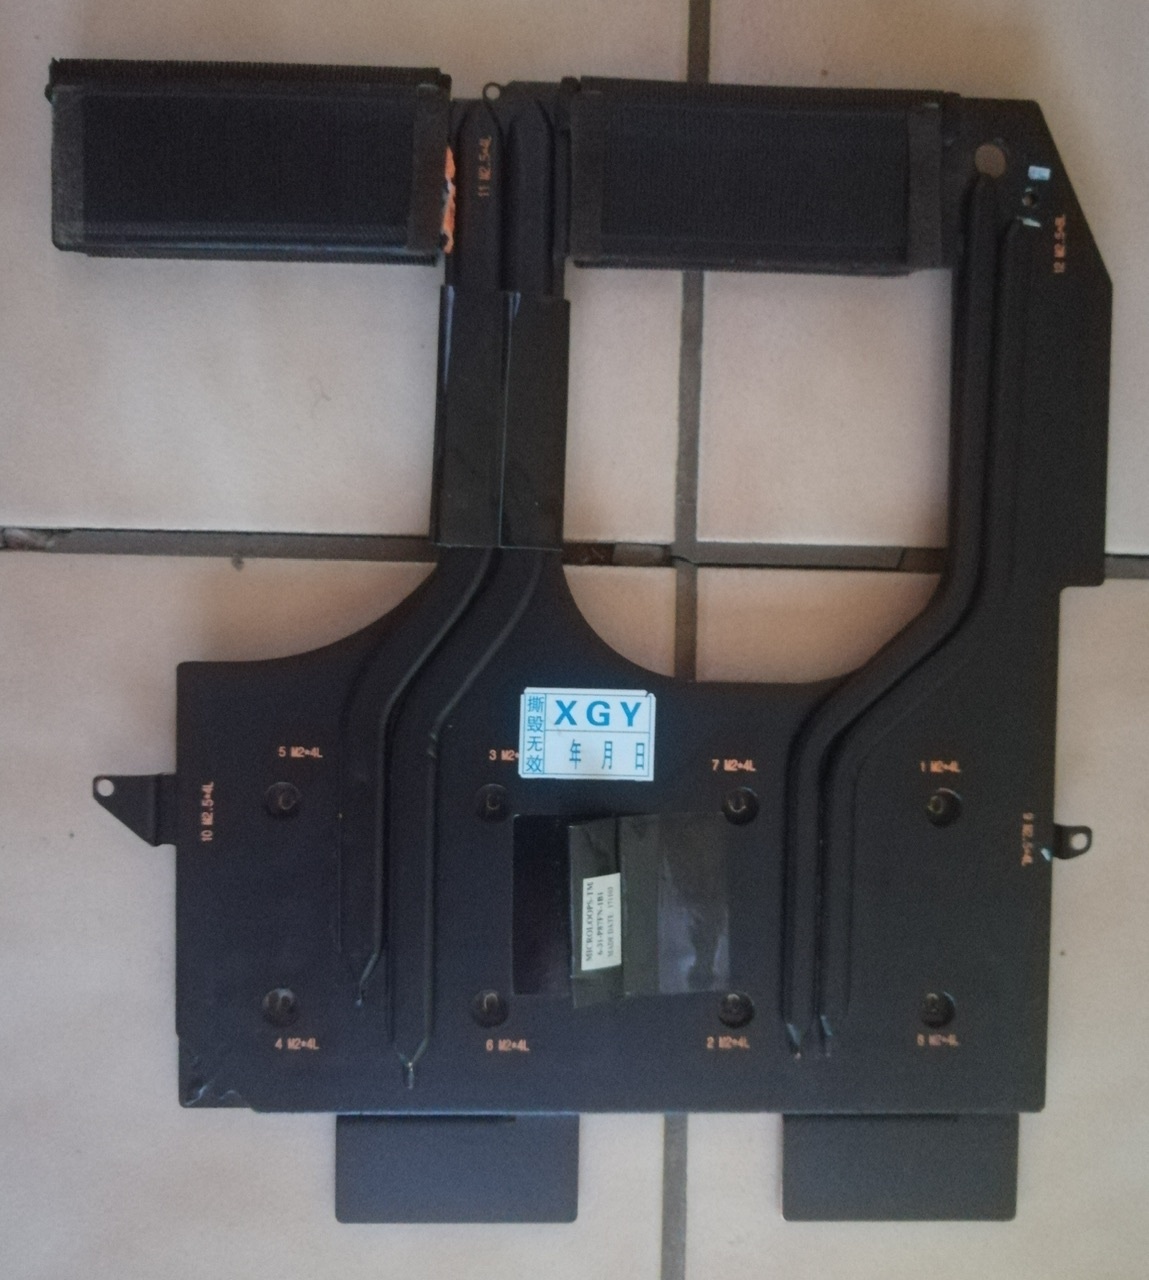
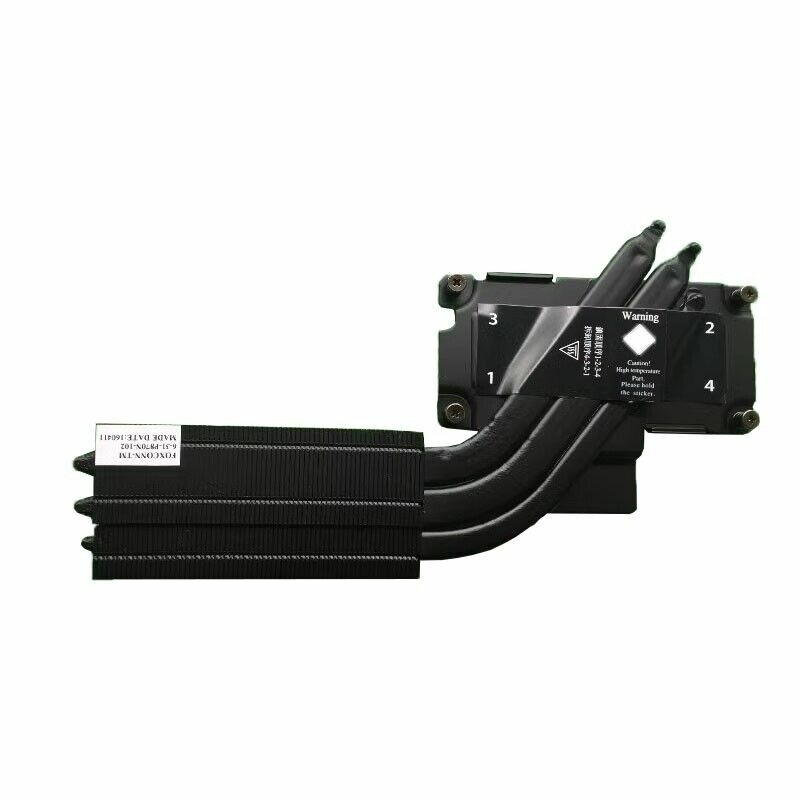
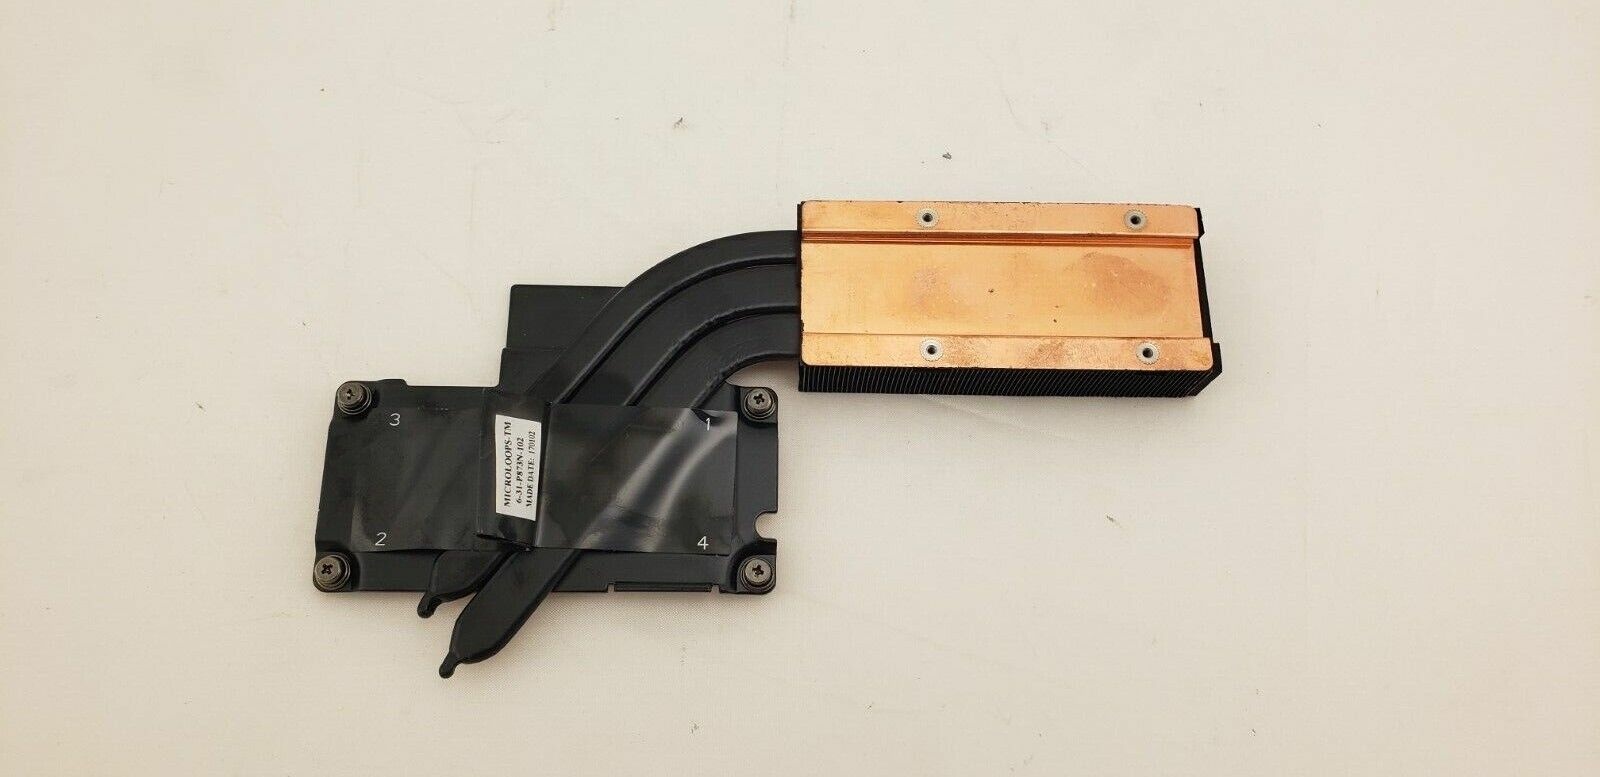
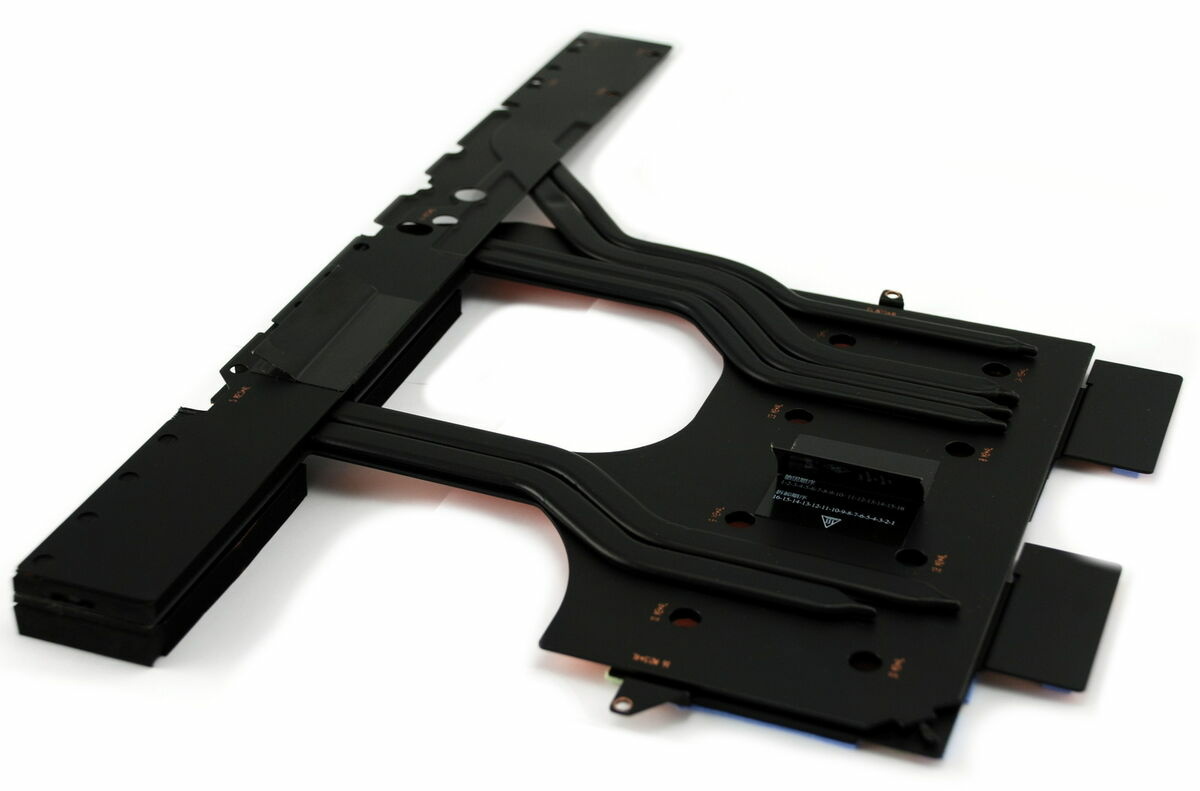
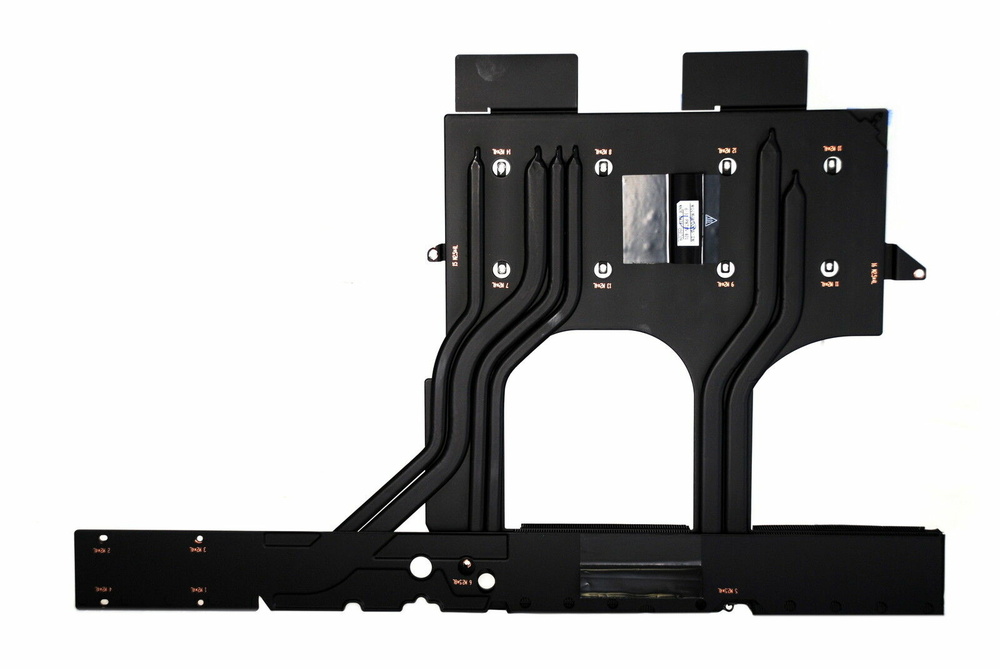
Update: new Heatsink has arrived and has been modified

-
I would rec. a thermal repaste along with replacing the thermal pads with thermal putty. It seems like your machine might not have the entire Die being in contact with the heatsink. at idle it shouldnt be at 100C, even when stressed it should get up to 100 but still be around 4.2-4.3ghz all core under load. (optimized fan preset). With my 7550 I have yet to repaste it since getting it, so it should be using the original paste and that has been my experience. After getting fresh and enhanced paste should improve things dramatically. Most cpu's that have absolutely cracked and dried out paste will show what you're experiencing, repasting it and also replacing the pads for the CPU with putty would be your best bet of getting things under control thermally.
-
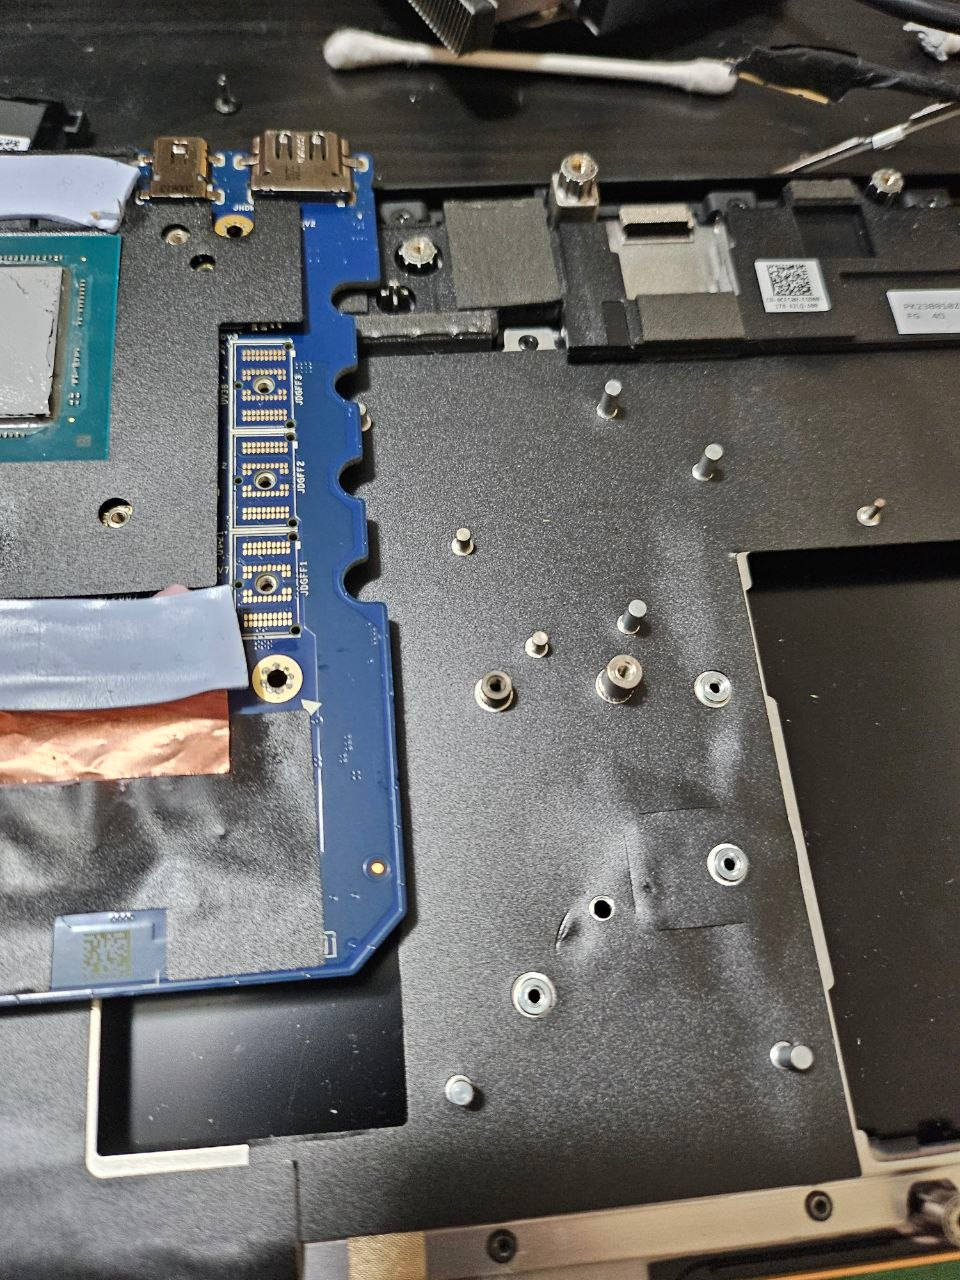
lmfao, based on the board design I'm just gonna flatten out the heatsink and then use the back of the Motherboard as the mosfet heatink lmfao.
-
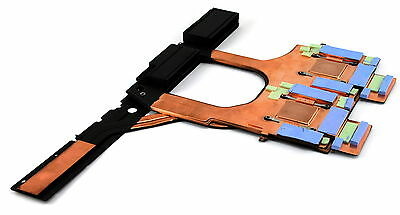
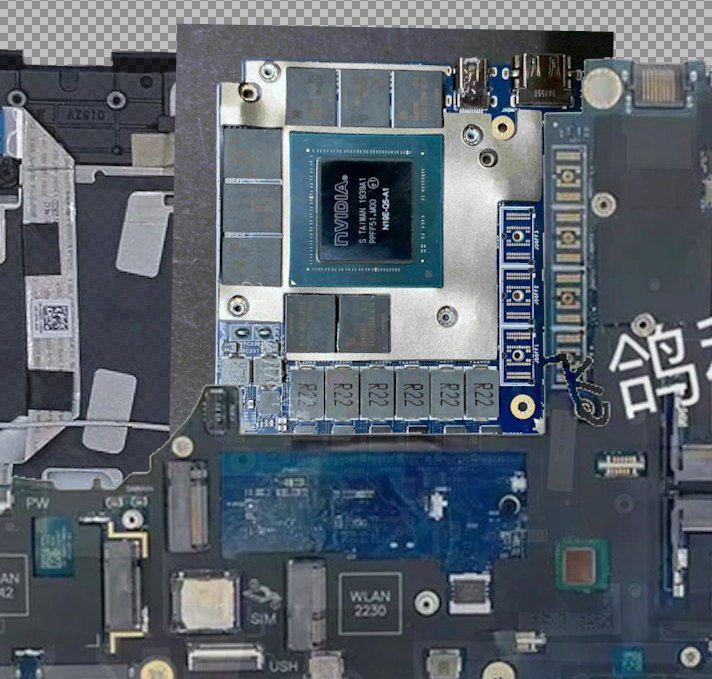
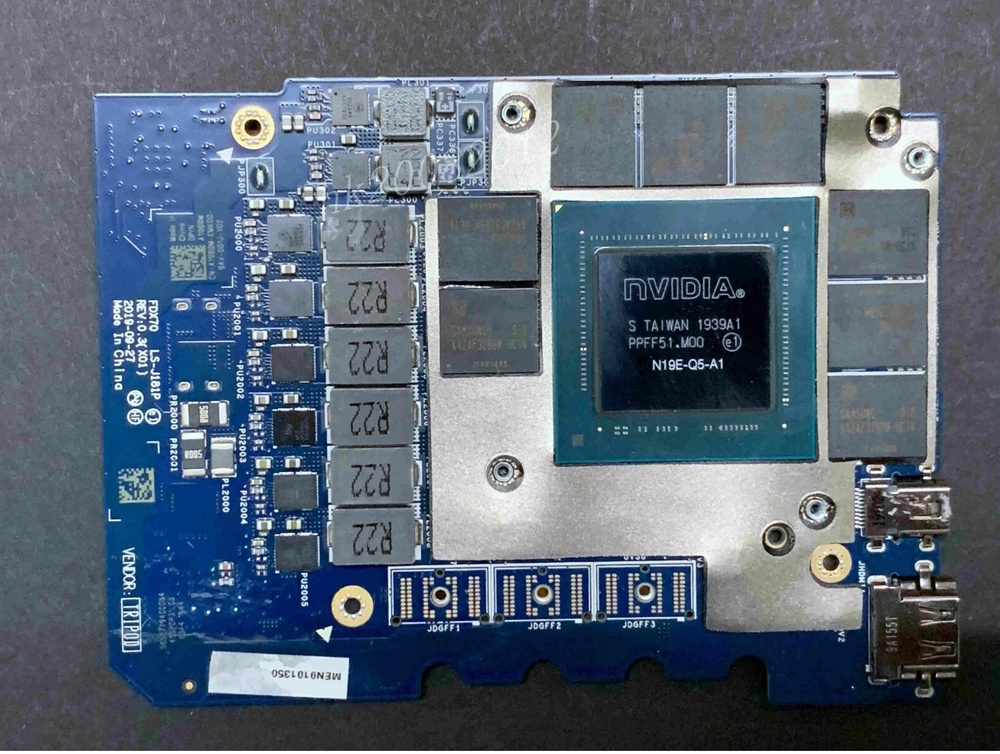
Here's the two cards along with an overlay of both of them for reference.

-
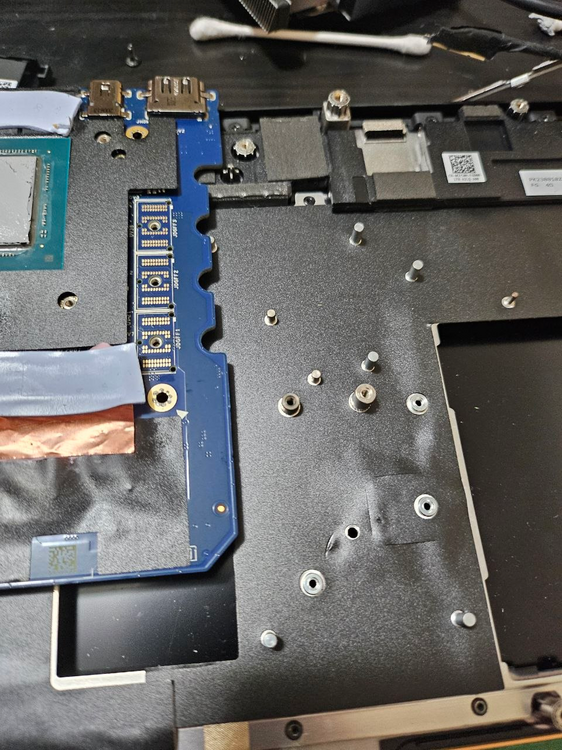
In short, A little bit of the bottom of the palm rest (the bottom part of it which faces up when you stare at the bare GPU, would have to get trimmed to make room for the mosfets/PD of the non-maxQ version. However the non-maxq version is the same length as the p5000 that was supposed to fit the 7540/50, as far as I can tell it's just longer between the two of them. the Width is the same and only one screw mount (related to screwing it to the palmrest) is different, other than that, the palmrest + heatsink modification (flatten it out since the "dip" for the mosfets will be in the wrong place, and then either adding a shim/small bit of aluminum to connect the mosfets to the 7550 heatsink), is all that is needed, and since they both share the same BIOS there shouldn't be a whitelist conflict.
-
Not if you're afraid to make a little modification to the palmrest and the existing heatsink :3 I will make this fit and prove it :3
-
Anyone swap a 7750 GPU into a 7550? Specifically the 110W variants of the RTX4/5000 series?
-
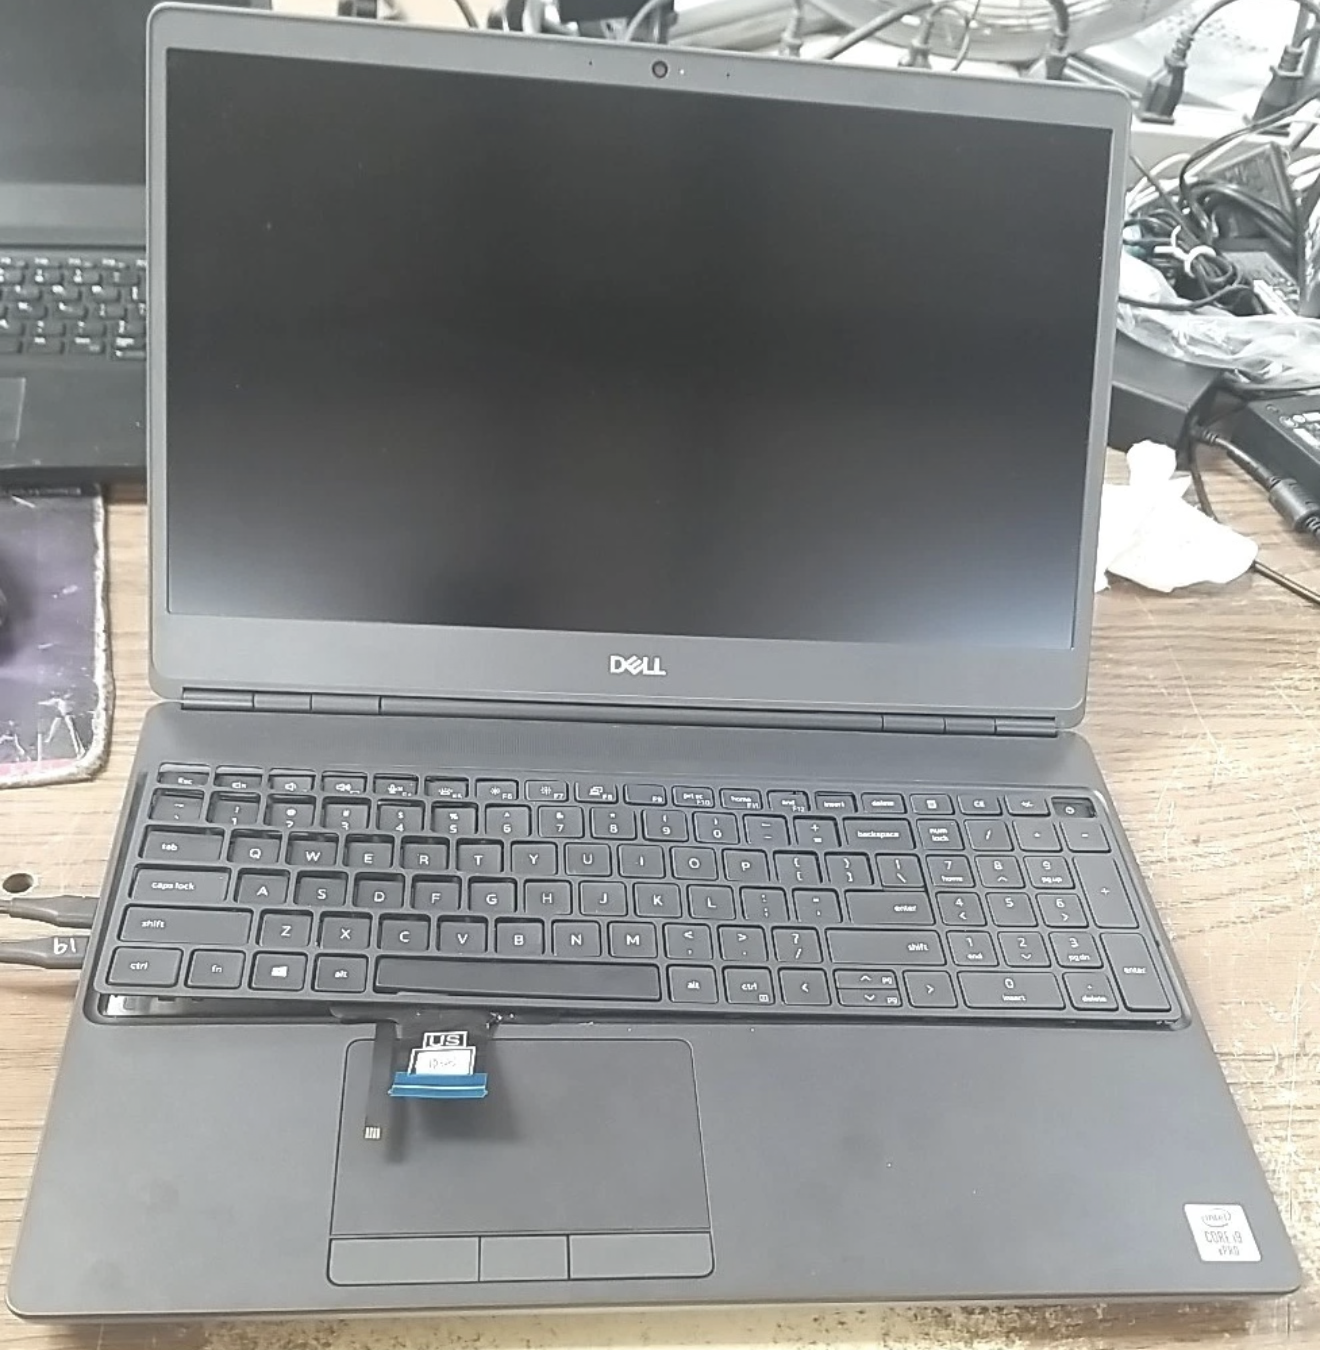
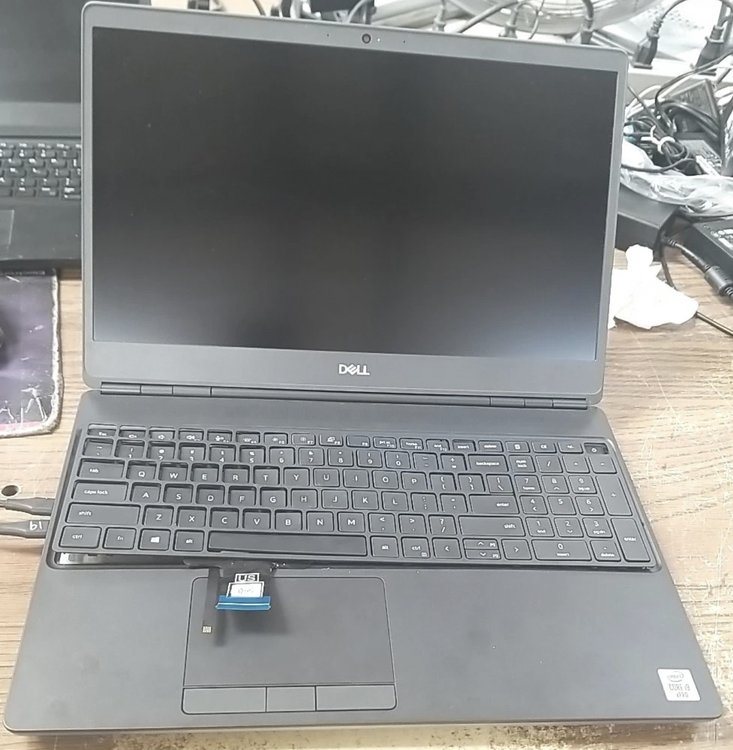
Here’s what the listing photo looked like and the dude was asking 280+40 for shipping. I lowballed and gave him an offer for 100$ and I was actually surprised that he accepted it.
-
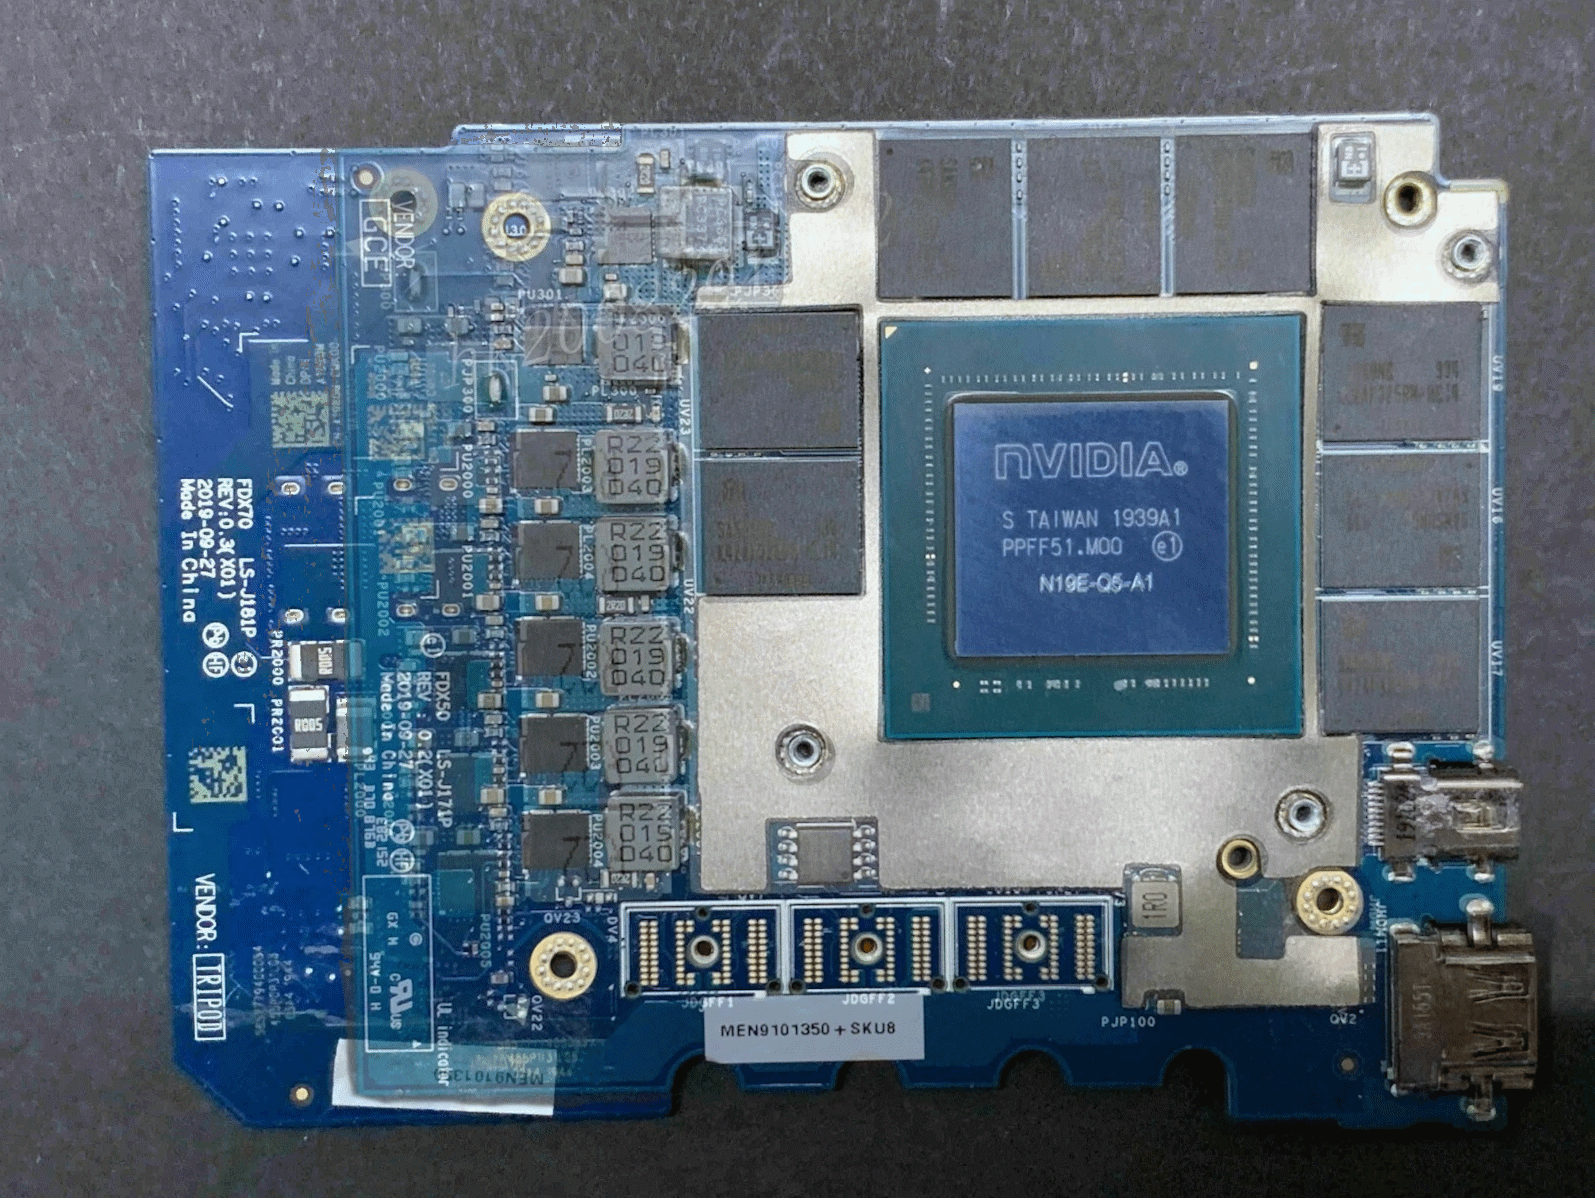
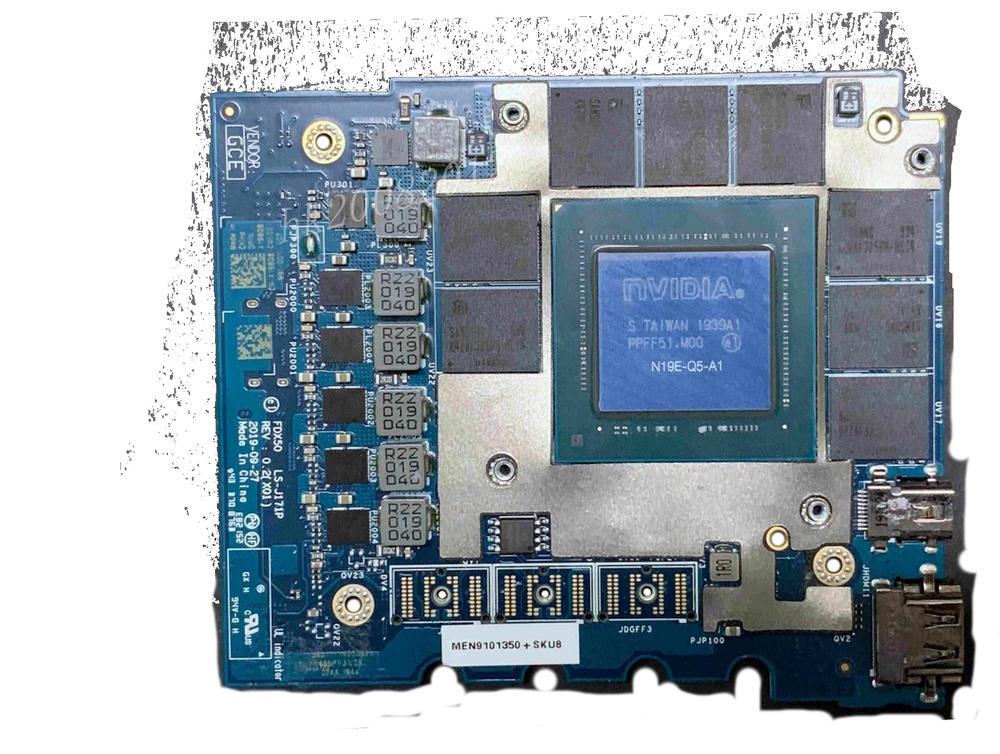
Hi yall, long time no see, I managed to snag a 7550 lately for 100$. No ssd no ram, keyboard ripped out, however i already had the ram and a SSD, so the only thing i had to replace was thankfully the busted keyboard. its an i9 configuration with the T2000 and the dci-P3 calibrated 1080p display which looks amazing. however since before I originally got it I’ve been rolling around the idea of upgrading it to the max spec GPU an RTX 5000 16GB. However between the 7750 and 7550 there’s two different sku’s for each, a 80(90)Watt “MaxQ” version that’s ment for the 7550, and a 110watt version ment for the 7750. I just so happened to snag a cheap rtx 5000 on Friday and it’s the 7750 110W version. Based on overlaying images at various opacities it looks like I may need to trim a little bit of the palm rest in order to add extra cooling to the mosfets since it’s so much longer than a typical card they wouldn’t be in contact with the heatsink. if anyone has done this kind of swap before precision 17” GPU -> 15(16”) please let me know if there’s any other potential incompatibilities I should be aware of like bios locks. But as far as I know the 7550 version (maxQ) also works in the 7750 and they both share the same bios there’s no reason as to why it wouldn’t recognize and boot with the 17” card. also to add I’m switching from the “P” heatsink over to the “E” style heat sink since said heatsink has a much bigger cutout(?) for the larger die of the rtx4000+ gpu’s. attached are some photos of the wonderful thing.
-
As it turns out if you dont plan on shaving them down, you can also hard mount the TM cooler to a DM2/3, I used the screws from a Cisco Switch I took apart. Took off the spring screws and replaced it with those, I finally got good enough contact to even use PTM7950.
-
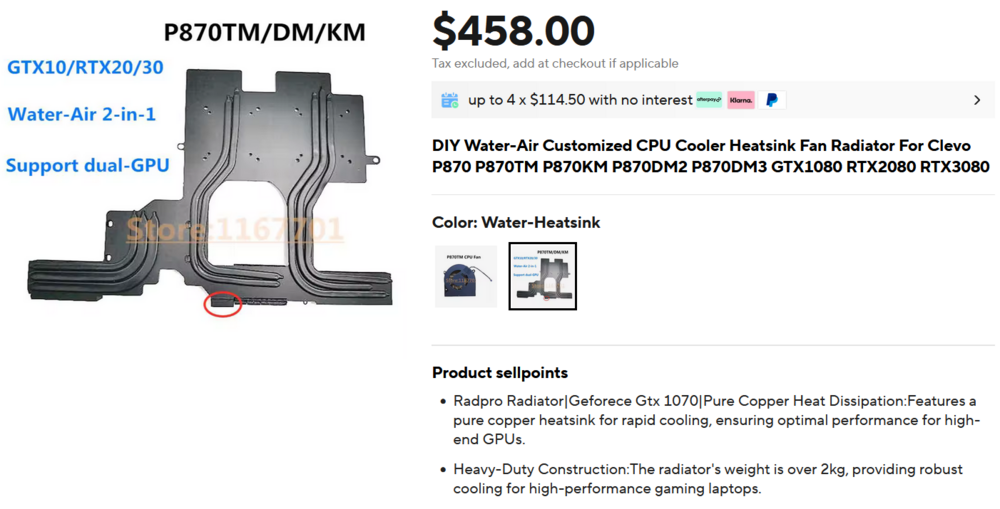
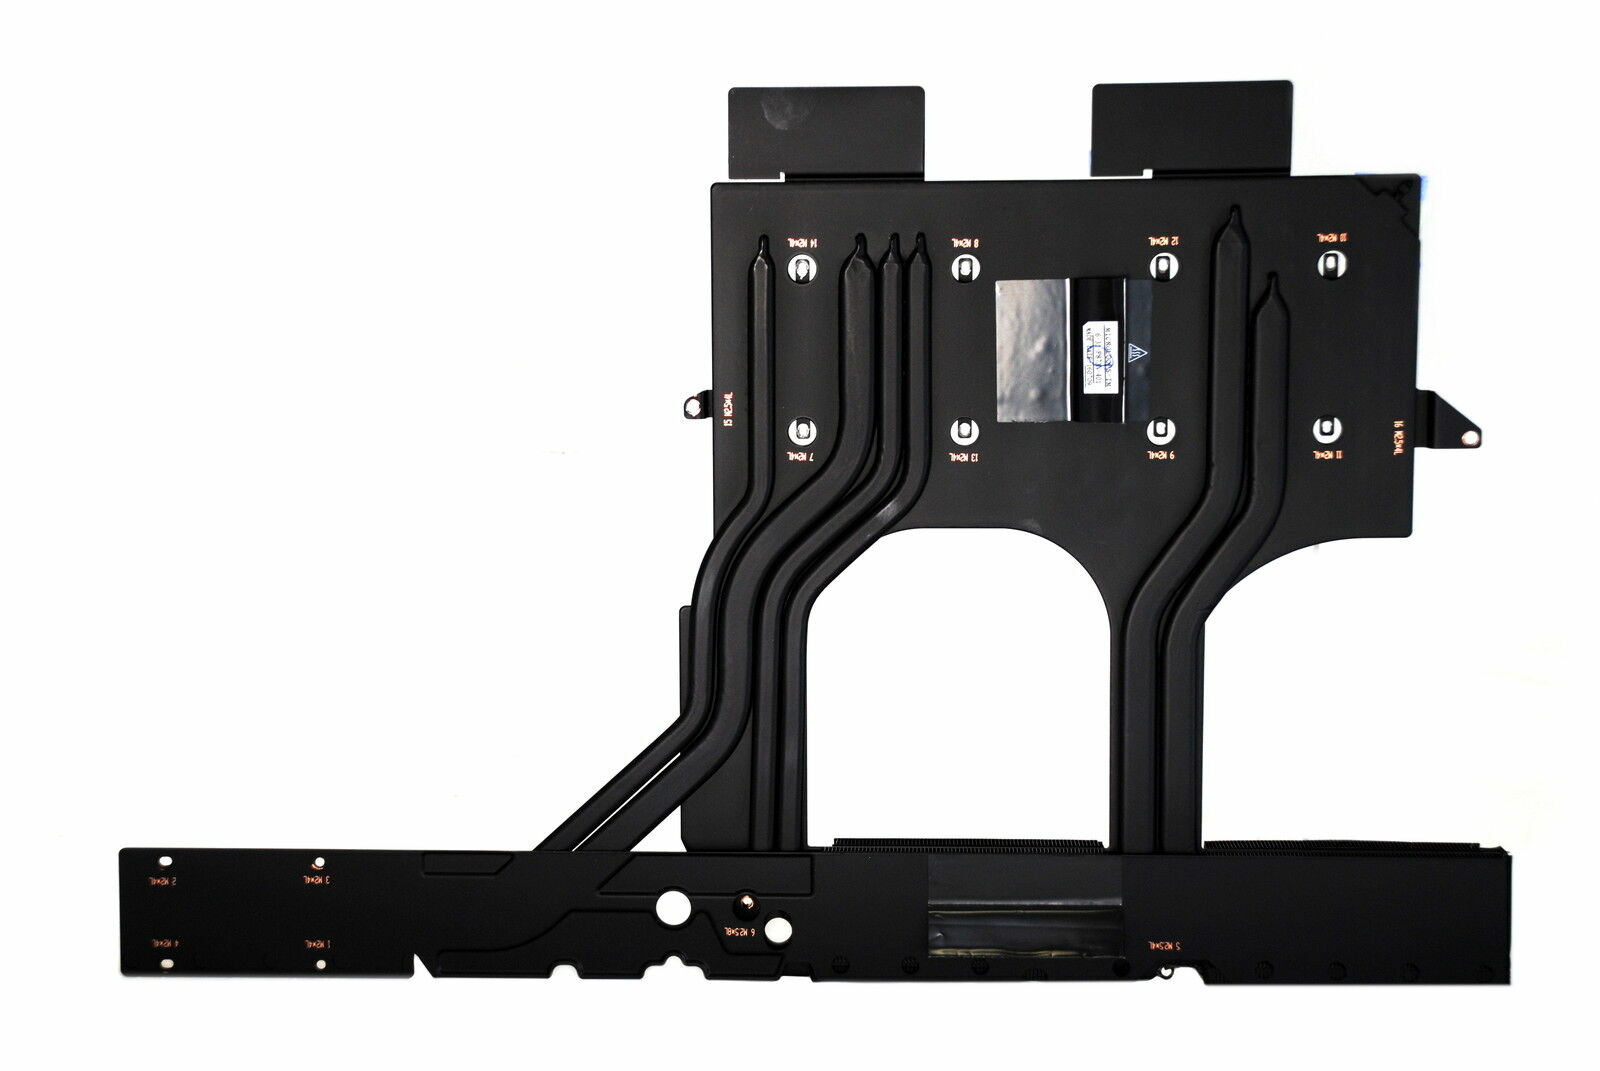
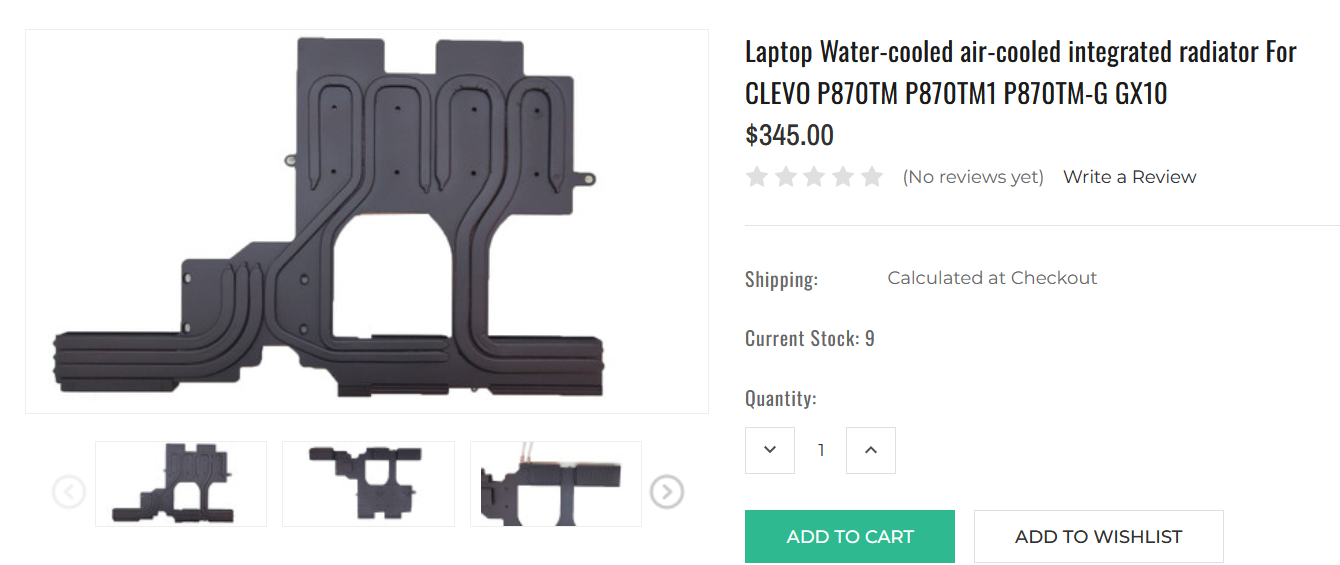
Out of the abundance of gatekeeping and spite regarding modding heatsinks to accept the 30 series cards, I'm starting a thread for making an Open source and freely available heatsink mod for the 3080m on the DM(2/3),KM, and TM series. I will be releasing exact measurements, and a guide once i've completed the mod and ironed out the kinks. I'm also limiting myself to using only thermal Putty and Copper shims so that ANYONE can do it. I've seen far to many gatekeepers here and I want to change that. There will be two versions, one for T-Shape and one for the Dual GPU vapor chamber, The first being developed being the dual GPU vapor chamber. If no one else is going to do this I will and I Will update the thread as it goes on.
-
P870DM2_DM3 QTJ1 stock/max TDP results
JamieTheAnything replied to JamieTheAnything's topic in Sager & Clevo
What I'm more than likely going to do is just limit it to 75 watts and up the single core performance to improve gaming. All core idk anymore, just sticking it to 85-97 watts or something to get an all core 4Ghz while undervolted and with the cache at 40x is what I'll deal with. -
P870DM2_DM3 QTJ1 stock/max TDP results
JamieTheAnything replied to JamieTheAnything's topic in Sager & Clevo
Yeah I ended up hard mounting it since one of the screws decided to cease holding, so I used 4 screws from a cisco switch I took apart and hard mounted it because otherwise it wasnt making ANY contact. -
P870DM2_DM3 QTJ1 stock/max TDP results
JamieTheAnything replied to JamieTheAnything's topic in Sager & Clevo
Odd thing about mine, It actually had all 12V fans. and It's a DM2_DM3 *I think the DM3 is the dual GPU version which is what I have. -
P870DM2_DM3 QTJ1 stock/max TDP results
JamieTheAnything replied to JamieTheAnything's topic in Sager & Clevo
Unfortunately, I have installed the new cooler and it had zero net improvement. however I did figure something else out to help in getting under 100 watts of load. i had the damn cache multiplyer set to 44 setting it to the default (21x)results in being able to get up to 4.4 GHz all core without thermal or power throttling. however it does have a considerable dip in performance compared to all core at 44x at 4.2 GHz vs 21x at 4.4, 1800 vs 1650 in CB 15 im tired. -
P870DM2_DM3 QTJ1 stock/max TDP results
JamieTheAnything replied to JamieTheAnything's topic in Sager & Clevo
It wont because the only difference between the dual GPU TM and DM is the thing that sticks out into the channel for the CPU
- 37 replies
-
- 1
-

-
- qtj1
- enginering sample
- (and 1 more)
-
Gsync is weird, in short, They only will support CPU's that actually exist and GPU's that should be installed, EX, 6-9th gen, + 10, and 20 series gpus = Gsync, However since you have the CPU equivilent of Missingno, it doesnt verify and disables Gsync.
-
What are the differences between the P870(DM/DM2/DM3/KM/TM)?
JamieTheAnything replied to Wingolf's topic in Sager & Clevo
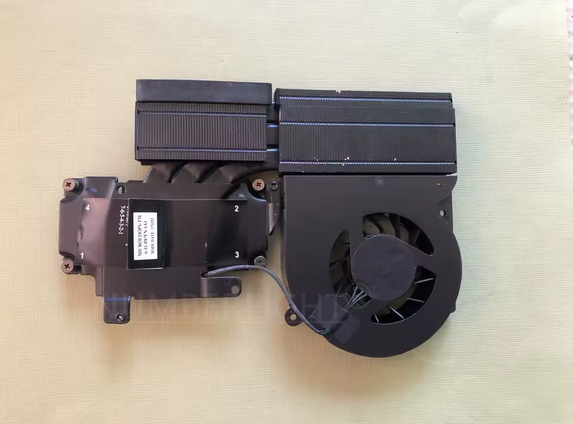
You're about right, One thing to note I believe there are 3 different CPU coolers, and 3 different GPU cooler, (and one that adds potential water cooling and combines the GPU and CPU) There's two different styles of coolers for the DM/KM Dual GPU Var 1, (Non vapour Chamber I believe these are for the Dual 980's) This is just one heatsink for each GPU. Dual GPU Var 2, 10XX series Vapor chamber 2.5 Vapor chamber that DOESNT include additional CPU cooling for the TM series (as far as I know there is one Vapor chamber that does have a part jutting out to additionally cool the cpu from the DM2 and KM series however with the TM's new cooler it didint need to exist so there's one without it) T-Style Single GPU cooler Then for the CPU coolers it Goes Single GPU/Dual 980 (Doesn't have the channel for the vapor chamber) Dual GPU DM3? (has the channel for Vapor chamber sit in to assist in cooling the CPU) TM series (Dual heat fins and an upgrade to 4 heatpipes for the CPU) Then for an oddball there's the water cooler that combines the CPU and GPU to the same heatpipes along with enabling watercooling from RTD And another out of stock option from aliexpress That is all of the variants I have found for the P870 series so far.