IllusiveMan
-
Posts
6 -
Joined
-
Last visited
IllusiveMan's Achievements
")


-
I was looking for years for a hi frequency 15.6 panel, like 144hz or more but this is like looking for life on Mars so I am stuck with the 60hz one.. 40pin was to be like the top one, never heard of 30pin 240hz 1440p, how is that possible?! Yes, LCD is crap, since I have the little AW 13r3 with Oled it's a big deal. But it's still a dream to find such displays. I love when everywhere are secrets within secrets, that EDID not sure how exactly works, is it close to the RAM DIMM EEPROM? I used to flash RAMs to their best specs and change to anything desired.
-
Yes, exactly.. unsoldering could indeed damage it. It only happens when idling with screen off several minutes. But if GPU-z is opened then it idles with no problems 3080ti, 3080 super on mxm 3.1/3.2, it's the GA103.. sounds interesting.
-
Oh, hi Khenglish! Looks promising! Wanted to go with 775 heatsink and extend the case but im good for now. Maybe a x170 vapor chamber could be fitted into it? Also got an issue with power states I believe, if idling for like more than 15 minutes the EC goes into GPU Temp panic. Will check this further. Edit: display sometimes turn on and after that system shuts down or system just shuts down in several seconds and display stays black.
-
Welcome! Many thanks!
-
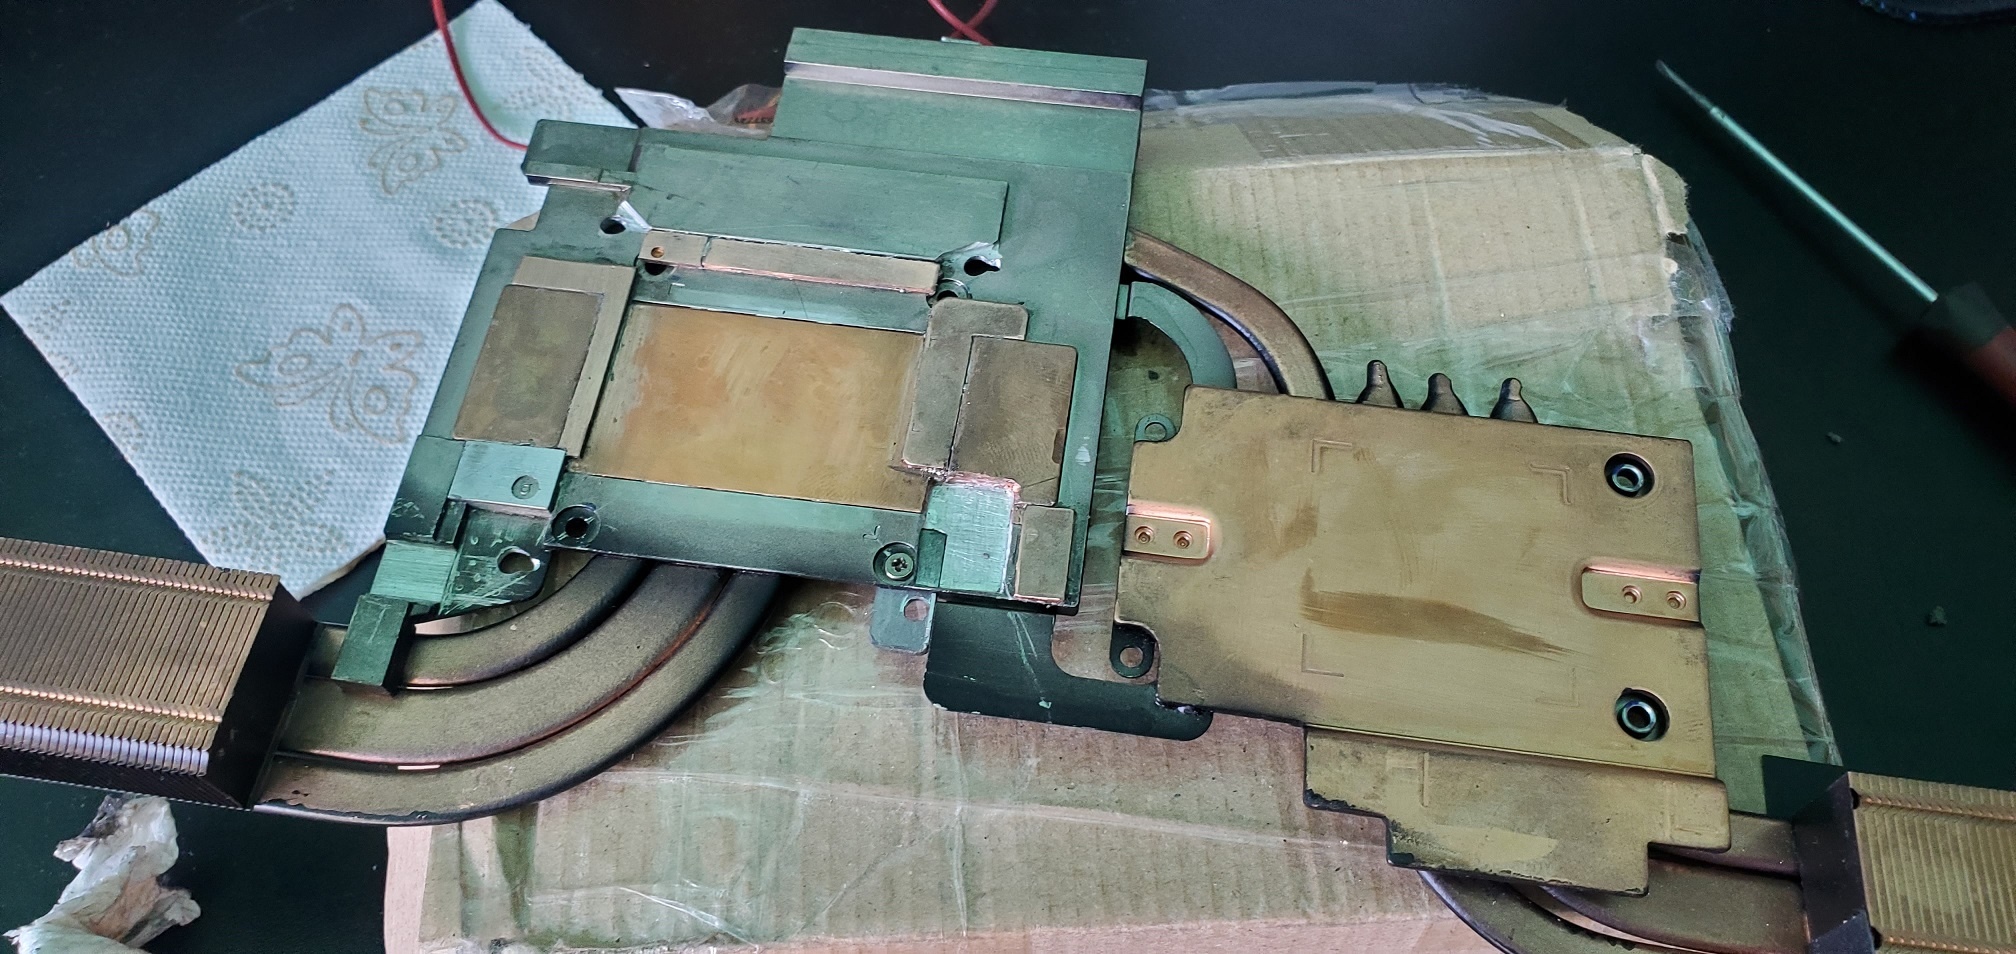
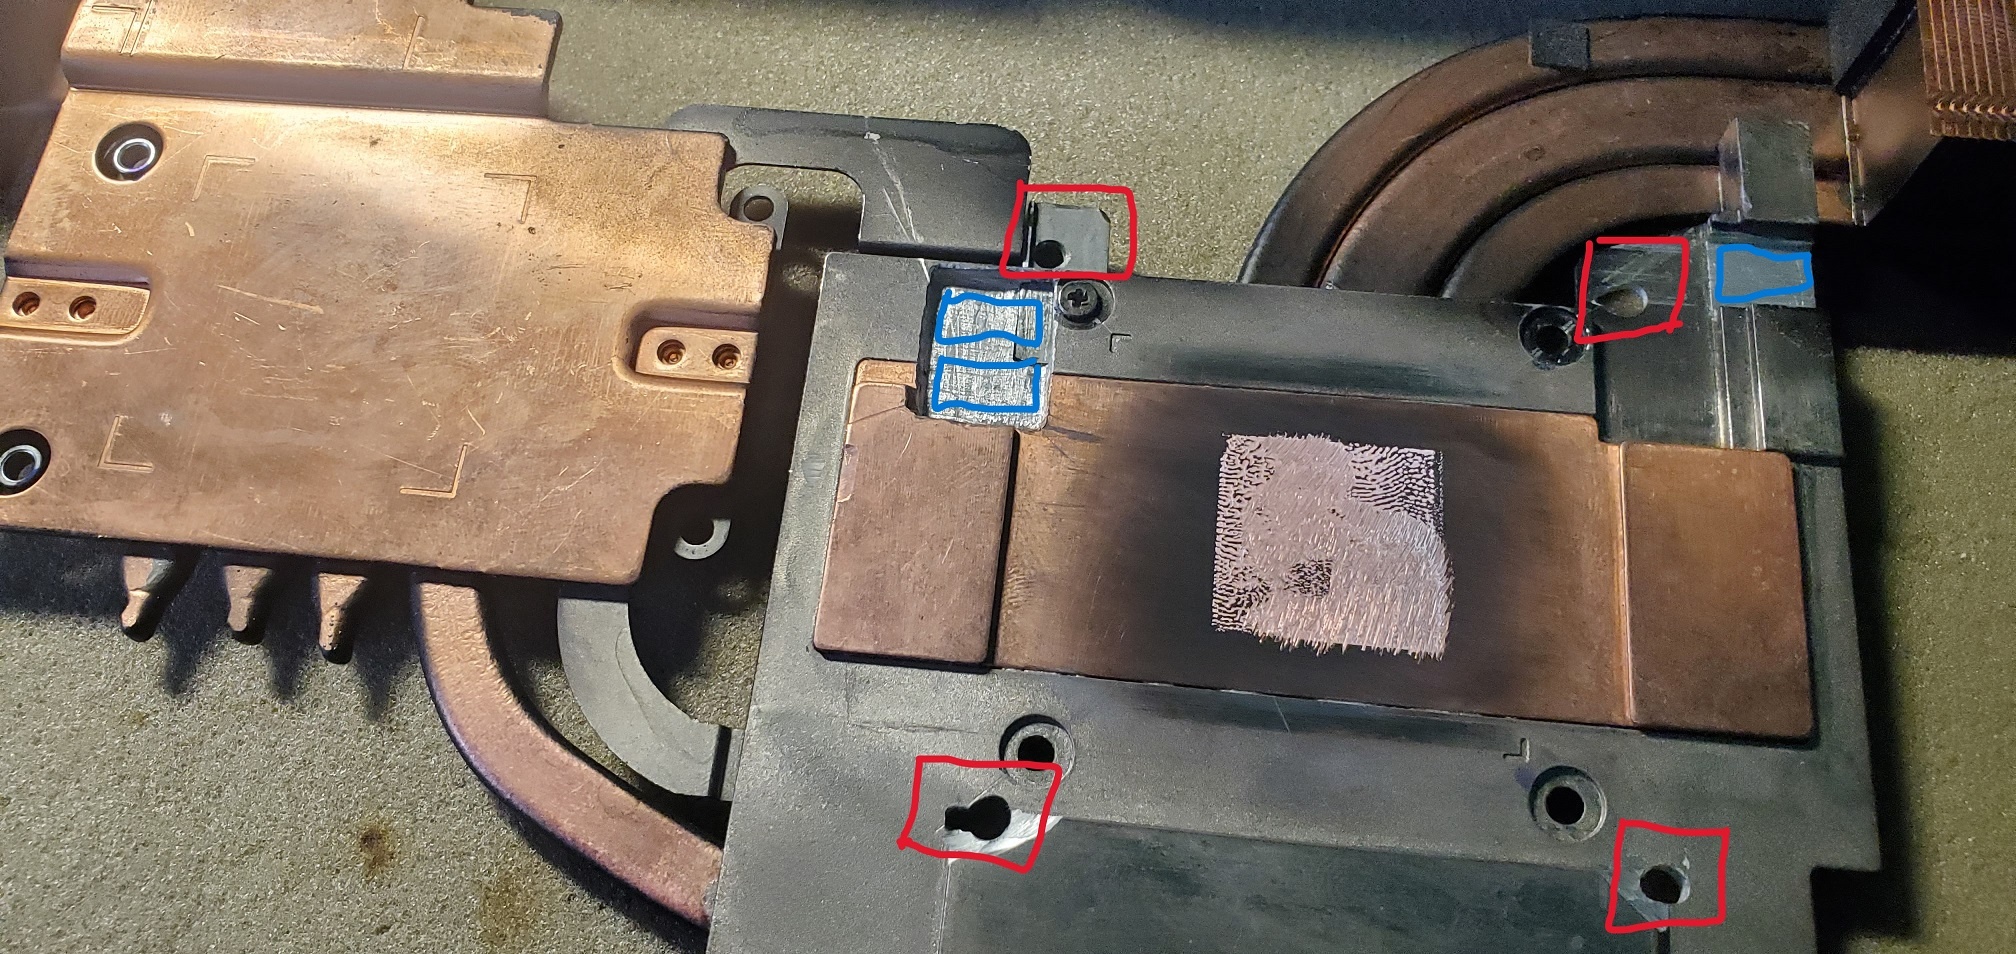
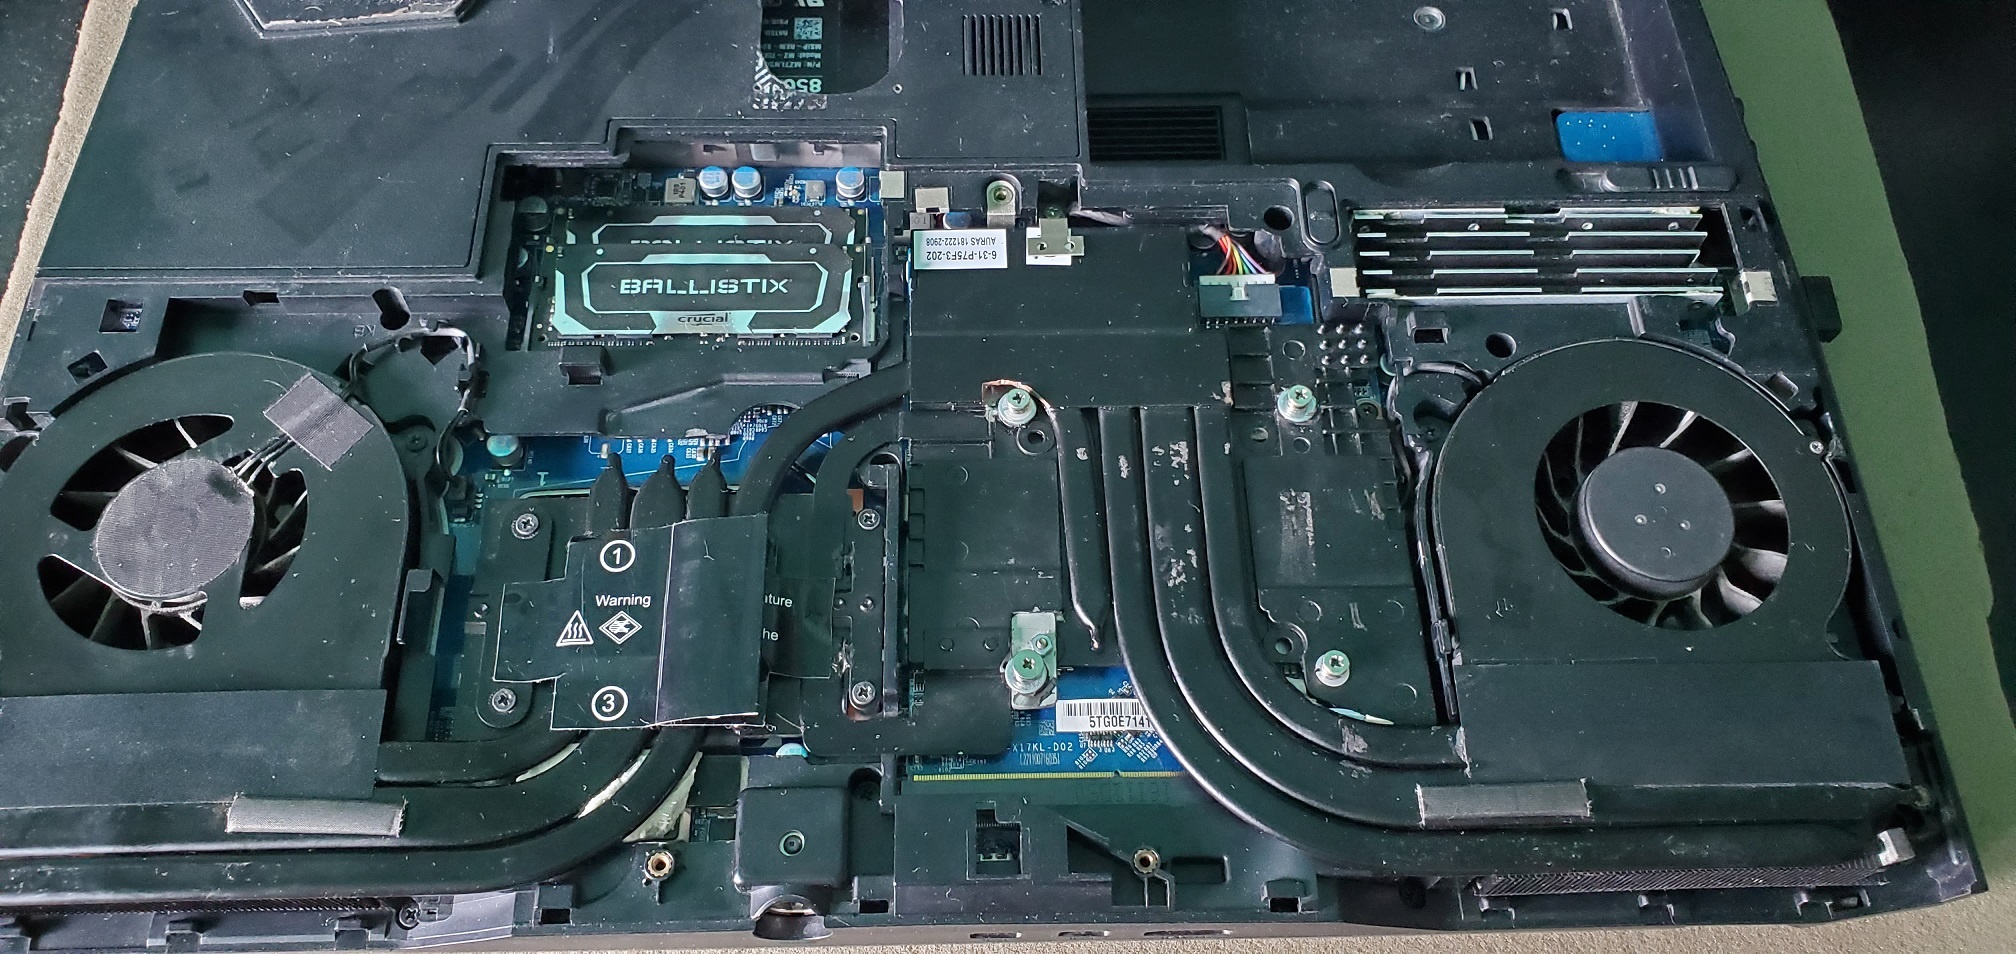
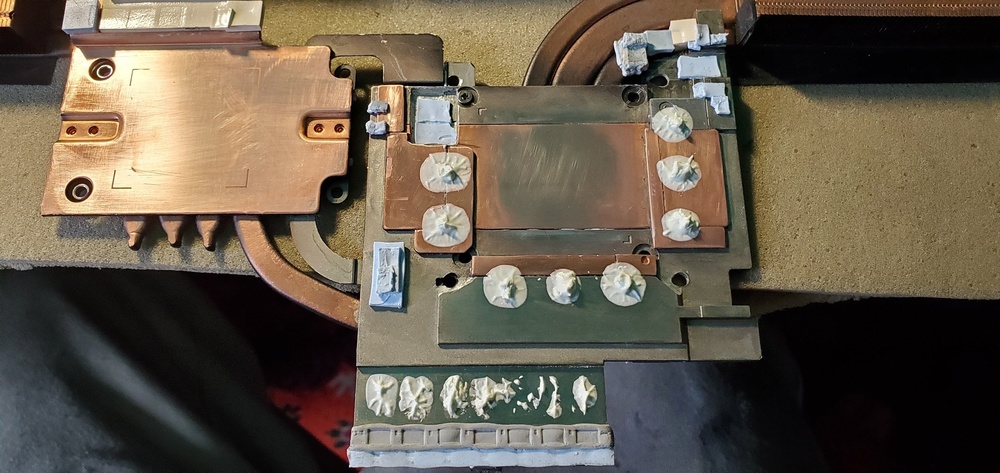
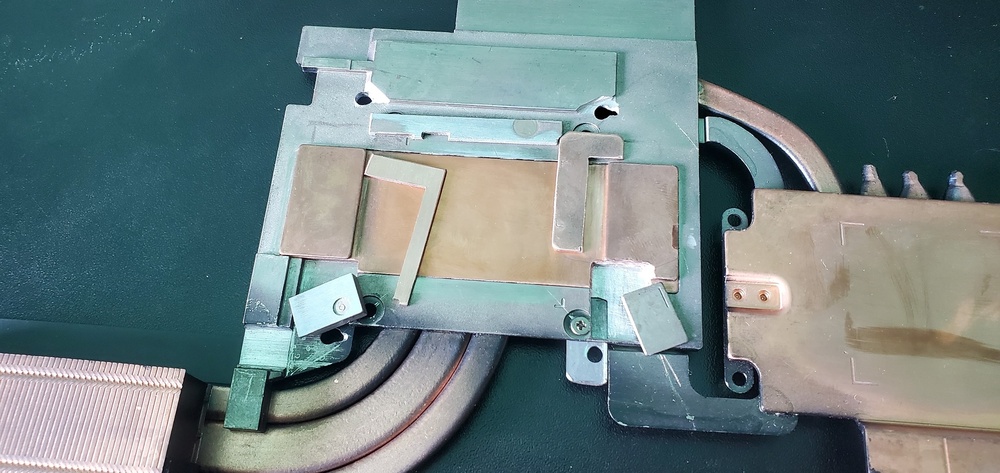
Hello community, Here is the long story short, again, the GPU upgrade story. Since beginning I went from GTX1060 to GTX1080 with the heatsink upgrade and lapping process, which helps temps a lot even with crap thermal paste. Now it was time for the final GPU upgrade, initially thought for RTX2080 but eventually got the RTX3080 as it's almost the top possible upgrade (maybe with GA102 chip replacement but it's way too expensive already). For the BIOS I had taken some of Dsanke RTX version and updated the subsystem ID to match the x170km for proper driver install and realtek audio driver (but still missing the soundblaster app, can't find it anywhere and my old hdd is still waiting for data extraction). And the heatsink, could not get at proper price the modded ones from taobao or that 1688 so I took the P751TM1 RTX version and the work began. First, drill the heatsink for the two 22 coils and third one marked these with blue, 3 holes for the screws (forgot about ~2mm core displacement) and added metal the 4th screw marked with red: Next is adding metal for memory displacement and some for VRMs: Next was the process of soldering, so I had some drops of SD-628T which is a must if soldering to this kind of aluminium heatsink: eventually had to replace top part with copper as aluminium did not want to solder at all. As of thermal pads, had to use thermal gum for top iductors and memory since the pads would be like 0.5mm thik and didn't had any of these: The screws and springs are custom, longer ones from other laptop model: The process took like 2 weeks of hard work and measurements, including lapping process. Temps keep good, ~45C in 22C room temp under normal load, as for high load, ~65C with ~120W on GPU and ~45W 8086K CPU. Maybe this overview helps anyone in case of upgrade to rtx30xx seriess. As it remains, a way to fool the driver for GSync (screen ROM edit and maybe other edits) but the 60HZ screen is not worth for now.


-
Hello community, Here is the long story short, again, the GPU upgrade story. Since beginning I went from GTX1060 to GTX1080 with the heatsink upgrade and lapping process, which helps temps a lot even with crap thermal paste. Now it was time for the final GPU upgrade, initially thought for RTX2080 but eventually got the RTX3080 as it's almost the top possible upgrade (maybe with GA102 chip replacement but it's way too expensive already). For the BIOS I had taken some of Dsanke RTX version and updated the subsystem ID to match the x170km for proper driver install and realtek audio driver (but still missing the soundblaster app, can't find it anywhere and my old hdd is still waiting for data extraction). And the heatsink, could not get at proper price the modded ones from taobao or that 1688 so I took the P751TM1 RTX version and the work began. First, drill the heatsink for the two 22 coils and third one marked these with blue, 3 holes for the screws (forgot about ~2mm core displacement) and added metal the 4th screw marked with red: Next is adding metal for memory displacement and some for VRMs: Next was the process of soldering, so I had some drops of SD-628T which is a must if soldering to this kind of aluminium heatsink: eventually had to replace top part with copper as aluminium did not want to solder at all. As of thermal pads, had to use thermal gum for top iductors and memory since the pads would be like 0.5mm thik and didn't had any of these: The screws and springs are custom, longer ones from other laptop model: The process took like 2 weeks of hard work and measurements, including lapping process. Temps keep good, ~45C in 22C room temp under normal load, as for high load, ~65C with ~120W on GPU and ~45W 8086K CPU. Maybe this overview helps anyone in case of upgrade to rtx30xx seriess. As it remains, a way to fool the driver for GSync (screen ROM edit and maybe other edits) but the 60HZ screen is not worth for now.