
win32asmguy
-
Posts
601 -
Joined
-
Last visited
-
Days Won
3
Content Type
Profiles
Forums
Events
Posts posted by win32asmguy
-
-
Personally I hope they would move back to the older 7560 heatsink design with fans on both sides, but switch to a unified vapor chamber with factory PTM7950, and fans that can be swapped without removing the heatsink. It could really, really use an additional 0.2 inches thickness for higher CFM fans and more cooling capability. If they want to compete with Ultrabook thickness that should be done on the 5690. Everything else should be performance, expansion and repairability oriented.
CAMM is already excellent with its ability to use SODIMMs at high MT/s with the interposer or capacity. They just need to get the price down with CAMM modules. If the connector is electrically superior we should also get a 32GB CAMM XMP 6800MT/s or such that is ahead of SODIMMs available. A bios option to set a minimum fan speed to a custom supplied value would be great.
I have heard that Nvidia will not be refreshing mobile Ada in 2024. Also 14th Gen HX seems to be a small boost over 13th Gen. So maybe CPU and GPU performance will be mostly the same for a while.
I think the display options are fine. I personally hate dealing with scaling and micromanaging switching between refresh rates when on battery so the FHD 60hz is perfect for me so long as it does not have PWM flicker. It also always seems like the FHD 60hz panel has the least issues working with Linux.
-
 2
2
-
 1
1
-
-
15 hours ago, Mr. Fox said:
OK I did this test using the latest driver 546.01 and found no meaningful difference in performance with my desktop 4090. If you are experiencing the same issue with 546.01 then maybe there is something different in the laptop drivers or something specific to the INF parameters the OEM specified for your specific laptop. I know Dell/Alienware used to make certain specifications for their laptops. Below are the results with MSI Afterburner Benchmark Utility for Quake II RTX. This was tested using W10 22H2 with Atlas OS mods.
I used this tool to clean install 546.01 on the Clevo X370 running Windows 10. The only thing to note is I had to select NV Platform Controllers in order for dynamic boost to work so power limits could go beyond the vbios default of 150W.
-
 3
3
-
 1
1
-
-
2 hours ago, electrosoft said:
I just returned my second Asus G18 (13980HX + 4080) a few days ago to Best Buy. I'll wait for the next wave of laptops to see if I'm going to snag one. My NH55 is holding it down for me right now along with being tinkering central.
Glad to hear the NH55 is still being enjoyed! The X370 has been alot of fun to tinker with Coreboot and an open source EC. It does not even need anything like the Clevo Control software which is the best part, as all of the configuration changes you would usually make in there are essentially applied in a custom EC + BIOS build.
-
 2
2
-
 2
2
-
-
4 hours ago, Sniffy said:
I didn't know System76 had done this with the X370. How does Coreboot + open source EC change things for you? Compared to say a other Clevo's with the Tuxedo software installed for fan control, etc? Sounds interesting.
It is both better and worse. Modifying the fan curve requires cloning their firmware repo, changing it to your preference and then building and flashing. It basically makes control software unneccesary.
They also have the Intel ME disabled which is an unusual but nice surprise.
-
 1
1
-
-
45 minutes ago, Rengsey R. H. Jr. said:
The screen is 18" 250hz, I believe it's QHD too. I do not know the model number.
Sounds like the same panel used in the Helios 18, which was made by AUO. Does Armory Crate allow disabling FALD (single/multi zone) on this panel as they do with the 16 inch variant?
-
On 9/26/2023 at 5:58 AM, jaybee83 said:
welp, one can dream...i like the way that OP it thinking. however, in the end, Clevo is now following the money trail, thin n light BGA crap FTW! 😢
It is disappointing that they do not have a modular GPU interconnect. Hopefully it is already in development and can be released next year. I have noticed that the BGA motherboards are much higher price than the old LGA + MXM models. For instance, X170KM motherboard is 420usd, but the NP50PNJ with 12700H and 3050 is 875usd.
Things are getting better on the software side though. We can get a Coreboot + open source EC supported Clevo X370 from System76 which is very flexible to tune and tweak with the right expertise and desire. It is the first 13th Gen laptop that I have seen that lets you configure every aspect of power limits and fan control.
-
19 minutes ago, nero519 said:
It was new from Dell's webpage (around 2300 usd total), bought in the US then transferred the warranty to my country, they said for my region the Alienware's stock was limited, this was their first replacement proposal.
My experience with the x15 was awful, so I'm happy with the upgrade.
It's a new build, currently in "Production"
Well that is a nice upgrade they gave you. I would say that config is more like 4500usd!
-
2 minutes ago, nero519 said:
Thanks for the info!
that's honestly more than expected by reading the thread, did you repaste? it seems to be that PTM7950 is the current best option, I'll get that one plus the IETS GT500 cooler, it should be a nice general improvement.
This is my first Precision, the replacement is for an Alienware x15 r2 (12900h, 3070 ti). my usage is mixed between working and gaming, I like the more professional look too.
I did get it with SODIMMs (32gb 5600) so it seems I won't have to buy the adapter, I'll look for the 64gb kit or alternatives, thanks for the tip!
Yes, repasted with PTM7950 on the CPU and GPU. It doesn't have any fan control compared to the Alienware, other than some of its performance modes have a different curve. However you do not have to deal with AWCC either which I consider a plus. I am surprised that they offered an exchange for an Alienware. Is it a new build or was it a refurbished model from the outlet? They do also have the new Precision 5680 there too, which may be a bit closer to what the Alienware x15 r2 was. I have no doubt next year it will be what becomes the XPS 16.
-
3 hours ago, nero519 said:
Hey, anyone with a 7780 equipped with a 13950hx or a 4090?
I'm being offered that as a replacement, but I can't find any info on how much power they can draw, I want to know how much performance I can expect (I've seen similar in this thread though), if someone has some cinebench r23 results or hwinfo cpu power consumption at full load, I would appreciate it. For the 4090 I would also like to know how much power it can draw, I've seen the Nvidia panel says 150w, but haven't seen benchmarks or hwinfo showing that sustain consumption yet.
Yes, here is the information I gathered from testing the 7780:
The CPU can draw up to 157W short term, and 85W long term. This results in about 30,000 in Cinebench from a cold boot, and sustained around 24,000.
The GPU can draw up to 145W but its going to only be around 135W-140W on average with Nvidia PCF managing power.
Intel IPF (similar to DTT/DPTF) can float the sustained CPU TDP between 30W and 85W. It can be disabled by blacklisting device ids or by using Throttlestop and locking MMIO limits. BDProcHot can also be triggered which can put the CPU and iGPU at very low clockspeeds for a period of time. It can be disabled via modding a UEFI hidden setup variable.
Unfortunately the dGPU performance can randomly be reduced at times. The best way to reduce this from happening is keeping the back raised in some fashion to help keep sustained temperatures lower. Also place the power supply somewhere it can dissipate heat easily. I use the 330W Alienware non-SFF brick at my desk as it stays much cooler than the 240W SFF brick.
All of the problems mentioned above aside, it is still a good upgrade to any previous generation. Oh, and if they ship it with SODIMMs you can use the 64GB Kingston Fury kit at 5200 CL42, and likely the 96GB kits work as well.
-
5 hours ago, Csupati said:
With TB4 they managed to bypass the PCH and other interconnection, its directly wired to the cpu.
Only on certain implementations like 45W H series 11th Gen and up, but not necessarily on any HX chips.
Also TB4 has increased latency due to PAM signal encoding so it was always feel slower than PCIe even at the same bandwidth.
-
8 hours ago, saturnotaku said:
The Legion 9i is now available for pre-order. $3799 for a 4080, 32 GB of RAM, and 1 TB SSD. The RTX 4090 is a $520 upgrade. According to one article I read, the laptop will come with both the standard 330W GaN charger as well as the 140W USB-C one so that's kind of nice, I guess.
Pretty expensive cost difference compared to the Legion Pro 7i Gen 8. I guess it would (likely) not have the keyboard flex area in the upper left side due to a more rigid build, but I worry about the palm rest temps being hot due to the flipped mobo design, or fans generating more noise at a given performance level as its thinner. It would be awesome if it randomly happened to have a USB-C wired to the iGPU. Of course they will not document such a thing in the PSREF so it has to be discovered by a user or eventual Jarrodtech review. I have already swapped the 2560x1600 panel on my Pro 7i for a superior (for me) 1920x1200 165hz panel. It would be a pain to have to do the same swap on the 9i...
-
 2
2
-
-
I am curious, do you use a KVM at your home desk to be able to easily switch between your desktop and laptop?
The A16 looks like a nice inexpensive replacement to complement your desktop. Its great that it has the iGPU video output, definitely an upgrade over the Legion Pro 7i. The WUXGA 165hz display is great. I am already using that panel in my Legion Pro 7i to boost battery life and allow use of 100% scaling. I would want the 7940HS over the 7735HS as its a bit closer to the 13900HX performance level. Although I do not even see that model for sale by Asus in the US yet, and the higher pricing puts it more into the territory of the Framework 16..
-
2 hours ago, yslalan said:
I have replaced the heatsink assembly, but nothing improved.
Also check Throttlestop limit reasons while under load to see if its BD Prochot causing the throttling. I had that going on (especially on combined loads) where it would randomly drop the CPU down to 30W despite temperatures being 70C and GPU drawing around 80W and DPTF/IPF/DTT disabled. BD Prochot is 0x7a in CpuSetup if end up needing to disable it.
-
19 hours ago, yslalan said:
Of course, just enable the overclocking option using grub.
I have made that change but the new "Dynamic Overclocking Undervolt Protection" (CpuSetup offset 0x381) remains enabled so changes made via Throttlestop were not being applied. I am running the latest bios which has microcode version 115. If you apply an undervolt, then read the undervolt value from a different app like Hwinfo64, does it still show the offset as active, as it did on the 7670?
-
On 8/3/2023 at 10:32 PM, yslalan said:
With CPU voltage offset(-0.125v):
Wait a second, did you get undervolting working on 13th Gen Precision?
-
On 7/21/2023 at 3:05 AM, presence said:
Fresh owner of a 7780, i9 13950 and RTX3500. Opted for 17" due to hopefully a larger/better cooling system.
CPU idles at around 55-60C (ambient 25C), but the CPU temperatures jump around like crazy, +20..30C in 0,5 seconds when given small workloads with Solidworks (rotating, manipulating assemblies). +100C is guaranteed every day.
I have already replaced the factory TIM with conductonaut, but I don't see much improvement (on my last Precision 7740, it immediately silenced the fans and dropped temperature about 10C).
Regarding the twitchy temperatures, perhaps the CPU is not making very good contact with the cooler, since conductonaut layer is very thin? Perhaps I should try PTM7950/7958? Or is the 20-30C temperature peaking normal?
I hope Throttlestop is available very soon...
Welcome to the owners lounge / NBT! I agree that the 17 inch is better for cooling than the 16 inch. Both heatpipes are the larger width and it has a set of exhaust fins directly over the GPU for DOO. With the 7740 it has more exhaust fins so its still superior, but the design team likes thin bezels more than cool temperatures so that is what we get now.
I have tested the latest bios and it still cannot unlock undervolting. These chips also boost very high on both single and multi core loads so repaste isn't going to reduce temperatures other than with the sustained long term, default 85W power draw. Even then you have to disable Intel IPF to get consistent performance, and also may need to disable BD Prochot as it can cause throttling to still occur even with good core temperatures.
With LM you may need to take it back apart after a few days and reapply if some has soaked into the heatsink, as these are not nickel plated like the AW18 and other systems with factory LM. You can also double-check if any of the thermal pads are obstructing contact pressure by not sitting squarely in their place on the heatsink.
I need to order more PTM7950 as it is the best non-LM TIM. Although the 145W 4090 in these can do very well even with stock paste:
-
9 minutes ago, Reciever said:
Excellent work, how is the fitment looking so far with the bezel?
Not bad. It is sitting pretty squarely in the a-cover. It does have a bit of light bleed in the bottom left and right corners after putting the bezel back on completely. One of the slimmer edges wasn't sticking quite as well as I had scraped most of the glue off at that spot to start prying on it.
-
 2
2
-
-
-
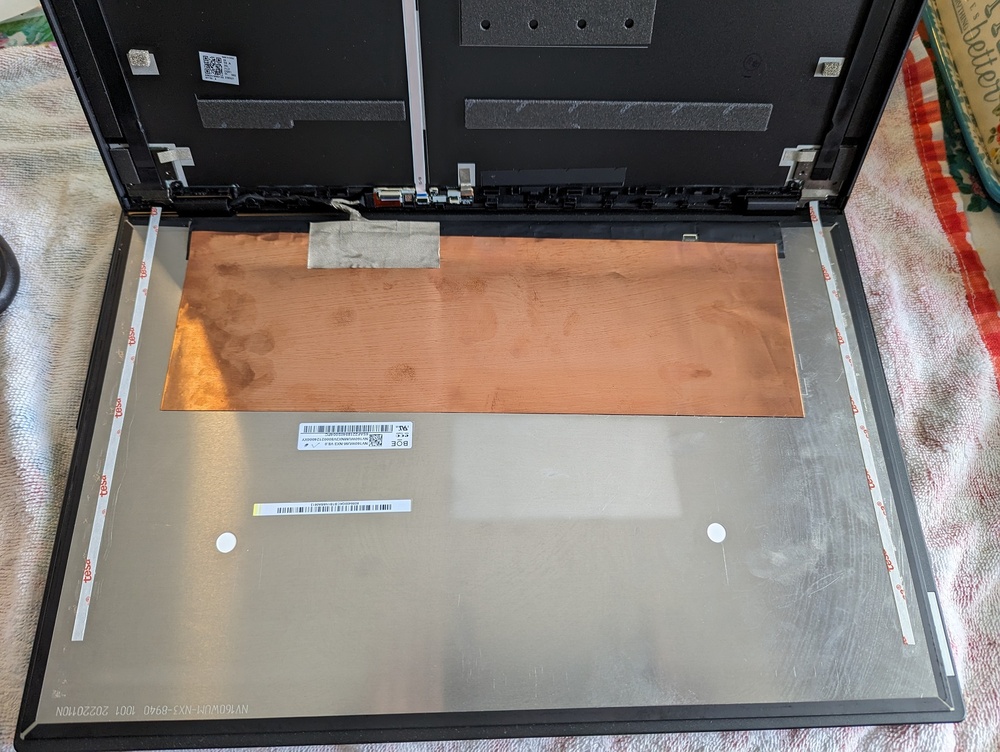
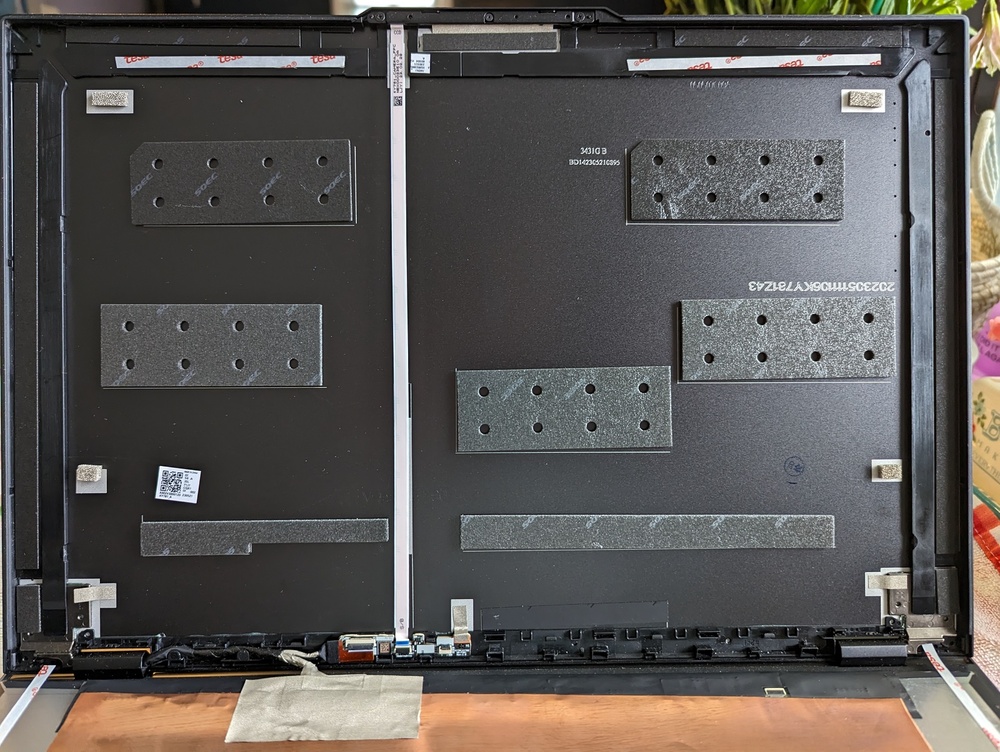
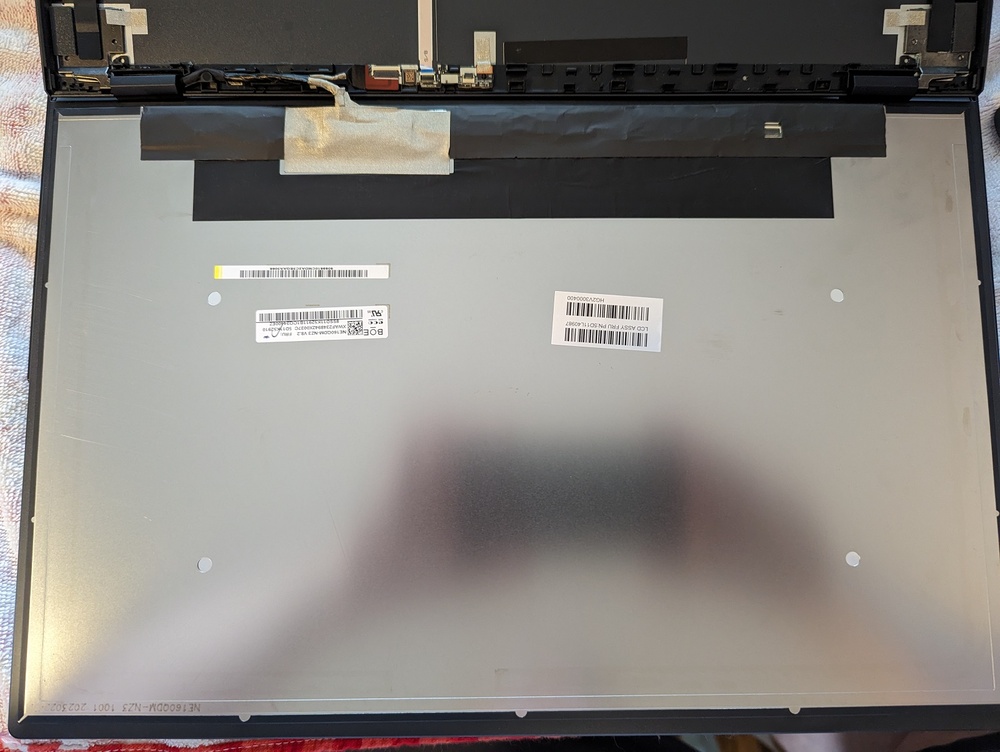
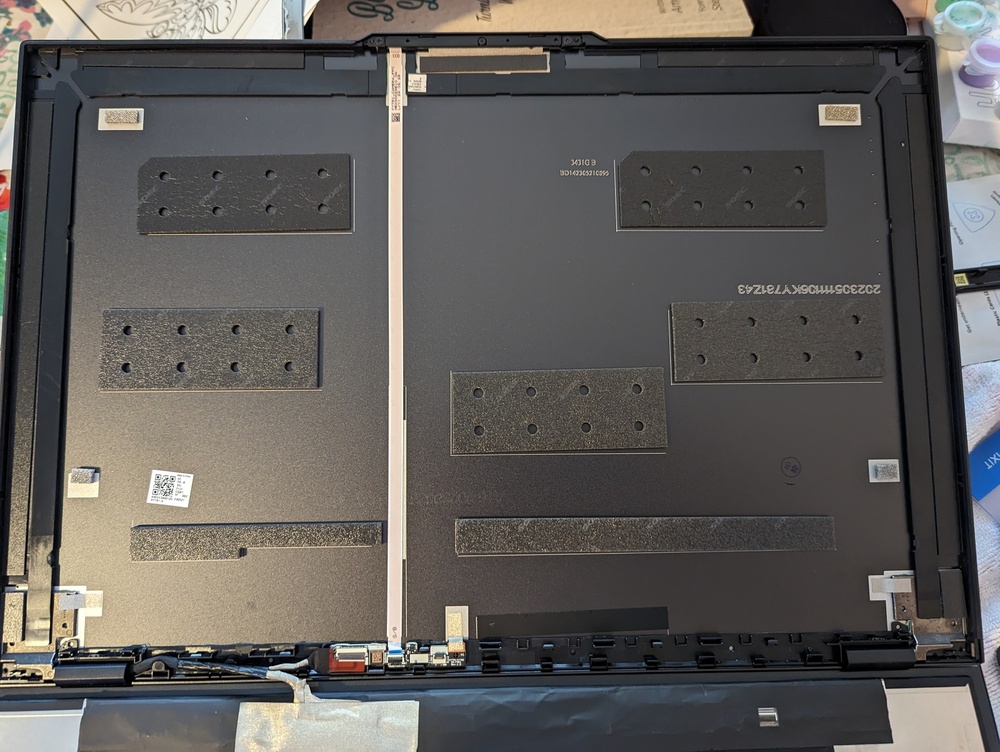
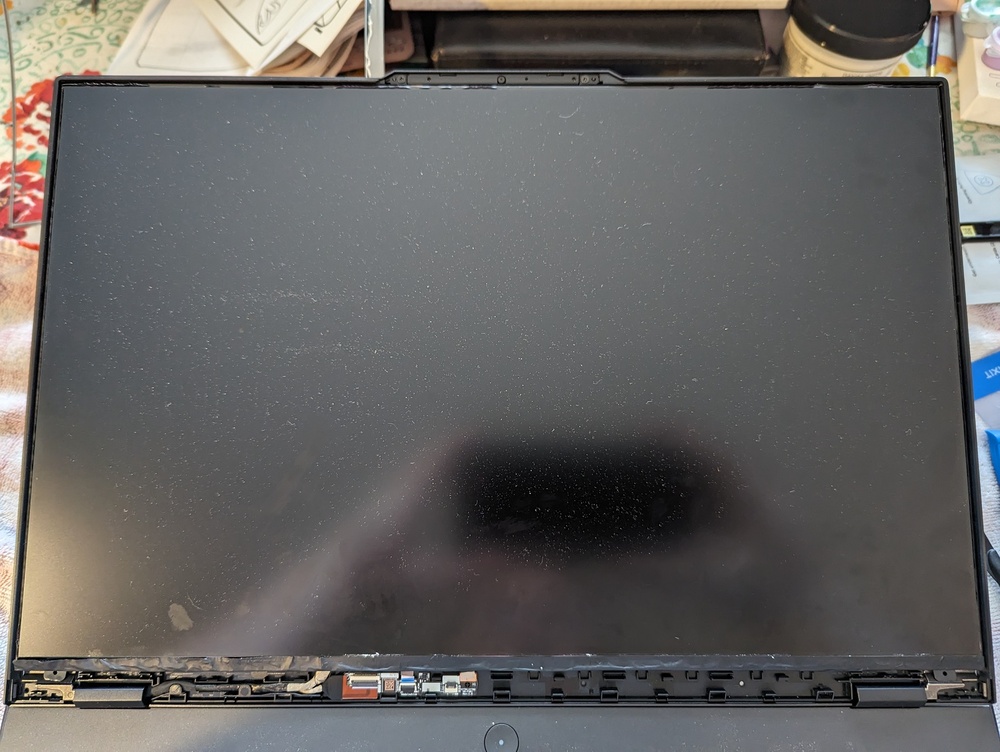
Recently I decided to attempt a display swap for the Legion Pro 7. My intention is that the standard WQXGA panel while nice for applications that support display scaling, is not really useable for me at 100% display scaling. Even worse under Linux where using Nvidia with Xorg does not fully support GPU scaling. Some other systems do offer lower resolutions but either have poor cooling solutions, high pitched fan noise, or are not available with the 13900HX or 4090.
My target panel was a BOE NV160WUM-NX3 V8.0 which is a 16 inch WUXGA, 165hz, 100% sRGB, 500nit panel which was used in the base model Asus M16 2022. Unfortunately no GSync support for this panel. It does have the same 40 pin connection, with the same connector location and pin pitch. Also electrically its backlight uses the same voltage range so the brightness steps used for the stock panel work as expected.
For the swap, the initial step is to remove the plastic display bezel. The back of the bezel is completely covered in adhesive tape. I used the iFixit Halbard Spudger to work the bottom center free enough to begin slowly pulling the rest of the bezel away while continuing to use the spudger to separate the adhesive as needed.
After the bezel is removed, the next part is the metal hinge cover. I used the blue iFixit Opening Tool, starting at the right edge. I was trying to use the tool to pull on the hinge cover while not pushing/leveraging against the display circuitry as it can damage the pcb or even crack the display panel.
After the hinge cover is removed now the double-sided tape under the display must be pulled off. There are two small tabs at the bottom of the display that can be slowly pulled to release the tape.
After the tape is removed the display can be rotated out of the a-cover and rest on the keyboard to remove the display cable connector. There is just a piece of tape and then a metal latch securing the cable to the display pcb.
I still need to pick up some replacement tape to secure the new panel to the a-cover. I will use Tesa 61395, and because this tape is not an L shape I will have to put a horizontal piece of the that is not adhered to the panel so there will not be a gap between the panel and housing. The vertical strips of tape should be enough to hold it in place and be removable via the same method if I need to swap it back in the future.
The bezel should be reusable as most of the adhesive is intact and its shape seems to be correct. It is a $47 replacement part from Lenovo if you want to make it look like new.
Some other people in the Lenovo discord are also experimenting with WQUXGA (4k) panels and miniLED panels with some success.
-
 2
2
-
 1
1
-
-
1 hour ago, MogRules said:
Did you do anything special to format the drive? I followed your instructions but it just loaded to OS recovery.
The steps should be correct but maybe I missed something. Look at step 5 in this guide just in case.
-
 1
1
-
-
On 6/21/2023 at 2:22 AM, TheShowX said:
I have read how to do this and did it but it still states undervolt protection is on maybe i missed something?
Here is how I modify those settings:
- Get grubx64.efi from https://github.com/XDleader555/grub_setup_var/releases
- On a small USB thumbdrive, formatted FAT32, change its file name placing that file in a folder location of drive:\EFI\Boot\bootx64.efi
- In the bios, disable secure boot and enable overclocking
- Reboot, selecting the thumbdrive
- At the prompt, enter "setup_var CpuSetup 0x381" which should show a current value of 0x1 (undervolt protection enabled)
- Again, enter "setup_var CpuSetup 0x381 0x0" which should update the value and confirm the operation succeeded
- Ctrl-Alt-Delete, go back into Windows and now undervolting production should show disabled.
RU.efi also works but I have found it to randomly freeze or not actually apply changes so I prefer using the modified grub bootloader instead. It is also pretty easy to clone the github repo in linux and build it yourself if you are concerned about malware or such.
-
 1
1
-
You might also try the kernel params "iommu=soft" or "dis_ucode_ldr" to see either allows it to boot. I would be curious if the same problem happens with the Asus or Lenovo models using dragon range chips.
I was curious about Windows 10 just because sometimes compatibility is not gauranteed and it is what I would run if I had one. Luckily the m18 Intel model has full support for Windows 10 22H2. Last year I tested the Asus Strix Scar 17 with Intel 12th Gen HX and it did not fully support Windows 10 and was missing many critical drivers, for the USB controllers for instance. It also was not able to easily boot Linux on it either - the bios had some kind of arcane grub2 memory mapping issue.
-
The 7740 issue started occurring after the microcode update was pulled in with routine updates to the distribution.
In general you could try booting with "acpi_osi=! acpi_osi='Windows 2022'". Are you booting with the MUX set to hybrid or dedicated mode?
Also curious if you have tested Windows 10 on the AMD M18 R1 variant.
-
I tested cold / hot booting Fedora 38 (kernel 6.3.8, nvidia 530.41.03, xorg, bios 1.8.1) with battery power under 60%, no issues. I did have to set nvidia-drm.modeset=1 to get rid of a phantom display but that issue occurred regardless of being on battery or plugged in. I do have secure boot disabled and no battery charge limiter set.
I have had a similar issue with the Precision 7740 in the past (would not boot linux on battery). The issue was a bad Intel CPU microcode update bundled with Ubuntu at the time which had to be disabled via a kernel flag.

Is Apple finally taking gaming on macOS seriously?
in Other Manufacturers
Posted
Maybe your unit just needs to be repasted? I am not sure what thermal measurement capabilities exist for apple silicon, but if you can see high core to core deltas under sustained load it might be worth it to swap for another machine.
On another note I noticed witcher 3 now has apple silicon support. Nice to see more titles supported and it should help make comparing macos vs windows in games a little easier. Notebookcheck always uses that title in their reviews.