No0B
-
Posts
3 -
Joined
-
Last visited
No0B's Achievements
")


-
introduction Improve Your Laptop Speakers With Equalizer APO (Windows)
No0B replied to No0B's topic in Components & Upgrades
Thank you guys for your interest. It's my pleasure! 🙂 Hope you'll be able to get some more enjoyment out of your devices. I've updated the links in the first post to link to Dropbox, so now they should actually be direct links. Then you should be more than set! Generally, you can't really expect very good sound all-round from your laptop speakers anyway, so I've done the EQing by ear and lots of experience of listening to the same music tracks on all kinds of different equipment. For my settings, I first targeted a direct comparison with the mentioned MacBook Pro (by just having the two devices side by side) and then refined it to my taste. While knowing roll-off and crossover frequencies would make the job easier for you, you can just as easily find out by lowering the pre-amp stage in Equalizer APO lots (or any other EQ software), then simply dragging up one of the bands in the equalizer and slowly dragging it over to the lowest frequencies. While dragging, you'll hear the sound fade away because the speakers are likely just too small to reproduce the lower frequencies. You can find the roll-off point, and likely the crossover that way. Maybe don't do that at maximum volume and you should be fine. I couldn't find representative screenshots of the app's equalizer section, but if it only features a certain amount of bands at specified frequencies, you'll find Equalizer APO to be more flexible, because you can more precisely position the bands in the frequency range. But generally, running multiple EQs is something I'd avoid. 🙂 It's all digital processing, so there shouldn't be any quality loss (except for the equalizers stacking and overdriving more than intended), but I agree it's just needlessly throwing processing power at the problem. -
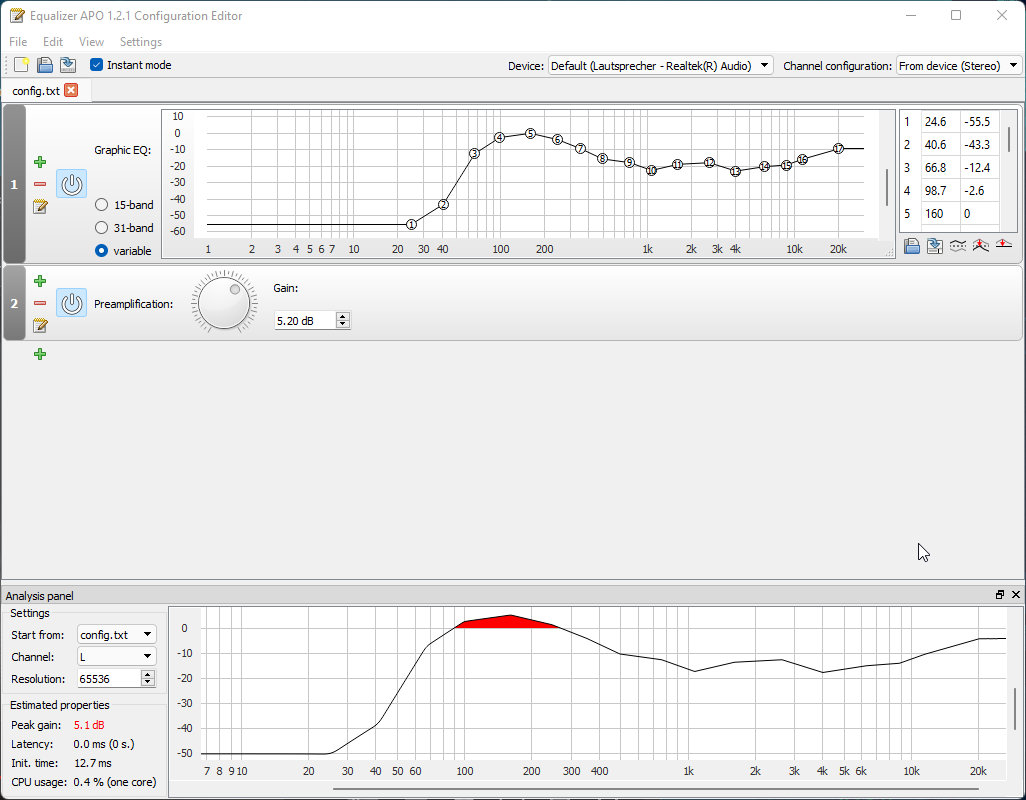
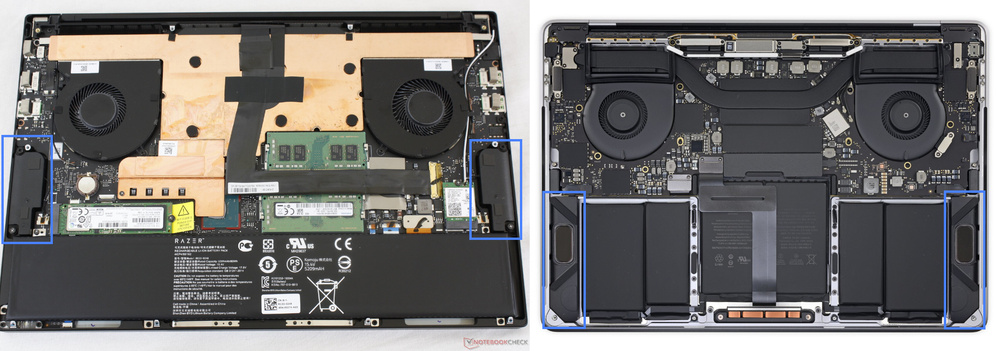
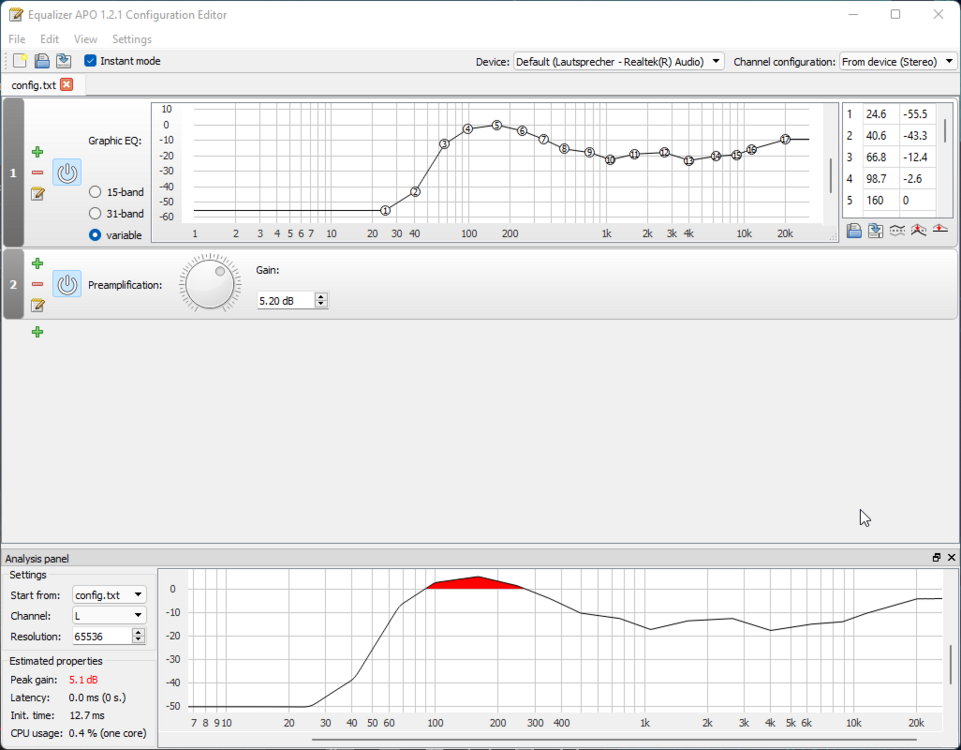
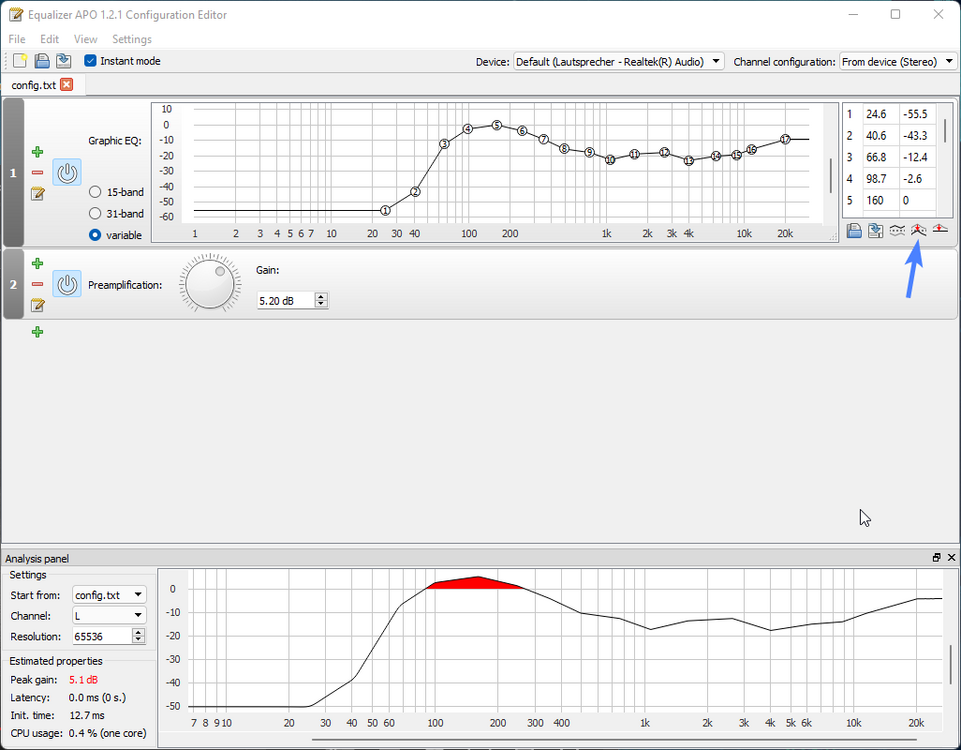
In the audiophile community equalizers are very prevalent to fix up flaws in the frequency response of ear/headphones and to a point remove the room as a variable in an audio setup, or simply to make the listening experience more enjoyable. For example, there are people with measuring rigs who measure all kinds of headphones and craft equalization profiles that model the device towards a target frequency curve. One such list is oratory1990's list of presets. You can potentially find your headphone(s) there and give it a try. Dave2D's recent video on the state of Windows laptop speakers in comparison to MacBooks prompted me to try to apply an equalizer to the speakers of my Windows laptop (a Late 2019 Razer Blade 15 Advanced) and try to get a MacBook-esque sound signature out of them. I compared to a 2018 MacBook Pro 15". The equalization profiles mentioned above can be accurately reproduced using Equalizer APO, a Windows software that allows you to apply sound effects to audio devices, meaning globally to all system sounds. This includes complex VST effects, but we'll focus on the equalization aspect, which is built-in. Download Equalizer APO here: https://sourceforge.net/projects/equalizerapo/ And you'll need a bit of time. Maybe an hour if you don't have experience EQing things. 1. Expectations Of course, we can't trick physics. So first of all, let's get our expectations straight. In any case, you're not going to get audiophile levels of sound from either the MacBook, or from your laptop. Take my Blade 15 and the MacBook for example. Let's compare the speaker assemblies. The MacBook not only has larger speaker assemblies, but also features passive radiators that help the speakers reach into lower frequencies than the Blade. While bass is far from everything that makes a good audio setup, it's one of the major factors that separates Windows laptops from MacBooks in terms of sound signature. Now, let's take a listen to the Razer Blade 15 and the MacBook Pro. Unfortunately I only have a mono microphone at the moment, so we can't compare the stereo image, but it gives us an idea of the frequency response. I placed a Rode NT-USB microphone precisely 30cm from the closest point of the speaker grills. When listening, keep in mind that this microphone doesn't have a perfectly flat frequency response, and your listening device will obviously also influence what you hear. But you'll get a rough idea for where we are and where we're headed. 2. Before I've selected some music tracks from various genres that I consider well recorded and have heard on tons of audio equipment, cheap and expensive, good and bad. The links should spawn an audio player in your browser, or at least download an AAC file immediately. Unfortunately, the 4.88MB total file size limit is not enough to share all the audio clips here via the forum. Bullmark - Tulip Waltz Cro-Magnon - Bowl Man Daft Punk - Get Lucky Hiatus Kaiyote - Breathing Underwater Justice - Genesis Sun Kil Moon - Heron Blue Squad War Sounds 3. Setting up Equalizer APO So, as you can hear from the example recordings, my Razer Blade 15 sounds very tinny compared to the MacBook Pro. While the lack of lower mid frequencies and below make vocals sound flat and distant, they sound passable, but that's the only thing it has going for it. The upper mid frequencies are somewhat exaggerated, resulting in an extremely shouty sound that may be workable, but not enjoyable. We can fix this using Equalizer APO. Download and install Equalizer APO from the link above. Allow it to create shortcuts in the start menu for convenience. After successfully installing, you'll be asked to select which audio devices you want to apply Equalizer APO to. My Razer Blade 15 has a Realtek audio chip and the respective driver, so I went with only the Realtek output device. Don't need an EQ on my microphone yet. You should be prompted to reboot the machine. After rebooting, Equalizer APO should be working in the background already. Find the Configuration Editor in the start menu and run it. You'll be greeted by the main window where you'll create your own custom equalizer profile. You can download my configuration file here as a starting point: config.txt This is the setup I ultimately came up with. The +/- buttons allow you to add and delete filters from the chain, you can reorder filters by dragging them by the currently grey areas with the numbers. As you can see, all changes to the volumes of each frequency are summarized in the graph at the bottom of the window. By default, this line is flat at 0dB, and all your shenanigans playing with the equalizer are reflected in it. Before you touch anything, I'd recommend turning the preamplification stage way down. Like -20dB or -30dB. Since the frequency response with tinny sounding speakers usually drops heavily around the 300-400Hz range (as was the case with my Razer Blade 15), you'll need to raise the lower frequencies considerably. Depending on the amplifier in your laptop, you can easily overdrive your speakers with this, and that can break stuff! You see, I've raised the bass frequencies more than 20dB in my case. The speakers in my laptop wouldn't have liked that without the preamp stage turned down beforehand. For the same reason I've lowered the very low bass frequencies into oblivion, so that the speakers don't even attempt to reproduce them. The speakers in my Razer Blade 15 seem to really roll off at around 120Hz. So anything below 60Hz is absolutely out of the question, and frankly I think that's too much to ask of such small speakers anyway. Now, get some music you like (ideally that's also well-recorded) and start tweaking! Generally speaking, you'll likely want to create a large hump in the bass frequency region, around 80-250Hz to get your speakers to sound fuller, then tweak the high frequencies to add a little bit of sparkle for the very high frequency noises, and lastly focus on the mid frequencies around 500-4000Hz. My Razer Blade 15 had a very shouty sound to it initially, which I calmed down a little by reducing the volume around 4000Hz. Depending on your laptop, this might be around 3000Hz, which is typically a range that's considered annoying. I've also reduced the volume around 1000Hz to model that part of the sound a little closer to the MacBook Pro, which sounds very relaxed and warm. After my adjustments I noticed that, obviously, while my laptop sounded way better, it was much quieter. So I've clicked the Normalize response button in the Graphic EQ to set the graph's highest point to 0dB. This will probably make your laptop incredibly quiet. So now is the time to raise the preamp to a comfortable level. As you can see in the screenshot above, the Analysis panel shows that I'm in the red. Basically, anything above 0dB will be distorted, because it's squished against the 0dB wall when the audio hardware in your laptop interprets the signal. I personally can't make out any distortion, despite a 5dB overdrive. I did it to raise the rest of the frequencies a little higher so that my laptop gets louder when I need it to. Again, keep in mind that lots of overdrive can cause trouble, or at least reduced sound quality. But that highly depends on the hardware. Usually, an audio compressor would be used to bring the volume of quieter and louder sounds closer together. As far as I've seen, Equalizer APO doesn't feature a built-in compressor, so this would need to be handled by a VST plugin, and those are usually a little CPU-heavy, so I left it out. 4. The result Again, let's hear the previously mentioned tracks, now with the equalizer tweaks on the Windows laptop. Bullmark - Tulip Waltz Cro-Magnon - Bowl Man Daft Punk - Get Lucky Hiatus Kaiyote - Breathing Underwater Justice - Genesis Sun Kil Moon - Heron Blue Squad War Sounds 5. Verdict Much better, isn't it? The tiny speakers in the Razer Blade 15 don't reach as low as the ones in the MacBook Pro, but they certainly can keep up. Of course, this is still nothing compared to a decent pair of speakers or headphones, but it'll be enough in a pinch! Of course, tweaking your laptop speakers like this comes with some drawbacks: It requires an Equalizer APO process running in the background. According to its own reporting, my configuration is very lightweight, utilizing around 0.5% of one CPU core With this small CPU load and your laptop's speakers being driven harder, battery life will shorten slightly It applies to the whole Windows audio device. If you plug in headphones, usually they'll be considered as the same Windows audio device, and you'll get your crazy EQ settings in your headphones. Realtek's driver has a setting that can split speakers and headphone outputs into separate devices, which somewhat alleviates this drawback, but makes audio setup more of a chore when you have some special needs or external audio hardware Your laptop will vibrate if the speakers within can reach low enough with decent volume, like 200Hz and lower. MacBooks do it, too, but it's just something to keep in mind Equalizer APO is Windows-only software. To do something similar in Linux, have a look at PulseEffects if your distro uses PulseAudio
-
Posting Images to the forum - Feedback Thread!
No0B replied to Reciever's topic in Internal Announcement Discussion
Invision seems to support WebP compression. I don't know whether that also applies to user-uploaded images, but if so, maybe that would be a good compromise between quality/legibility and filesize. WebP is supported quite widely in modern browsers.