
Jerryzago
-
Posts
192 -
Joined
-
Last visited
Recent Profile Visitors
3,176 profile views


Jerryzago's Achievements
")


-
Is this the incorrect 980m card for my M17xR4?
Jerryzago replied to JJ90's topic in Alienware 17 and M17x
For the M18x R2 I could remove the plate, because the fan was underneath and kept cool those memory chips. I believe the M17x has the same design. The fan is below the GPU and has a hole to blow through. For the 8 Beeps, there is a custom Bios for the M17x R4 that also unlocks the advanced menu. If you don't want to mess with this, you must set your laptop to full UEFI mode in Bios. First set UEFI boot and then install the GPU. If it boots, just install OS again and custom drivers. If it still gives you 8 Beeps, then probably you have the g-sync model. VBios is not to important. I had success with dell, clevo and HP Vbios and GPU booted just fine. -
This is an insulating tape. Most heatsinks have copper for the core. The core has some electronic parts around it that they might come in contact with the copper heatsink and short or even destroy the GPU itself. Leave it as is. For the record 980m used to have problems with the vrms, not the GPU core.
-
Is this the incorrect 980m card for my M17xR4?
Jerryzago replied to JJ90's topic in Alienware 17 and M17x
This heatsink comes from clevo laptops. You can unscrew the four screws and uncover the xbracket. I used this one for my RTX3000 for my AW17 R1. Needed some trimming to make it work. I doubt if it can work inside the M17x R4. You will have to remove it. -
Does these black chips require thermal pads? GTX980M
Jerryzago replied to Sebastian Ramirez's topic in Alienware 18 and M18x
When I had mine, Yes I had thermal pads on them. -
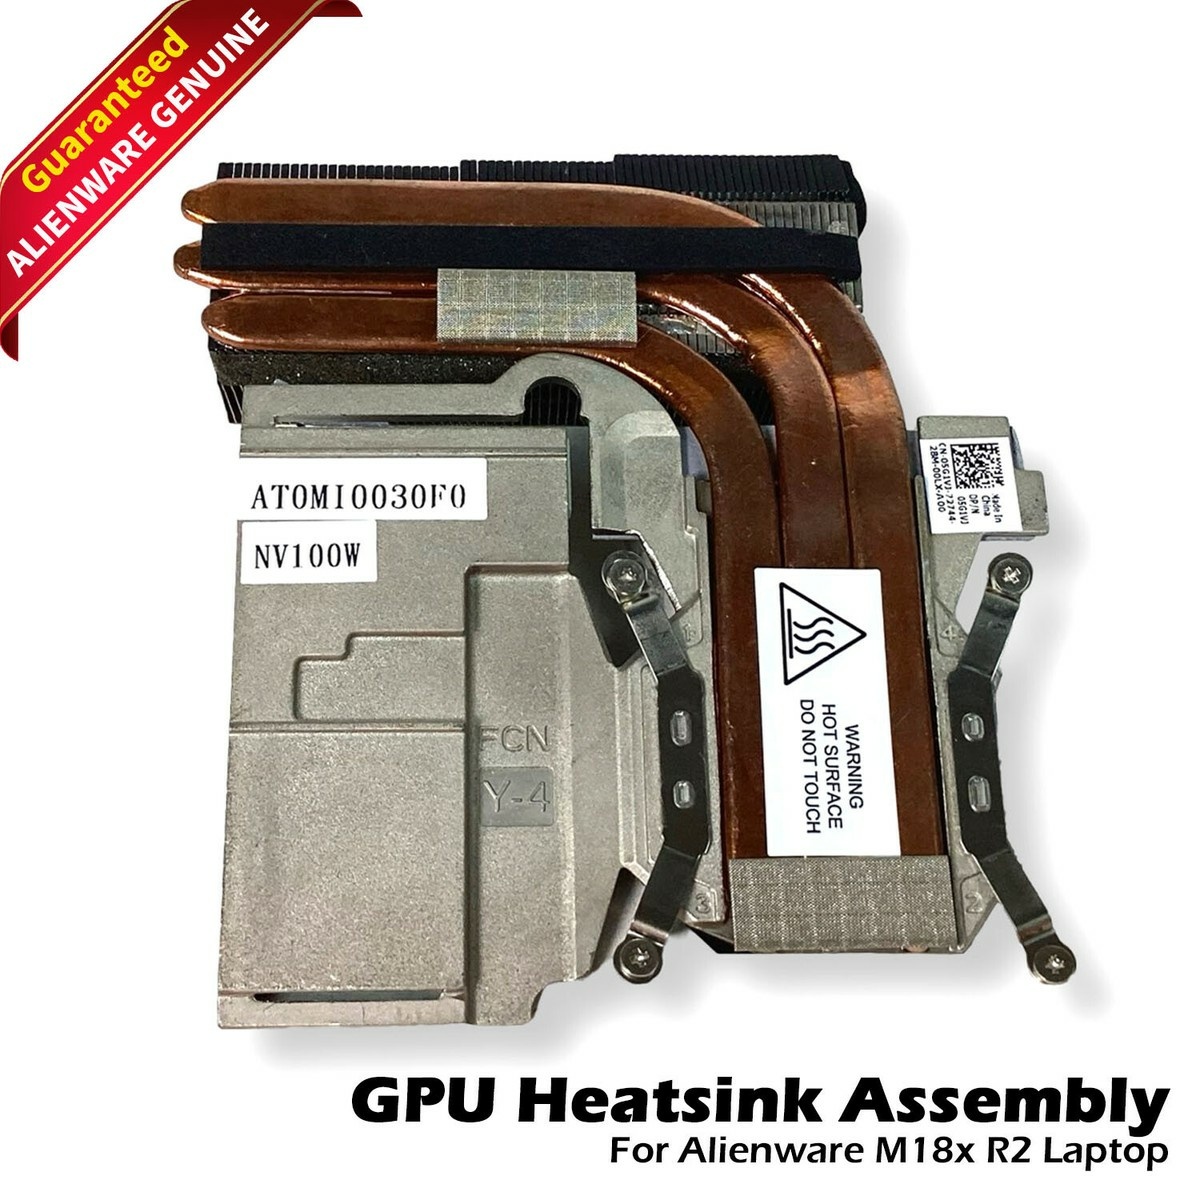
I can assume by your experience, the GPU hits it's thermal limit and shuts of. It stops sending power to the core, leaving you with the internal GPU, thus you have 0 degrees showing at HWinfo. Meaning the GPU is absent from the system. I am not sure, but since you had a 980m, the heatsink is the 100watt one?
-
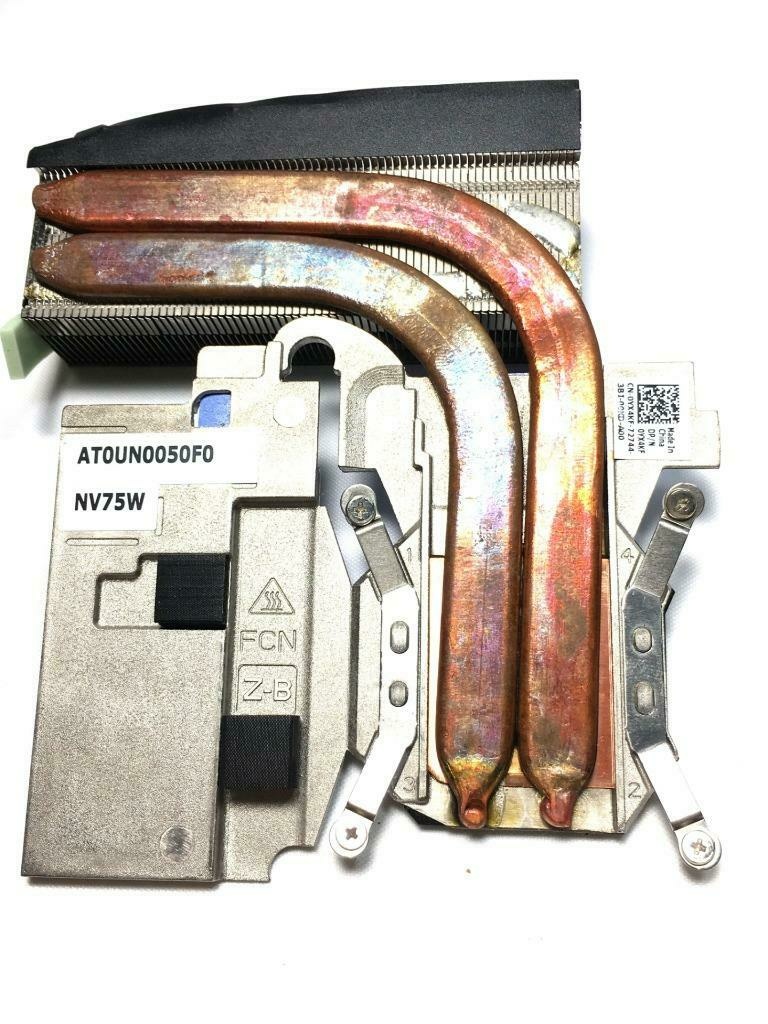
Look at the photos below. One if for 75watt GPUs and the other is for 100watt GPUs. I believe the 980m needs the three heatpipe one. I had my R2 with dual 980m with the amd variants


-
Does NV75W OEM heatsink work well with an GTX980M
Jerryzago replied to Sebastian Ramirez's topic in Alienware 18 and M18x
I believe those 75watt heatsinks have 2 heatpipes and 100watt equivalents have 3 heatpipes. So maybe they will fit the GPU, but cooling will be a problem -
Very nice upgrade. I believe MX-4 is an outdated thermal paste. I have an RTX3000 and with MX-4 and PK-3 temps were a problem. I switched to PTM 7950. Now the gpu tops at 75 degress with the hotspot getting to 84. I have an AW 17 so it uses the stock fun curve.
-
New MXM cards finally work in EDP only laptops
Jerryzago replied to sliderfra's topic in Alienware 18 and M18x
I have mine for almost a year. I had to change the screen cable and saw the two connectors at the board. My screen is LVDS. -
Can you share a photo of the heatsink? 4060 is an MXM-A right? Heatsink is the stock AW 17 R4 one? Is it custom made ?
-
Yeah, AW 18 seems to not work with my settings.
-
I have a post in the custom builts section with a gallery of BIOS settings. I have the unlocked A14+ and the Video Settings are set to iGFX. Both GPUs are visible in windows and no throttling. Power draw tops out at 80watts for me.
-
Mine is a PNY RTX3000 and doesn't throttle in my Alienware 17.
-
Finally the new RTX MXM cards will work in our laptops!
Jerryzago replied to SuperMG's topic in Components & Upgrades
I am tempted to replace the screen and cable to my AW 17 with the 120hz one and the edp cable......I will make the RTX 3000 work in PEG mode then! -
M18x R2 with MSI 970m 6gb, not installing newest drivers.
Jerryzago replied to Signex's topic in Alienware 18 and M18x
Yes. Nvcleanstall is our friend since we mainly have not supported GPUs in our systems. I think natively, the 970m was supported for the AW 18, not the M18x R2