
DoenerBoy123
-
Posts
36 -
Joined
-
Last visited
Content Type
Profiles
Forums
Events
Everything posted by DoenerBoy123
-
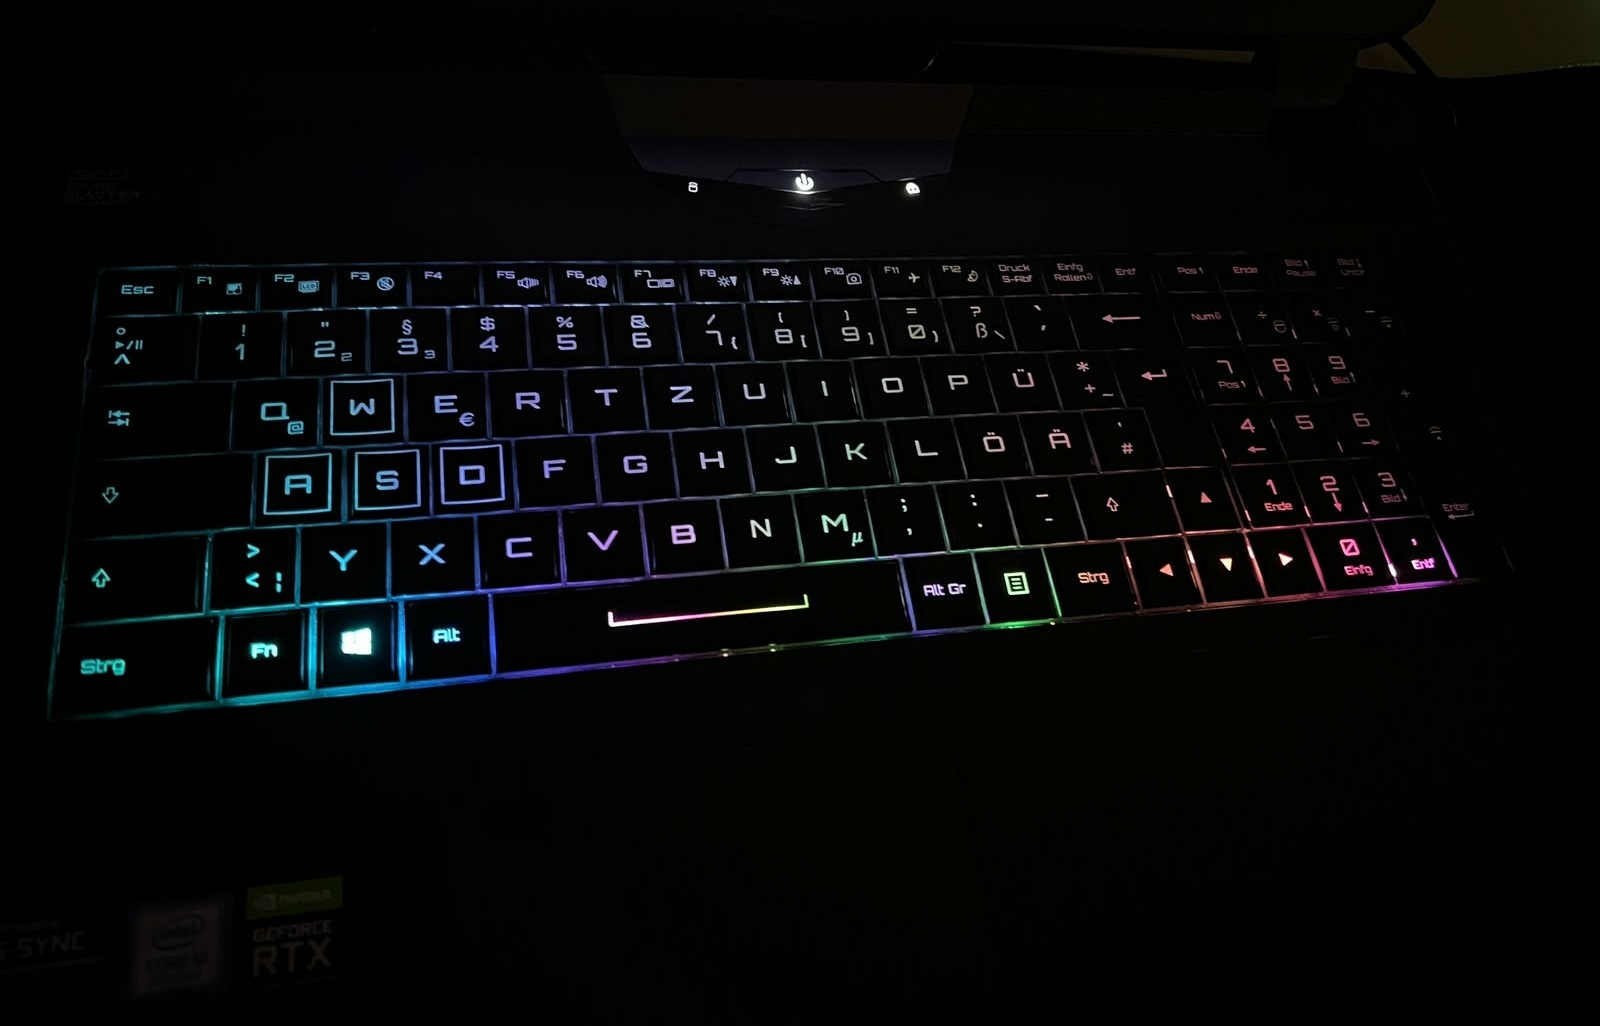
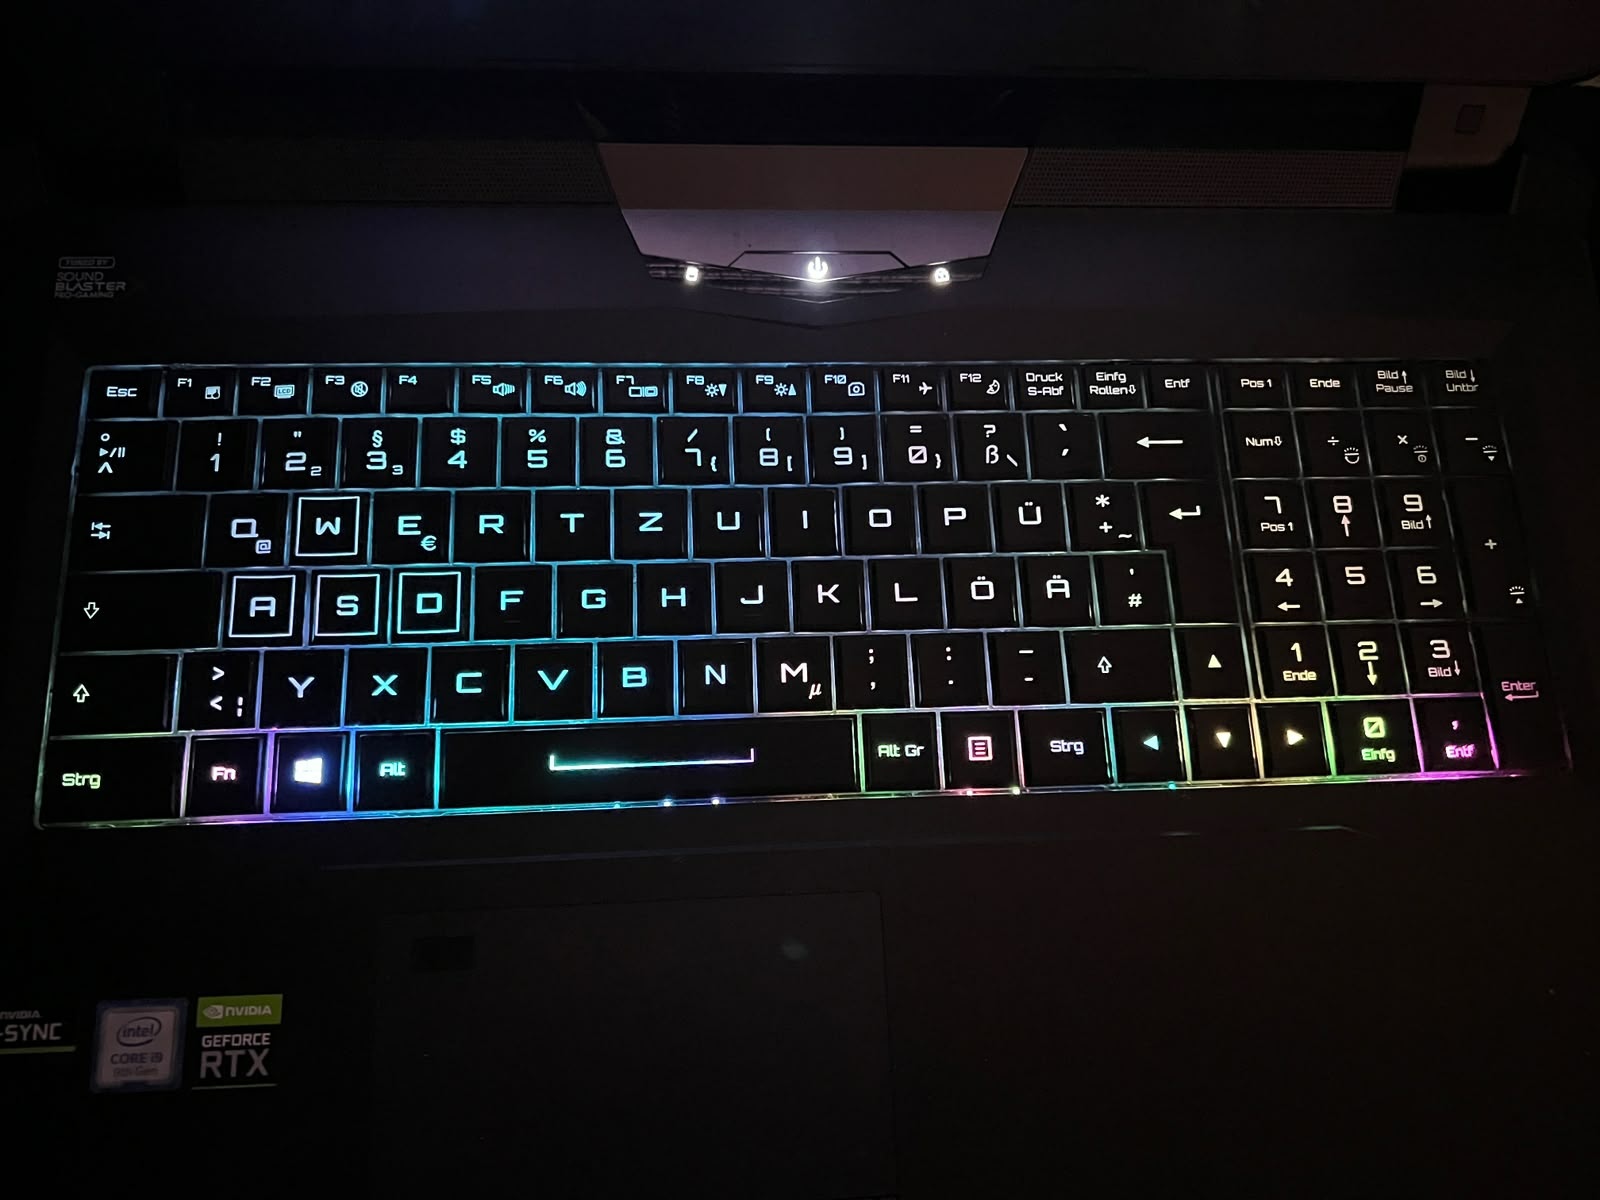
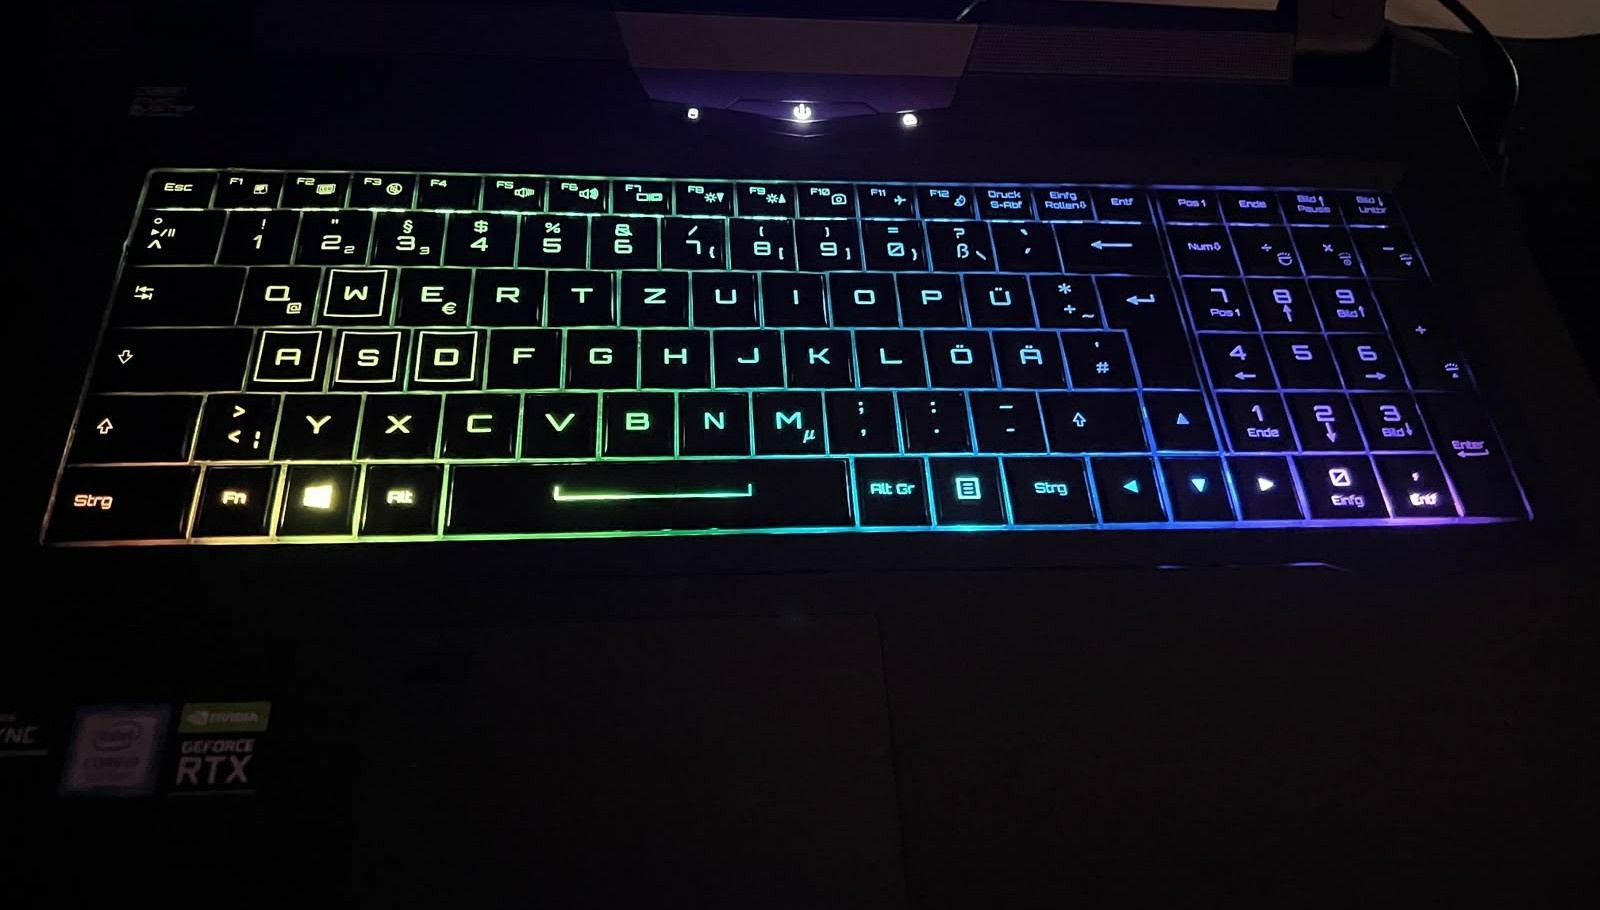
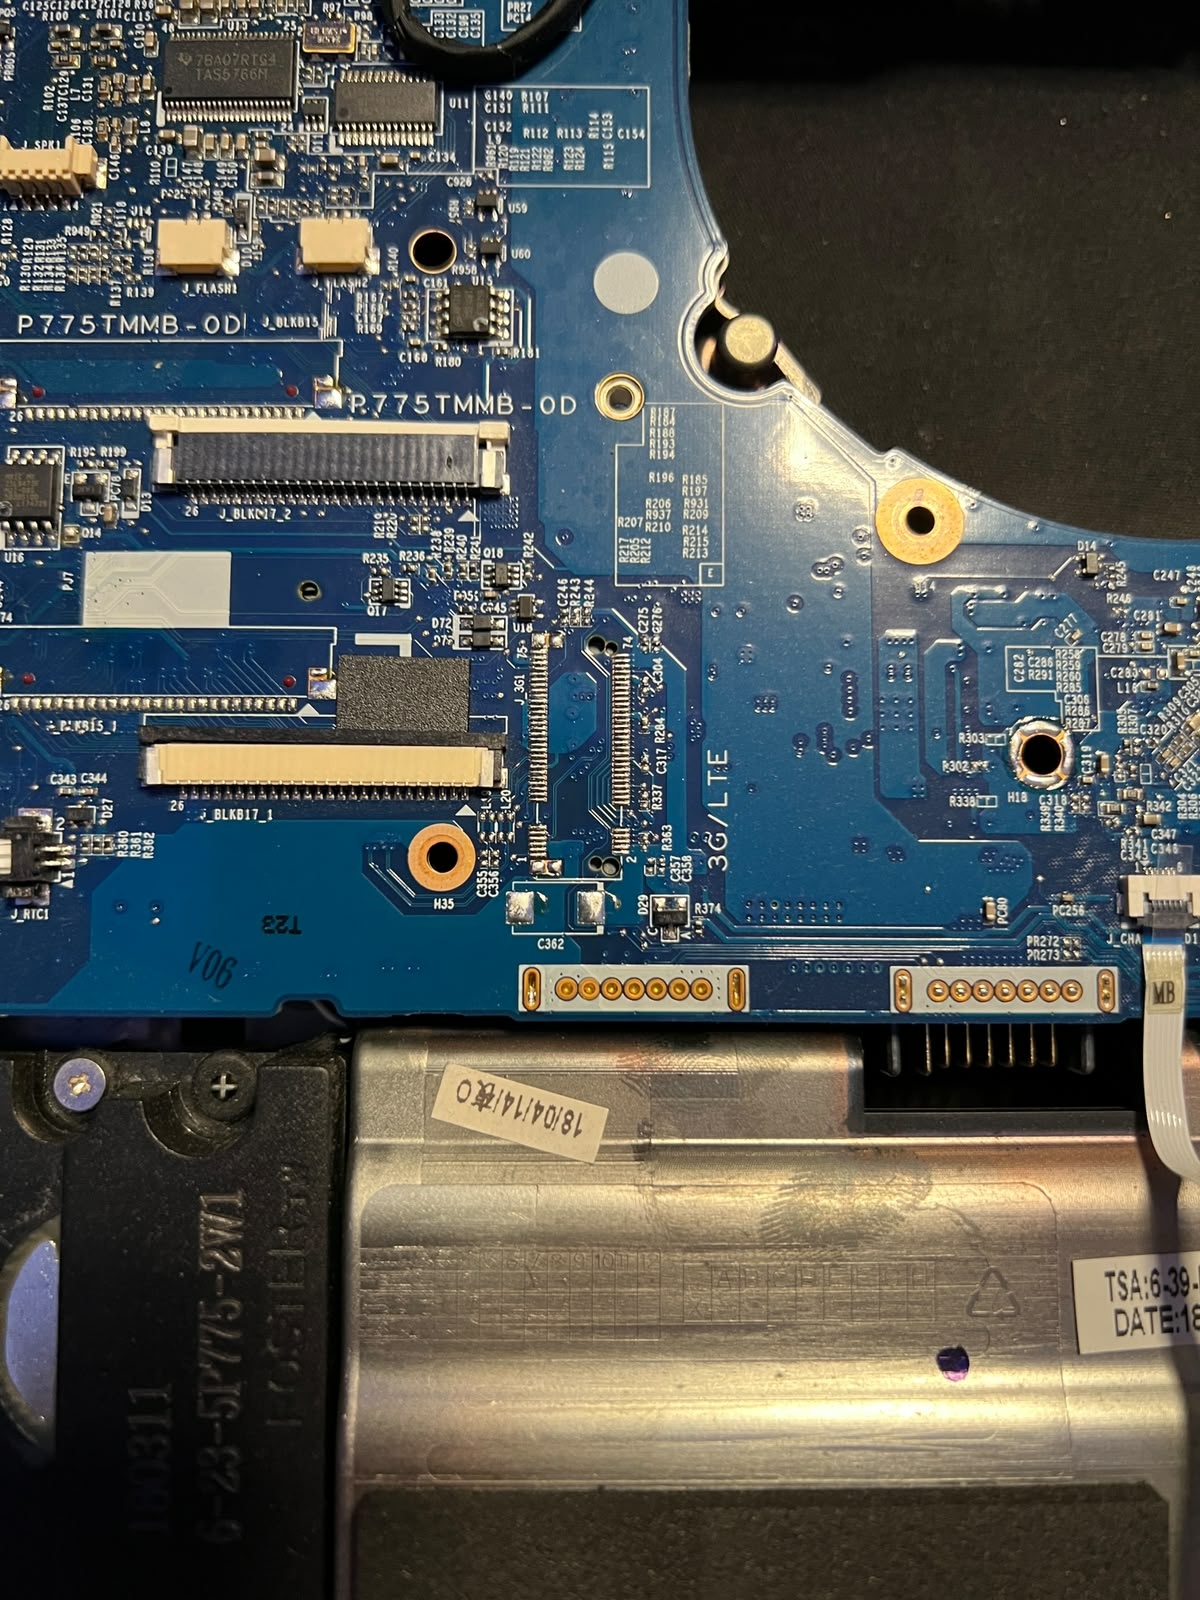
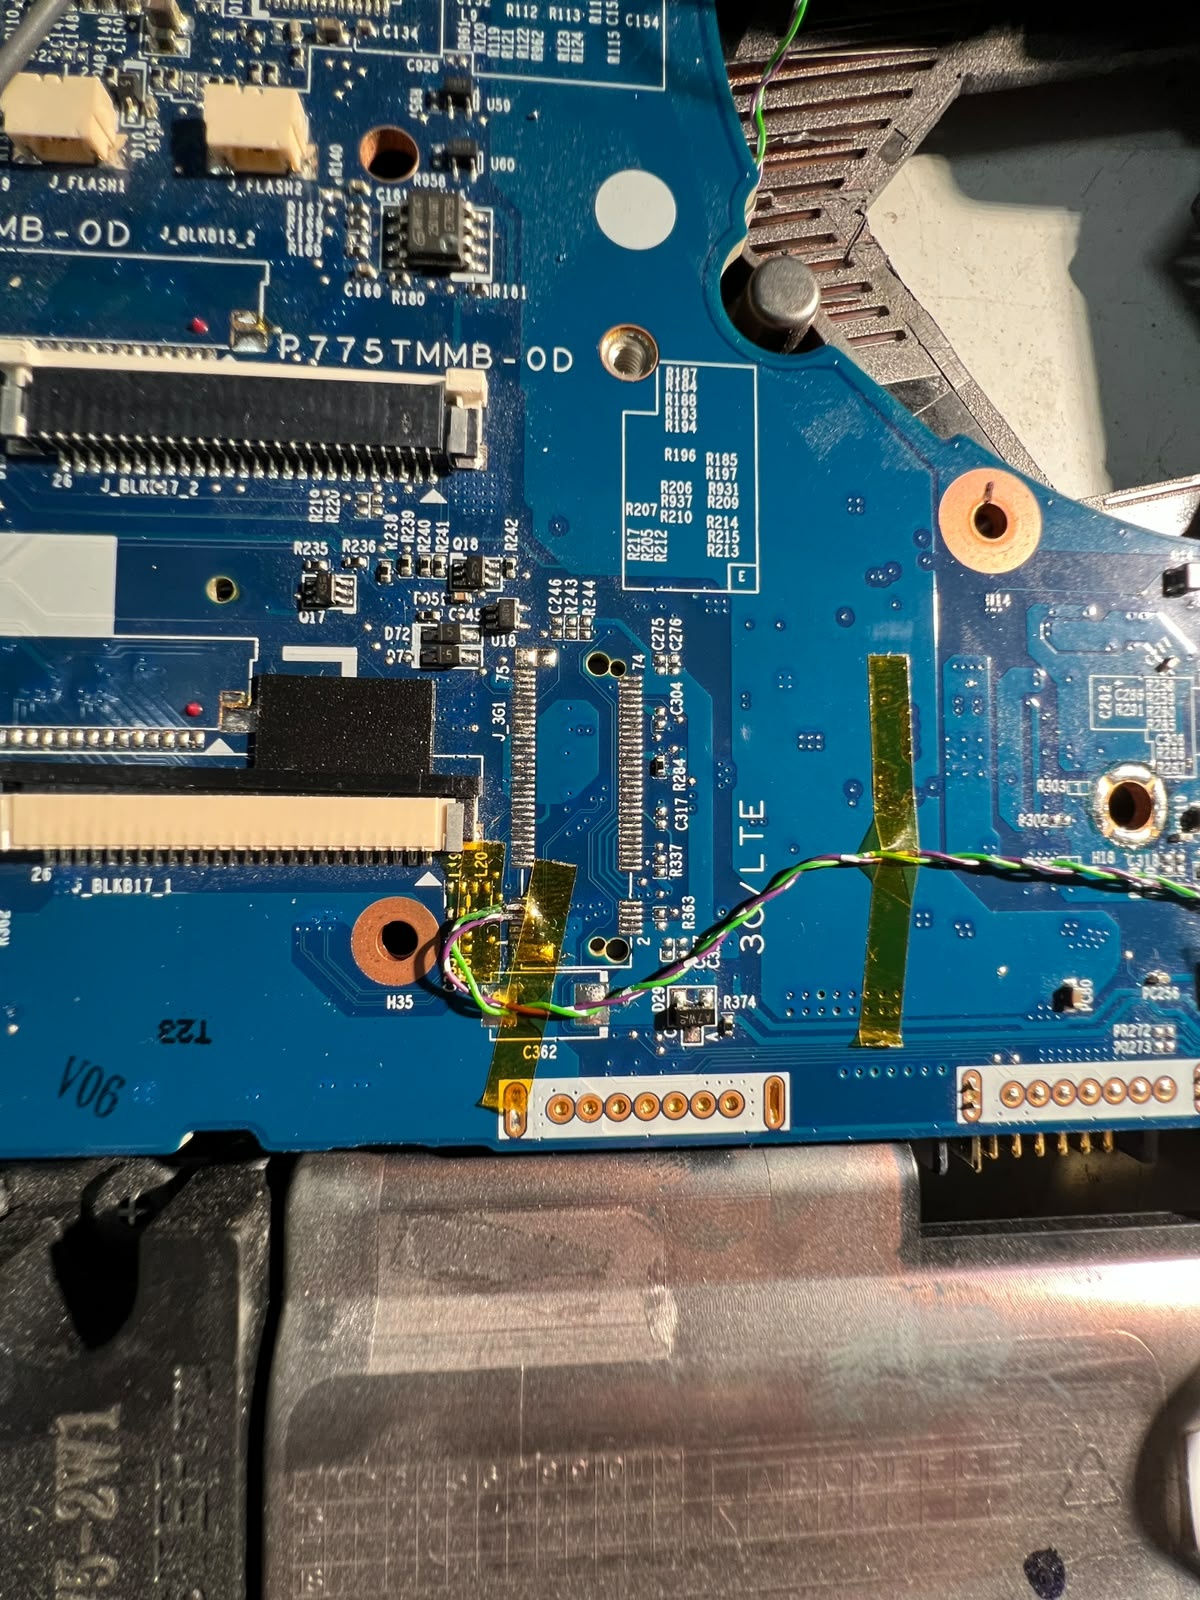
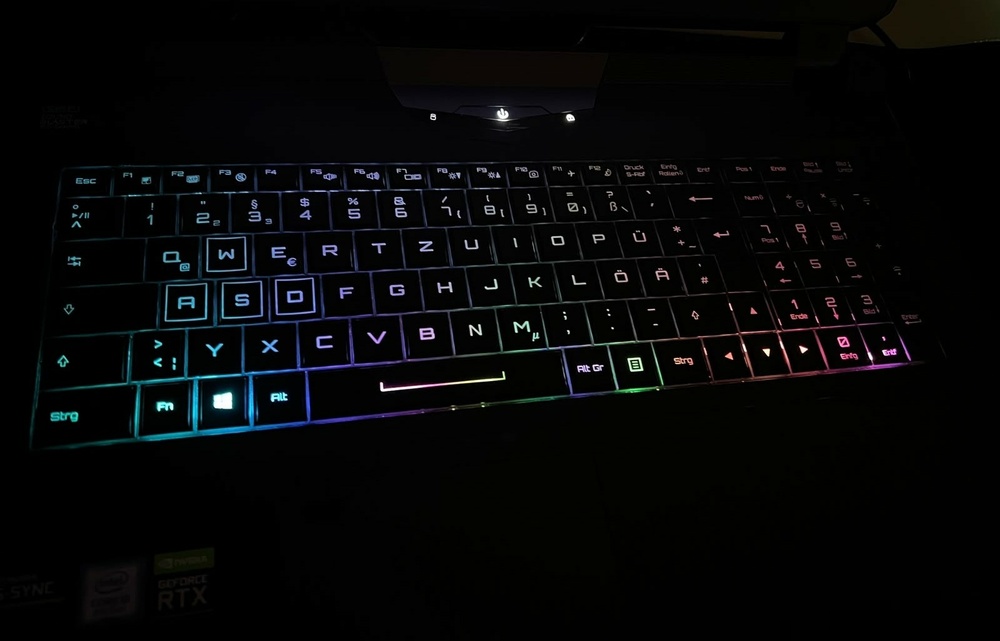
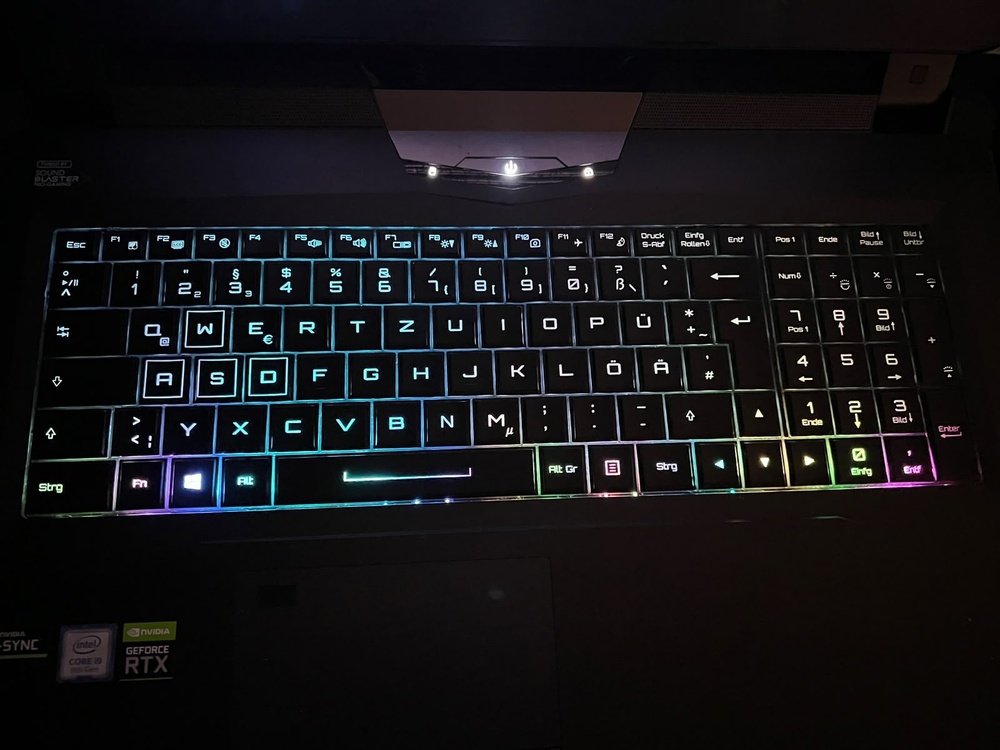
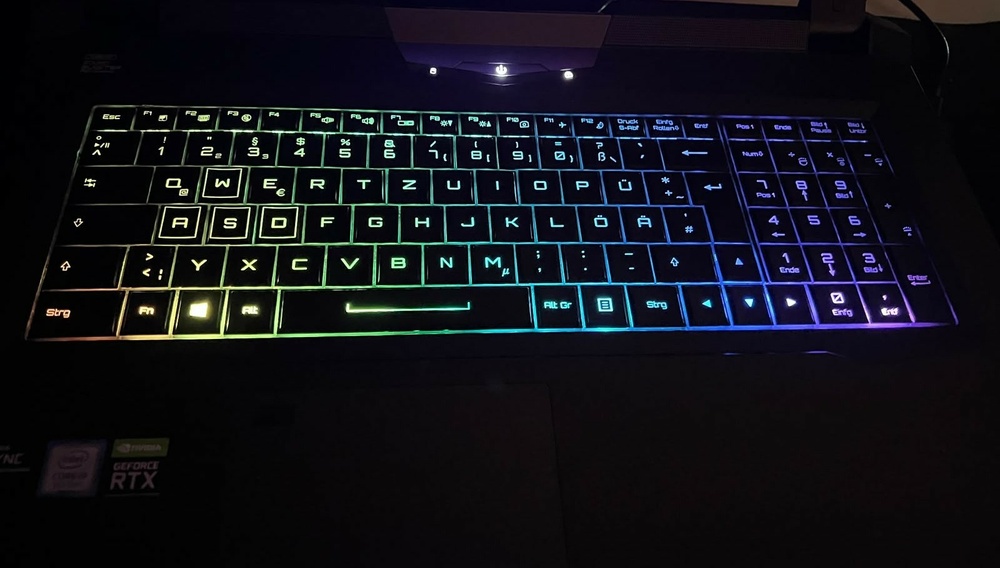
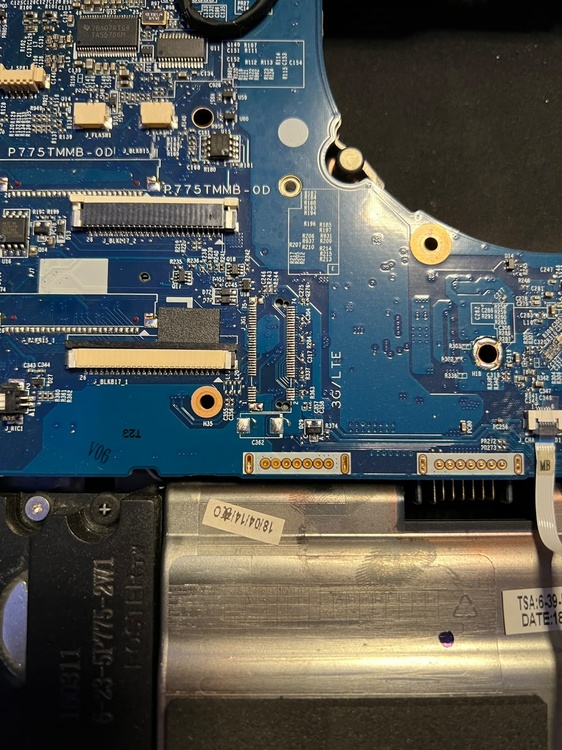
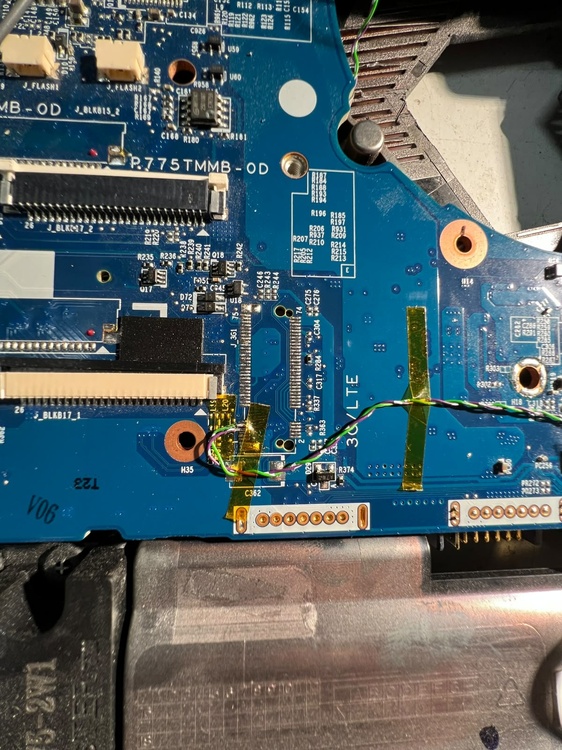
 I did some testing, and I can confirm that the USB lanes of the unpopulated LTE port (J_3G1, the B-key M.2 footprint labeled "3G/LTE" on the mainboard) are active and can be used for pretty much anything USB-related. I hooked up the ARGB controller to the USB lanes, and it worked right away with no issues. The pins you need are: Pin 7: USB D+ Pin 9: USB D− Pins 3, 5 and 11: GND(dont use them for power GND, just for reference) The pins are located in the short section of the footprint (pins 1–11), on the odd-numbered row. To reach them, you have to remove the palm rest. Heads-up: there are two small screws hidden under the heatsink, so the heatsink has to come off first. I left those two screws out, as they don't add much to the stability, and it makes removing the palm rest much easier for future mods. I used twisted cable pairs from an LVDS/eDP cable, as they're super small and high quality. I took the 5V from the SATA daughterboard. There's an unpopulated pad for a capacitor that is directly connected to 5V, which can be used easily for 5V and GND. For me the next step is to install a small USB hub PCB inside that will be connected to those USB lanes, as I want to add another controller for more lighting zones (underglow). I also experimented with M.2 USB controllers, but I couldn't get them to work. And now let's get to the keyboard mod, as this might be the most useful part of this thread. It's a well-known problem that the keyboard backlight burns out over time. I don't know why, but I think either the LEDs are driven too hard or they're low-quality parts. Mine died too, and green was the only color that still kinda worked. Blue was completely burned out, and red wasn't that bright anymore either. I thought about buying a replacement keyboard, but that would have been just a temporary fix for this problem. So I took the keyboard out and disassembled the backlight. I had some super small ARGB strips lying around, which came from those car LED strips you can press into the gaps of doors and dashboards. The strip has 34 individual LEDs, which translates to roughly that many zones, a big improvement compared to the original 4 zones. Like most LEDs, these fire straight up and not at an angle, but it turns out that's not a big deal here. I installed the strip with the LEDs facing up toward the keyboard, right at the diffuser. They don't fire into the diffuser at an angle like the original LEDs did. You can see it, as the lower part of the keyboard is slightly brighter, but it's barely noticeable. It's a PITA to put the keyboard backlight back together with these LEDs, as the lower part is slightly thicker than before, but once it's installed, you can call it a day. As mentioned above, the controller is connected to SATA power and USB internally, which makes the mod super clean from the outside. The controller currently sits next to the internal M.2 port under the audio board, but it will be moved to a different part of the chassis, as there's plenty of room. I'm not done yet, and there's room for optimization, but for now I think this is a good and lasting solution to this annoying problem. A huge benefit is that you can now control the keyboard via SignalRGB or OpenRGB. This gives you much more flexibility and much better effects (I'm mostly using screen ambience). I also want to go further and install the same LEDs facing down toward the desk and shining out of the exhausts. My main laptop used to be an Alienware M18x, and I miss its lighting, which is why I want to take this further lol (Forgot to make pics of 5V supply pins and the controller position. will add them when i have the laptop apart again)
-
Okay so I might found something promising. The service manual mentions a 3G/LTE port that also carries one usb 2.0 port. The pads of the slot seem to be present, but just left unused as this laptop never had an option for using WWAN network cards. To reach the usb pins I have to fully disassemble the laptop. I will give it a try the next days and report back whether those pins are actually working or not. If successful, I also gonna write a follow up regarding the keyboard ARGB mod as it might be quite useful for lots of people here, especially for those with dead keyboard backlights
-
Hello folks! I’m currently modding my Clevo’s keyboard. Like on lots of these machines, my keyboard backlight burned out, and I’m not in the mood at all to buy a new keyboard just because of that. So far, I’ve completely replaced the stock LED strip with an addressable one. It works as intended and is a huge upgrade over the stock LEDs, but it’s still far from perfect. I’m controlling the LEDs with a Nollie 1 controller, which works with either SignalRGB or OpenRGB, completely bypassing Clevo’s crappy software. The problem I’m facing now is finding an unused USB port to connect the controller to. I thought about using the webcam or fingerprint reader data lines, but I don’t want to lose any features for this mod. So, the big question: does anyone know of unused pads on the motherboard that I could connect the controller to? That would be awesome for this mod! I’ll post a follow-up once I’m done with it. Thanks!
-
@KnibenJust like you I had immediate shutdowns without any throttling or performance drops, just like if you would cut all power to the device. It always came out of nowhere without any noticeable signs
-
M18x R2 with MSI 970m 6gb, not installing newest drivers.
DoenerBoy123 replied to Signex's topic in Alienware 18 and M18x
Depends on which 1070 you'd like to use. The MSI one needs some cutting at the MXM slot and modifications on the heatsink. With the Zotac GTX 1070 im using you only need to modify the heatsink to make it fit. GPU fan control won't work with the Zotac cards which is why I added a switch to the laptop that forces the GPU fan to run at full speed. The 10xx series GPU don't have any kind of LVDS output, so you need an unlocked bios and have to set the graphics option to SG(switchable graphics) -
I was actually able to solve the issue. Turns out the thermal pads I’ve been using on the gpu VRMs where not thick enough. Now with the proper size I don’t experience these shutdowns anymore and it runs completely fine unter full load. I also improved the airflow by cutting off the plastic grilles above the fans and at the exhaust. The 9900K I’m using runs at 100W PL1 and 120W PL2 and the 2080 runs at 150W max. I you guys haven’t already, I would give it a try and replace those thermal pads. The chockes don’t necessarily need thermal pads, but make sure the FETs have proper contact, they’re much more important. Same goes for the CPU VRMs. I can test if this behavior occurs when using the stock 330W PSU to rule this out as another cause of this problem
-
I have the same shutdown problem with my P775TM1-G with RTX 2080, 9900K, custom heatsink and the 780W power supply. Installed is the Dsanke bios along EC image of xmg. I’m quite frustrated with this as I’ve never experienced something like that(In such cases it always was the PSU). Would be very nice if someone could help me with this
-
Okay, I was actually way to stupid to use Google. I updated the EC using a premade package ive found on XMG/SAGERs site. For the BIOS I've used the unlocked version from dsanke found on Github and flashed it using the uefishell and afuefi, even tho not recommended. BIOS: https://github.com/supermarsx/other-clevo-modded-bios (0729) EC: https://download.schenker-tech.de/package/xmg-ultra-17-xul17e19/ (NBC)
-
Hello, I just bought an older Clevo P775TM1-G along with a RTX 2080 mxm. Everything works fine exept that i have to use nvcleaninstall to install the drivers which is expected as the bios is from 2018 without turing support. Ive searched everywhere for a newer BIOS/EC version but couldnt find something/links are down(might also possible that I'm stupid) Could someone provide me the necessary files so that I can upgrade the BIOS? An unlocked BIOS would be nice too. Greetings!
-
Alienware 18 Screen Mods? is it possible EDP mod?
DoenerBoy123 replied to TruenoG7's topic in Alienware 18 and M18x
Can you post some picture of the mentioned board you’ve got? I’d really like to the way it’s supposed to be implemented. My way would be to just manually solder the eDP data channels and smBus lines directly to the MXM slot on the PCB. Another way might be to use the dell wireless display port next to the WiFi card(that weird long mPCIe port). The extra pins are for the video signal which is just eDP/HDMI. These signals do either come from the MXM slot or the PCH and are switched Via MUX. This might be the easiest entry point as you could just design a breakout board for the signals. Does anyone know if there are bios or EC limitations that would prevent this to work? -
Alienware 18 Screen Mods? is it possible EDP mod?
DoenerBoy123 replied to TruenoG7's topic in Alienware 18 and M18x
I’m actually planing on doing this along with connecting the dgpu straight to the mDP connector. In theory it should be possible by adding the eDP and smBus lanes to the mxm slot. Thing is, I don’t know if software modifications are necessary for this to work(bios). There’s also the problem that the DP signal is fragile af. Both wires of each lane needs to have the almost exact same length and impedance- 32 replies
-
- 2
-

-

-
- alienware 18 screen mod?
- screen
- (and 8 more)
-
Interesting, thought this wasn't a thing anymore since often cards have different vBios versions for different amounts of memory. Are there any sources for how to place the resistors for specific memory sizes like for a 980M or 1070M(ex. the MSI version)
-
Would be interesting to know what part of the vBios needs to be modded in order to use that amount of memory. Id really like to try something like that on an old GTX 980
-
I had the same Issue and also tried that, but this does not seem to fix this(at least in my case). As I mentioned above, you first have to refresh the bios chip with a dump of whatever version. This makes the usb backflash working again which is what your machine brings back to life. I had to desolder the bios chip in order to be recognised by the CH341A programmer, probably because the 3.3V rail draws too much current. My theory is that this Intel HD memory setting bricks the Intel ME portion of the rom which is absolutely necessary for the machine to run. This would explain why the USB backflash method does not work in this case as the ME is responsible for the usb flashing process(as far as I know) @simon h Depending on where you live and if you are willing to, you can sent me your board and I can try to revive it the way it worked for me. Just PM me
-
GeForce GTX 980M voltage regulator mod
DoenerBoy123 replied to DoenerBoy123's topic in Components & Upgrades
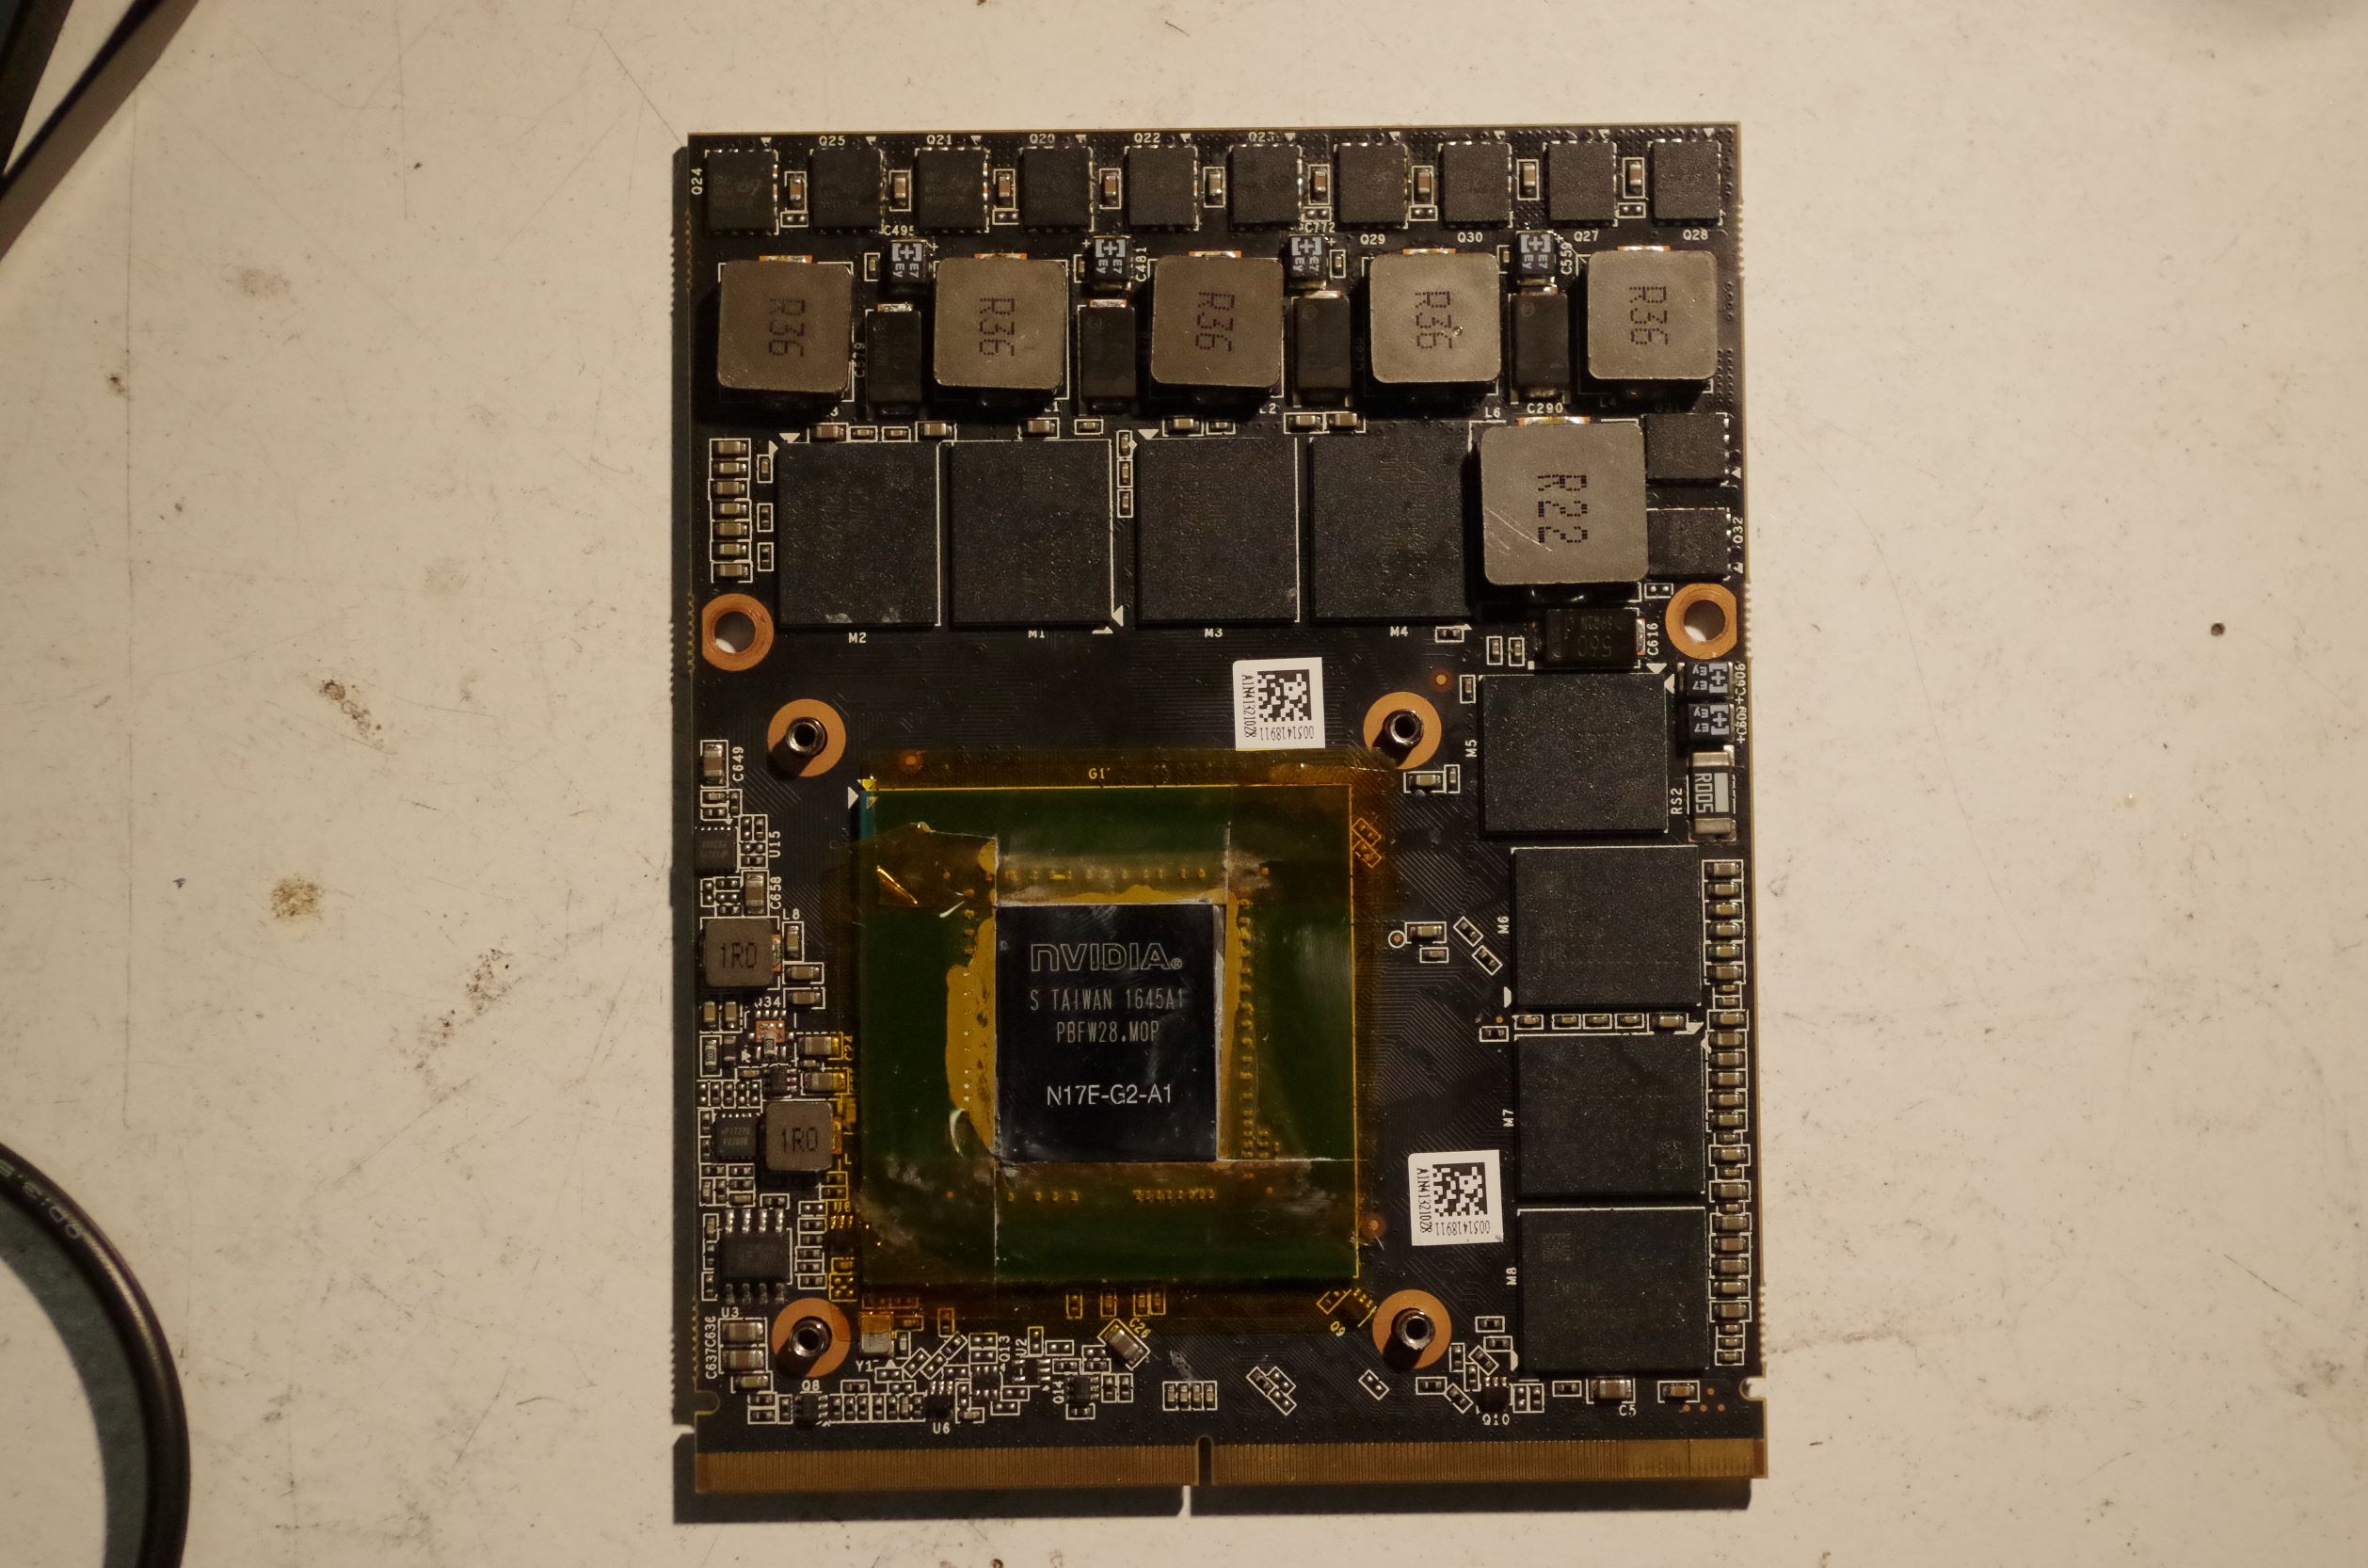
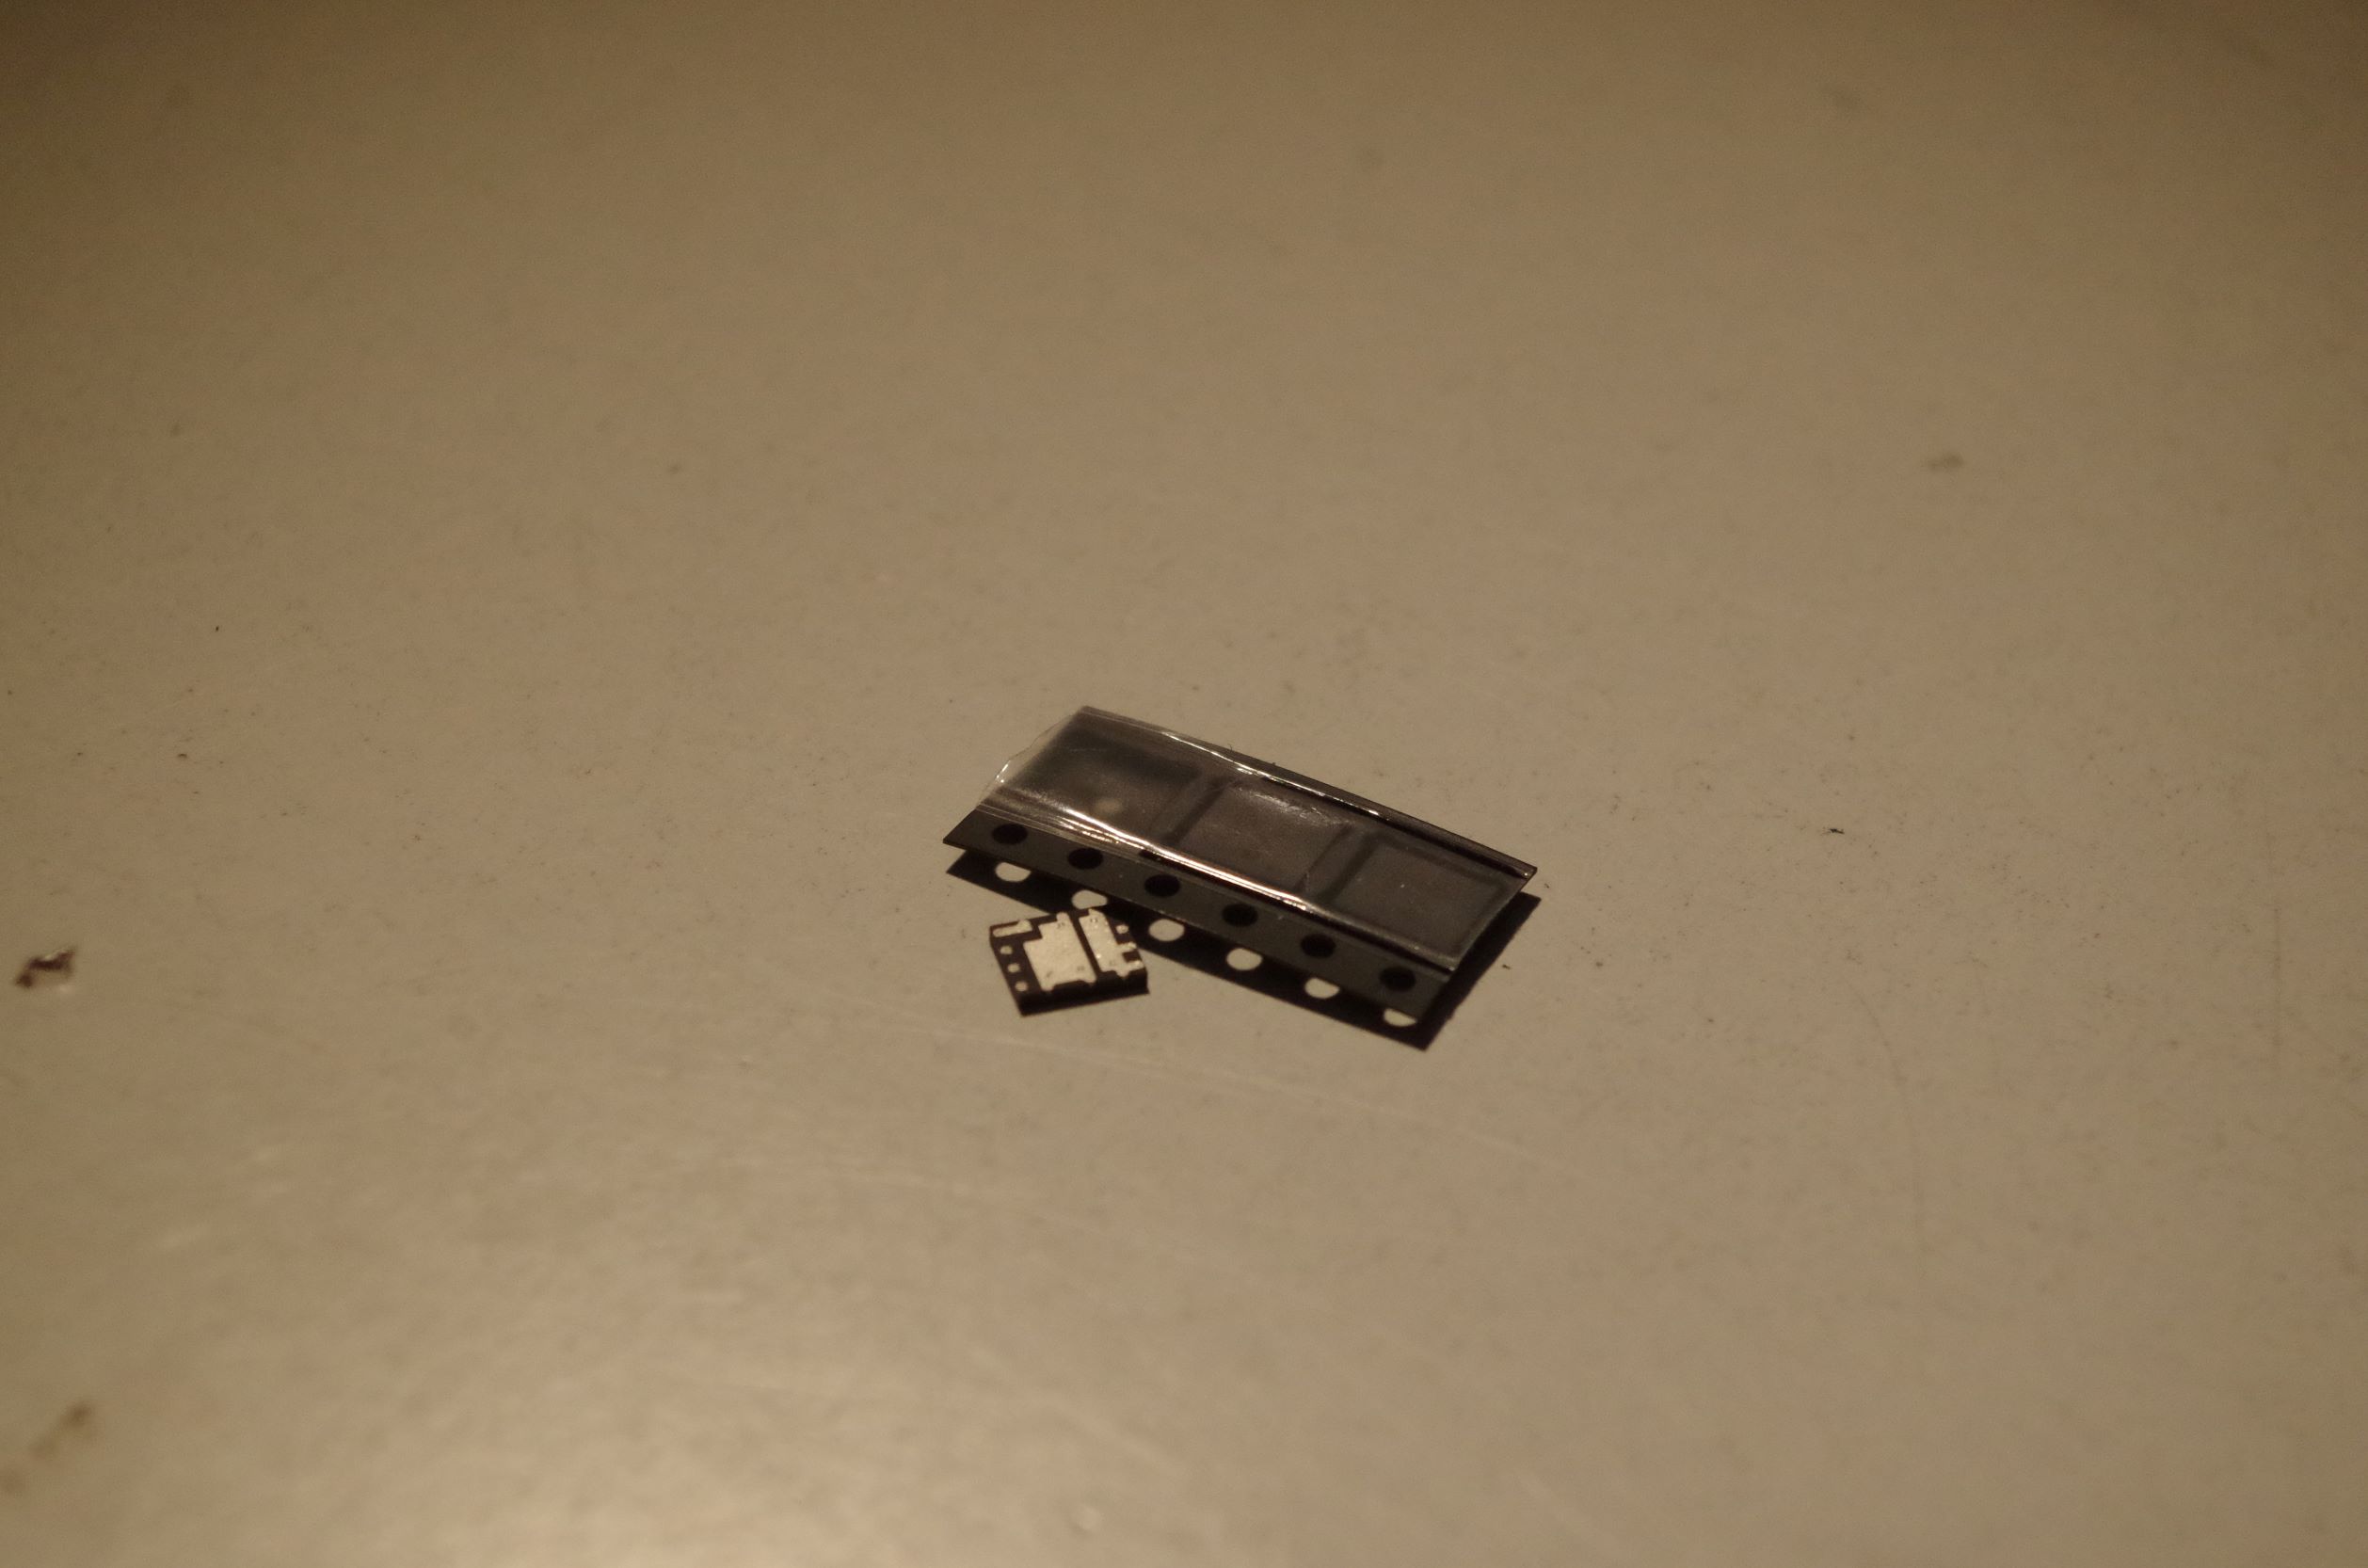
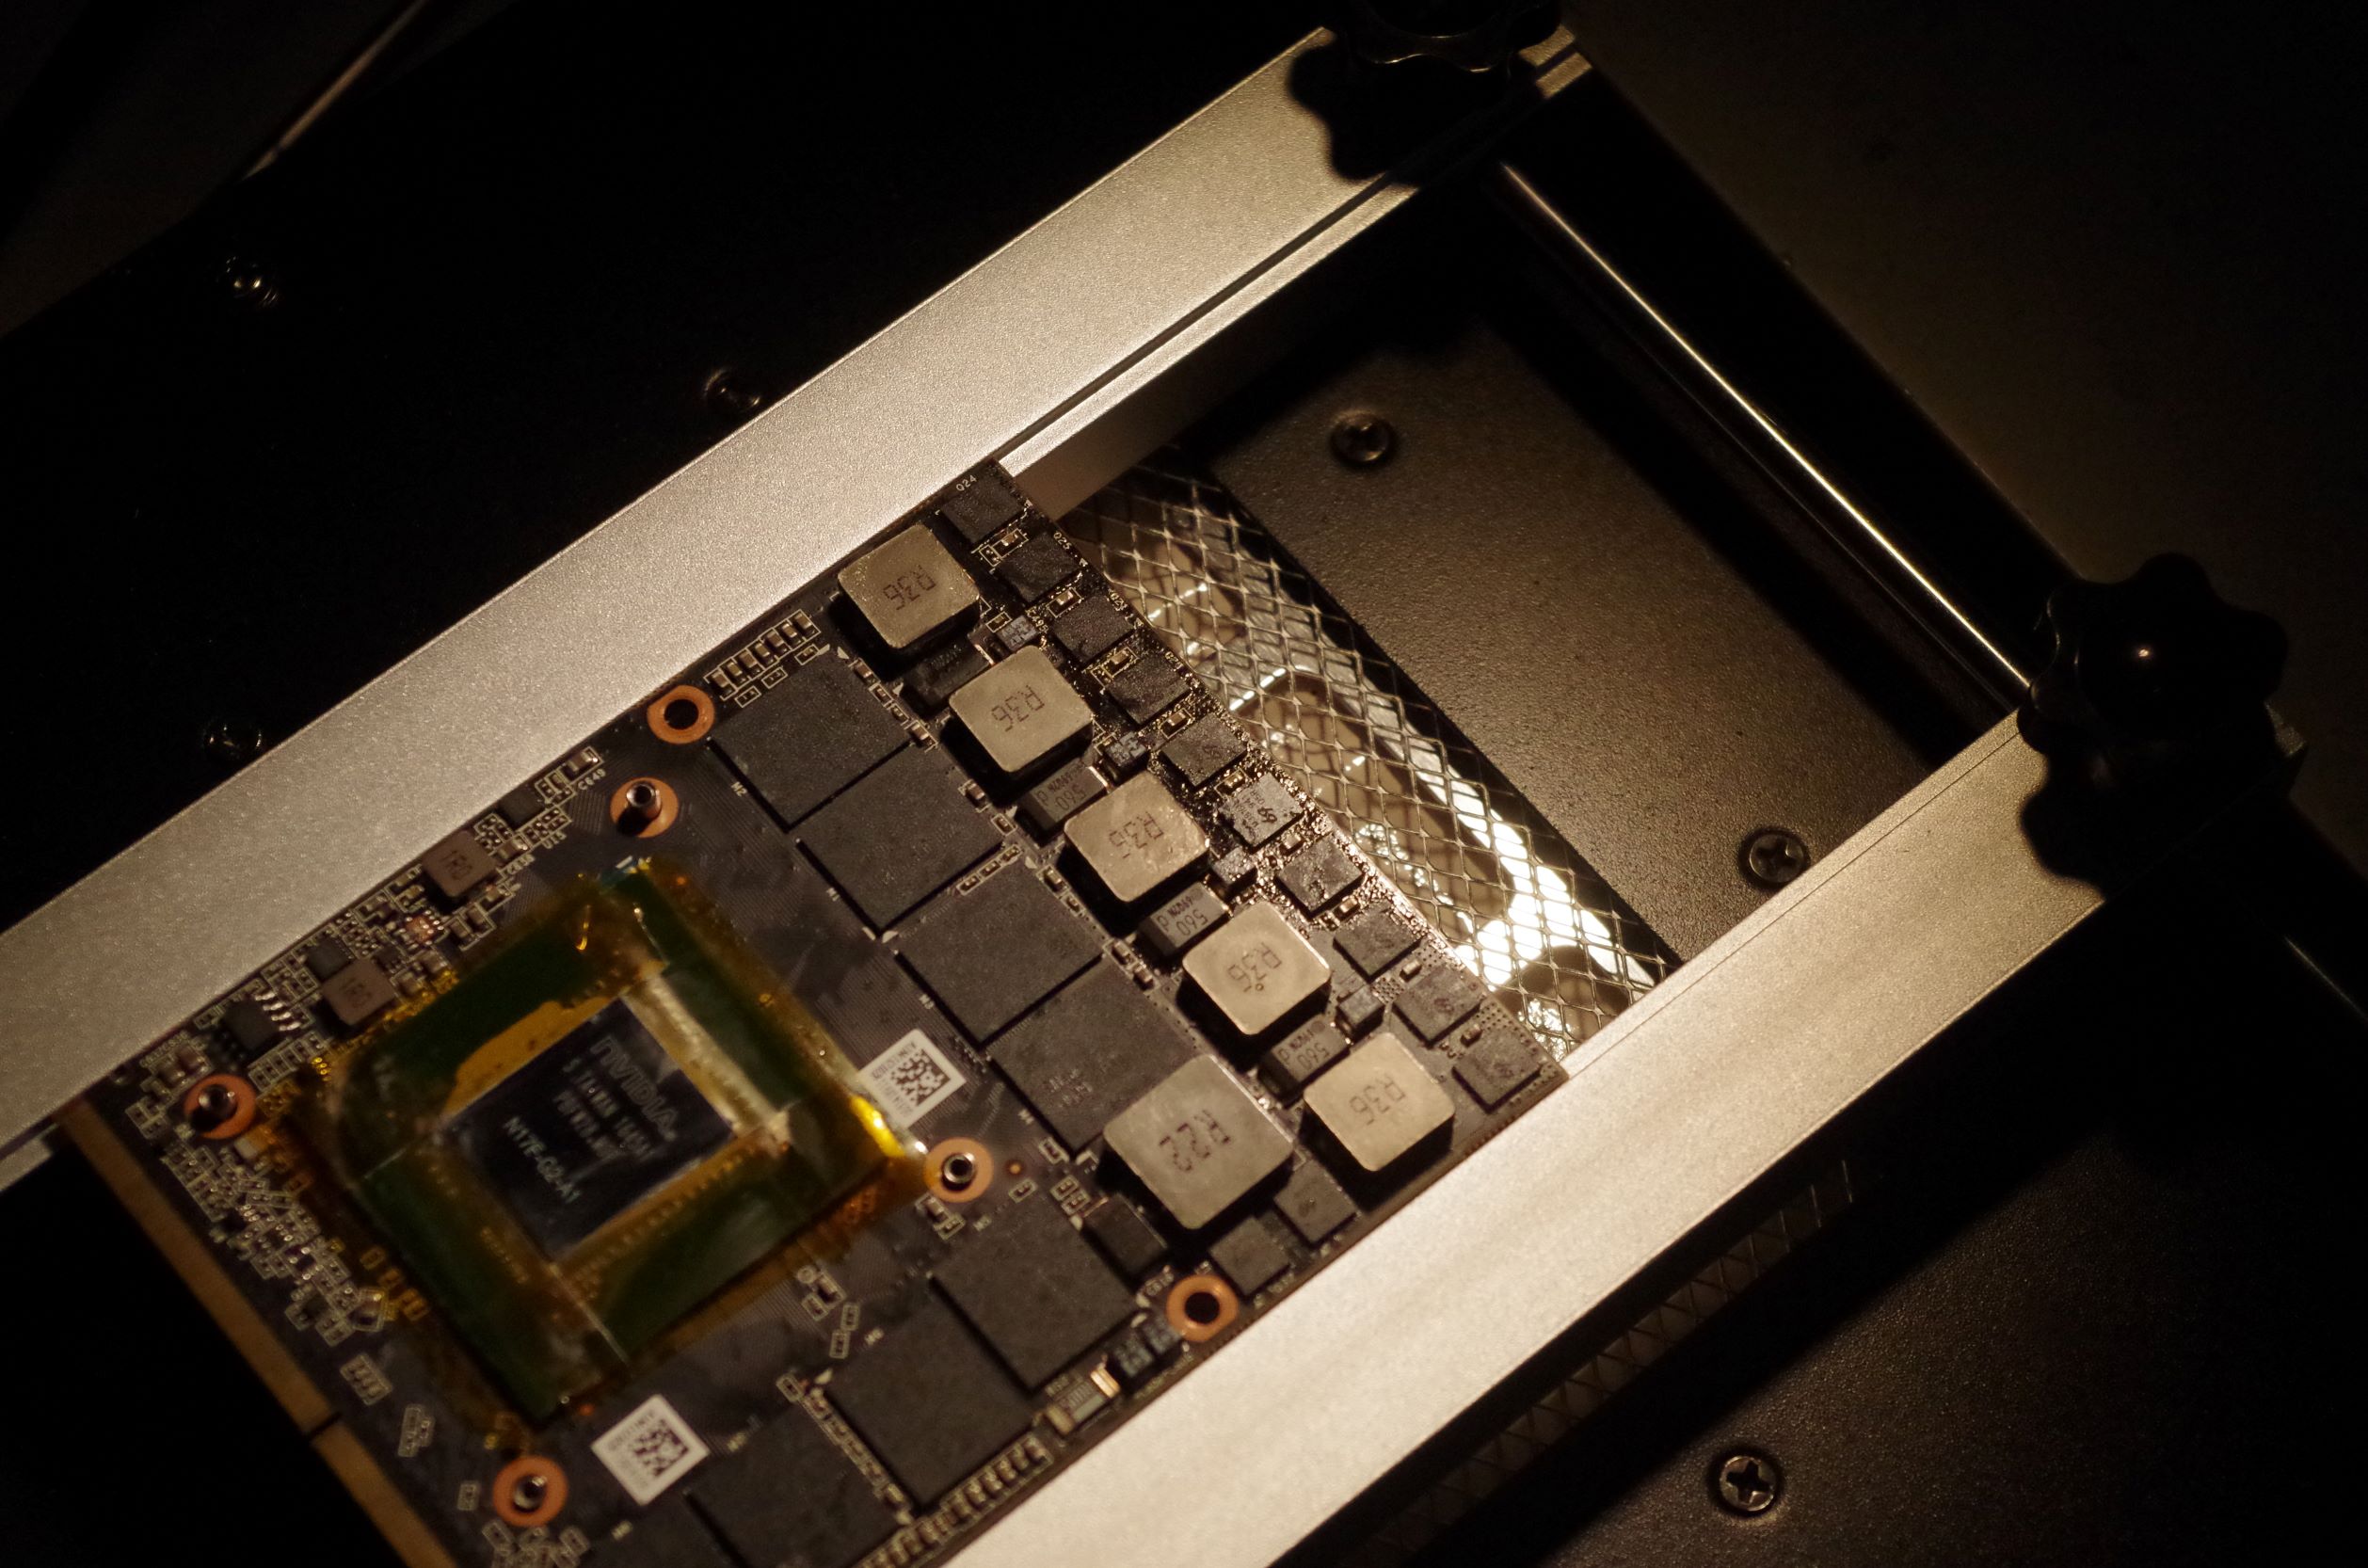
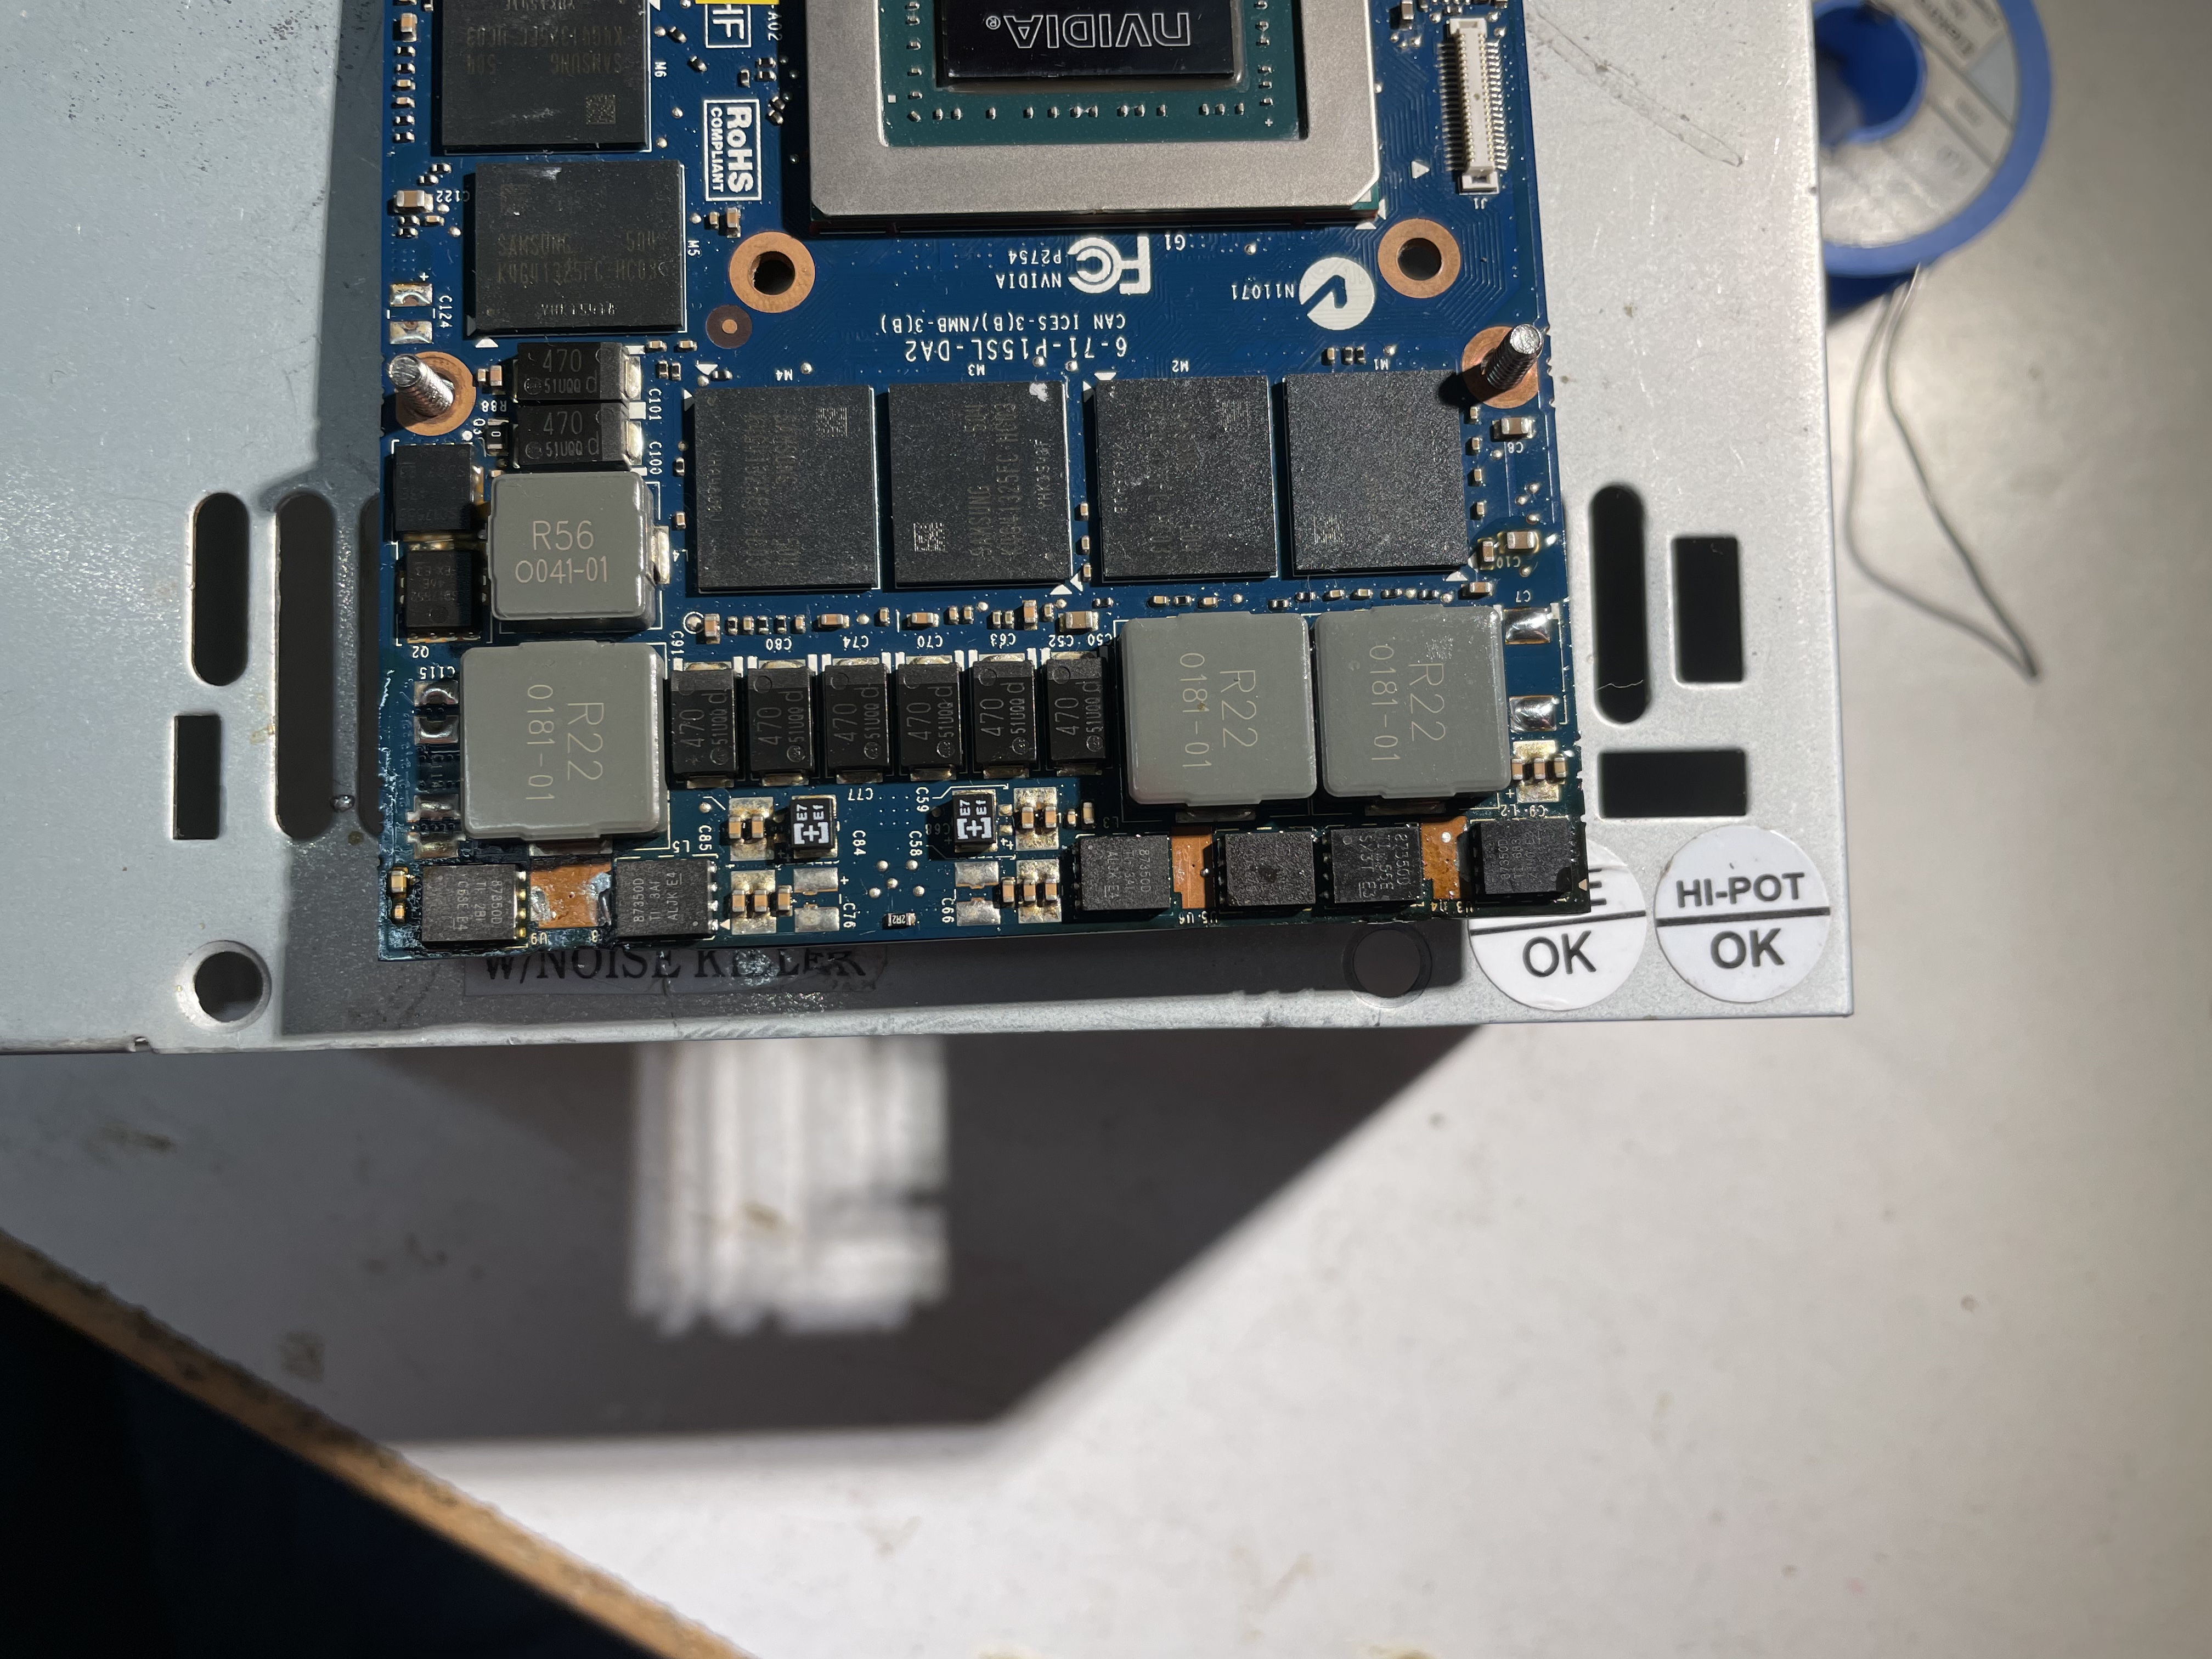
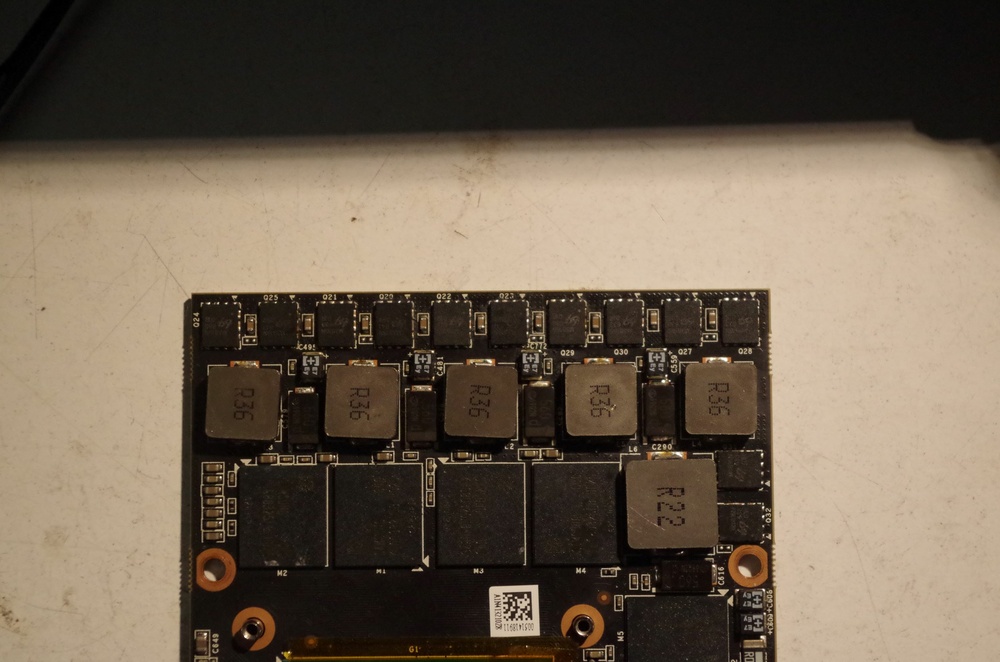
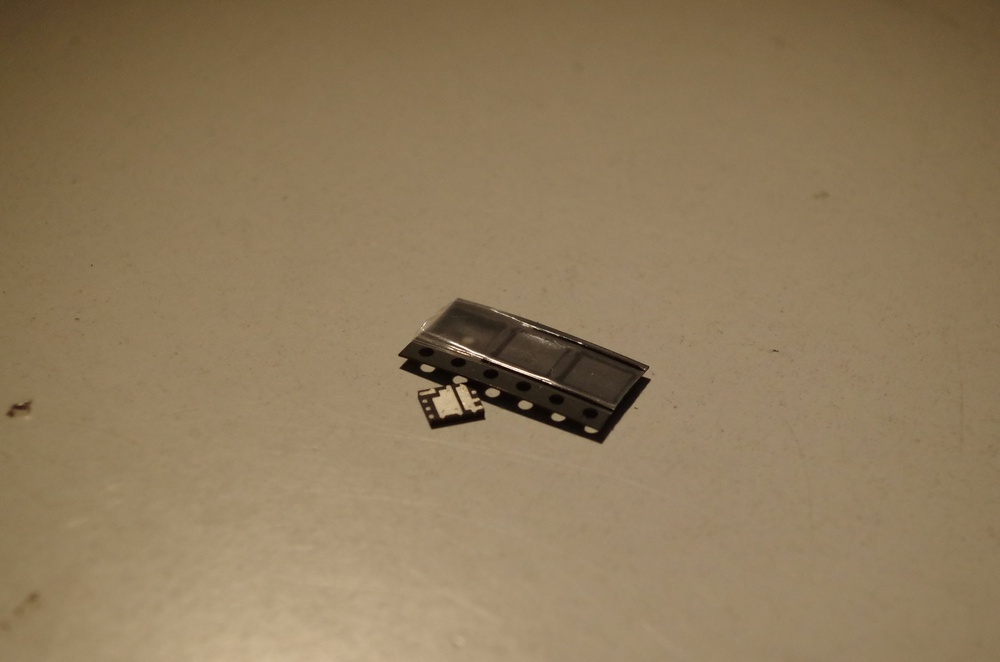
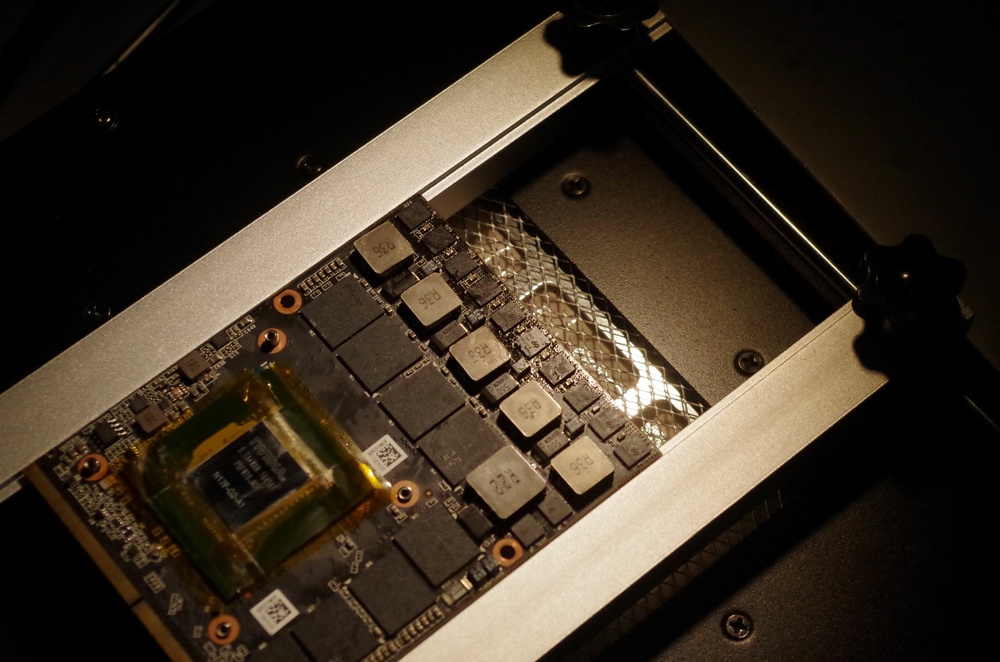
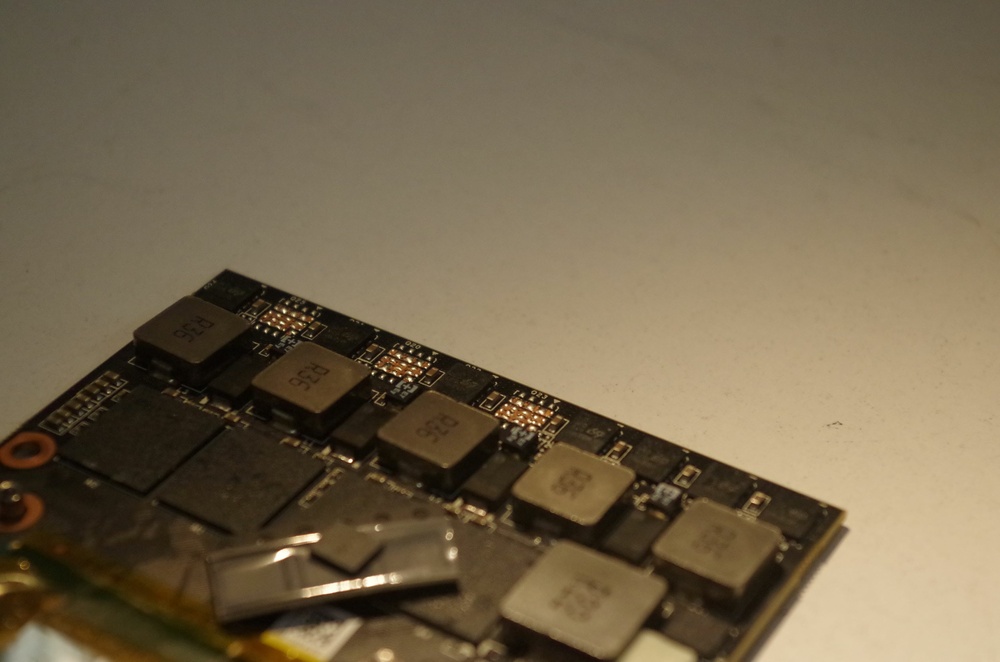
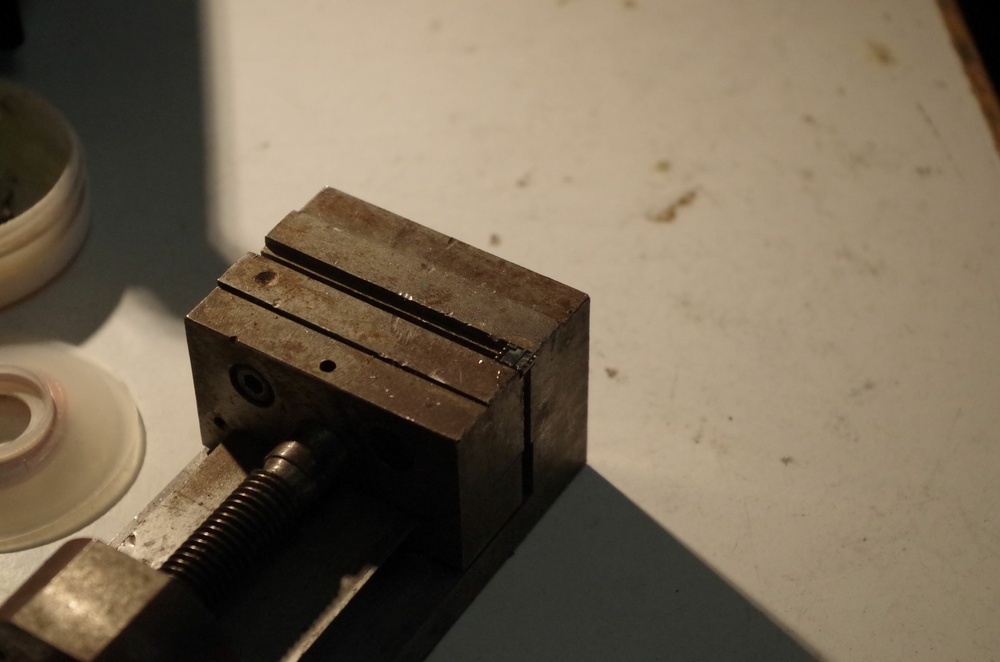
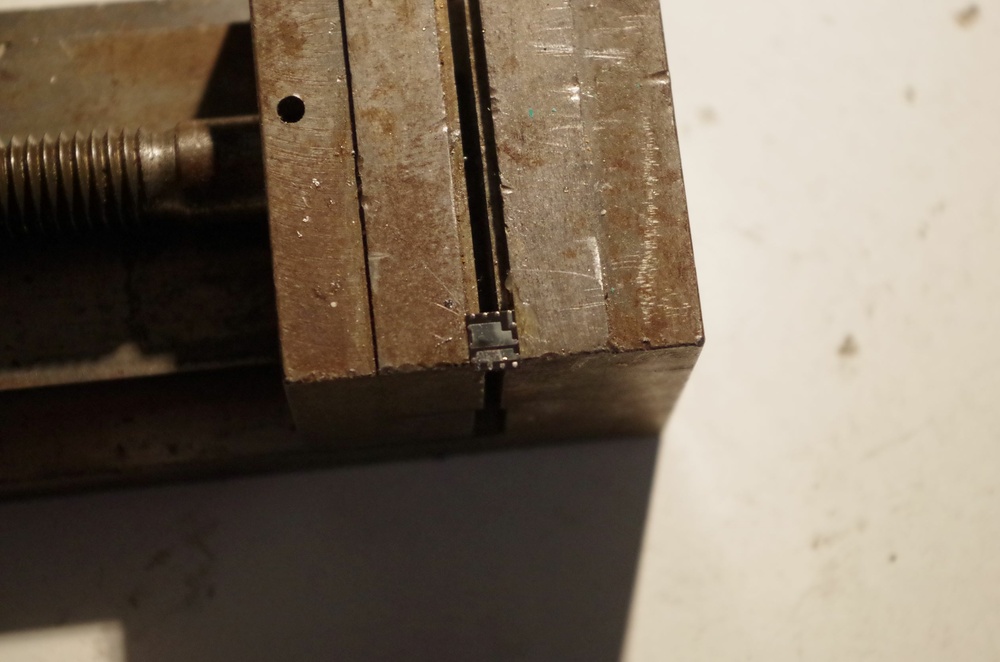
For those who might be interested, I've done something similar to a Zotac GTX 1070, also to increase the available power. There are three unused pads left for a total of 10 MOSFETs. The powerstage for the Vcore circuitry consists out of 5 phases, so at the end you have 2 MOSFETs per phase. The stock config has two phases with 2 MOSFETs and three with 1 MOSFET per phase. I already saw a few cards that had these single MOSFET phases burned up, which is another reason why I did this. All these mods were made on a PCB preheater and with leaded solder to decrease stress on involved components. After that I flashed the vBios from the MSI GT72 to raise the powerlimit from 90W to 115-120W I hope that my text is not too confusing, I'm quite tired ....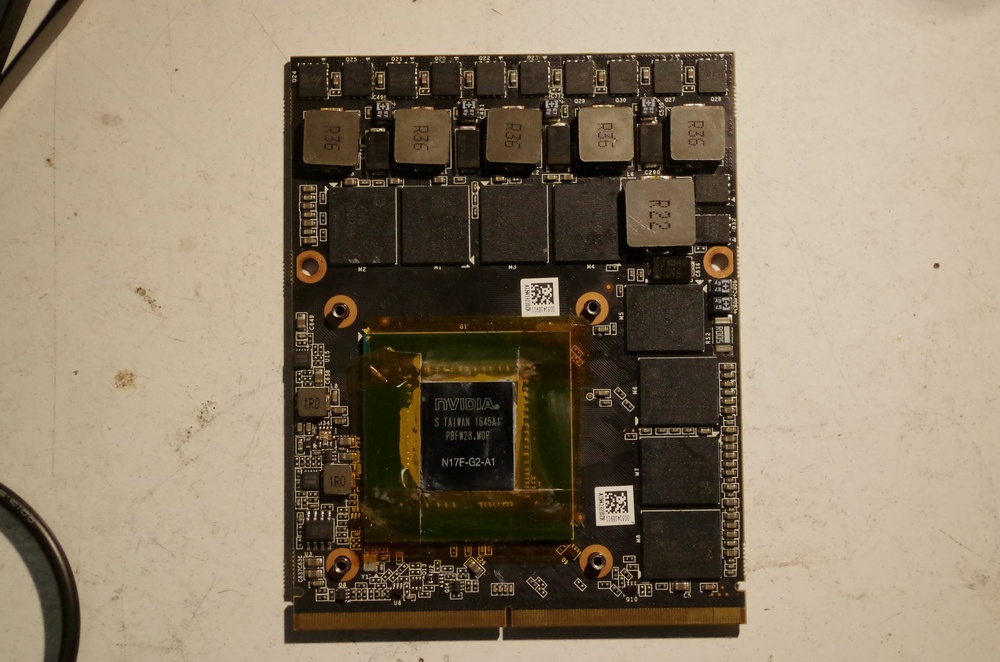
-
M18x R2 - Display overclocking using Custom Resolution Utility
DoenerBoy123 replied to GMP's topic in Alienware 18 and M18x
Try Nvcleaninstall. In my opinion this is a little bit easier and you have more control over the driver intsallation like telemetry and stuff like that -
GeForce GTX 980M voltage regulator mod
DoenerBoy123 replied to DoenerBoy123's topic in Components & Upgrades
This thread is a little bit old now but I want to to give an update about this mod. It’s already a few months past since I’ve mod this card and so far the results are pretty good. I’ve took the mosfets off of an old half working quadro and a 680m I’ve had laying around. The soldering itself was not a big deal, but requires some experience. The maximum power draw with the prema vbios seems to be around 170 watts. The test was done with furmark for a very short time to see how much this card can pull(this was with a 200mhz oc on the core, voltage untouched). In most games the power consumption goes up to around 140-150 watts max with the temperature settling at 65-70 degrees(M17x R4)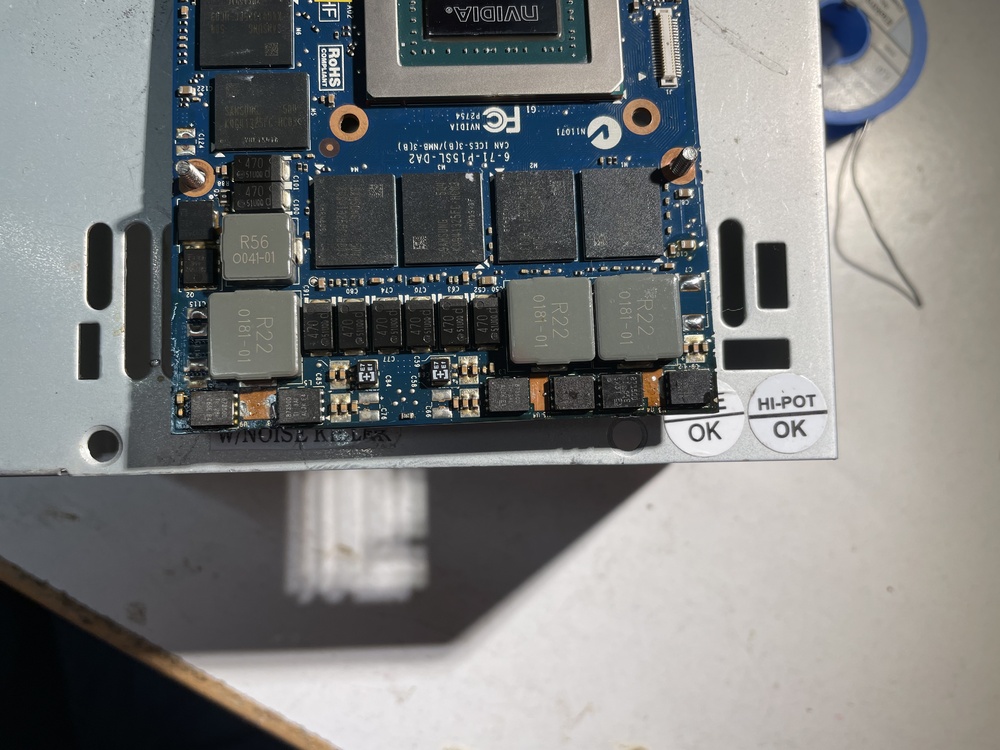
-
Alienware 18 Viking modded drivers for 1060
DoenerBoy123 replied to Yarema's topic in Alienware 18 and M18x
I can recommend NVCleaninstall. In my opinion, this is easier than modding the driver manually and this gives you more control about telemetry and other stuff. -
In the M18x and many other notebook's the MXM slot is wired directly to the main power rail without any switch in between. Even when the notebook is turned off there is voltage present on the slot. This is also why lot's of notebook's with shorted GPU's will trigger the PSU's short circuit protection when plugging in. My guess would be that there is no switch on the adapter board that disconnects the SSD and it's voltage regulator from the main power rail/MXM slot when turned off. This means the SSD is always on and drawing power. It's the same like an external HDD with it's own PSU turned on but without USB being connected to it
-
I think it doesn't really matter which template you choose, at least that's the case with my GTX 1070 mobile. I just took the standard template for the 1070 mobile and it worked fine without even having the same hardware id
-
Cooling suggestions for my M17x R4 CPU
DoenerBoy123 replied to Otic's topic in Alienware 17 and M17x
Some people replaced the stock fan with one from the m14x R1 as this fan can push much more air. Unfortunately these fans are hard to get as lots of sellers sell "R1 compatible" fans which is not what you want. The R1 one has similar shaped blades like the gpu fan which is the reason why they are so good. -
Alienware M18x (R2) SG dGPU video out
DoenerBoy123 replied to DoenerBoy123's topic in Alienware 18 and M18x
As far as I know a copper plate between heatsink and die is actually essential as pascals core has less height. To get back to the main topic, I have some plans to try the modification and if I'm lucky I have some time at the weekend. I'll defenetly post some updates, even unsuccesful ones! -
Alienware M18x (R2) SG dGPU video out
DoenerBoy123 replied to DoenerBoy123's topic in Alienware 18 and M18x
Okay that might be the difference! Are you able to control all the fans independently or do you control all three at once and does the card work at it's desired speed? I was also thinking about using an Arduino and a temperature probe to build something like a Pam fan controller, but that was before I found the fan to be partially working. -
Alienware M18x (R2) SG dGPU video out
DoenerBoy123 replied to DoenerBoy123's topic in Alienware 18 and M18x
That's what I thought too. In my case the fan works after some warming up and then without issues(GPU heats up to arround 65-70* in idle, fan turns on after some time, now put some load on the GPU and the fan will continue to spin like with a compatible card). I found out that there's actually another thermal sensor on the pcb which monitors the MXM slot ambient temperature which might be responsible for this behaviour. If you look at the HWmonitors's entry to the EC you see that theres no GPU temperature listed with the zotac card. If you use another card like the 980M theres an entry for the GPU, so the EC "sees" the card. I went through the MXM 3.1 spec sheet and found out that MXM specifies some pre defined adress values for the smBus which is how the EC reads the temperature. I think zotac used some diffrent adress values which might be why the EC is unable to read the temp. The adress can't be changed by a using a different vBios, rather there should be some resistors on the card to set the adress. Maybe here are people with more knowlege about smBus and might wanna help solve the problem? As the card semms to be based on the GeCube one, people with those cards can help? Edit: Here's the spec sheet for MXM 3.1 and the thing about the smBus adresses i meant: https://www.module-store.de/media/pdf/d9/a4/43/MXM_Specification_v31_r10.pdf
-
Alienware M18x (R2) SG dGPU video out
DoenerBoy123 replied to DoenerBoy123's topic in Alienware 18 and M18x
Good to know and somehow sad. I'm gonna try this mod the next days when I may have some time. I think it's actually not that hard. As example, the MUX chip used for the mini DP is a Maxim MAX14998. This chip has two inputs, one coming from the PCH and the other coming from the MXM master slot. The inputs of this chip can be changed by setting the switch pin either high or low. So, if my theory is correct I have to disconnect this pin from the EC and pull it low in order to activate the output coming from the MXM slot(according to the schematics). This goes for all outputs, but these have different switches(same principle as described). I dont know about the 1080. I've heard that these card are hard to handle in dGPU only laptops as the eDP output makes some problems(was never intended to be used). My card seems to have the original zotac vBios and works fine as I'm using optimus. Another problem with these zotac cards is the non working fan control, guess that has something to do with the smBus