
srs2236
-
Posts
275 -
Joined
-
Last visited
-
Days Won
1
Content Type
Profiles
Forums
Events
Everything posted by srs2236
-
Does it default to 2400? Like for the first time when you put them in? It is a weird bug for sure, i wouldn't be suprised. RAM overclocking is unfinished in BIOS for P775/P751TM... But I haven't had this exact issue as mine have XMP. But it should still default to hīghest JEDEC spec
-

clevo p870tm/tm1-g Official Clevo P870TM-G Thread
srs2236 replied to ViktorV's topic in Sager & Clevo
Niiice, I wanted to do this myself 😂 The pinout is the same, it is a matter of ordering the IC, desoldering 3080/soldering 3080 Ti on the 3080 MXM PCB and flashing one of the Clevo 3080 Ti VBIOS! I litterally was looking for the IC's today. Let us know how it goes! I ļike to believe it's doable 100%! -
What kind of RAM is it? Why don't you use XMP profile?
-
It doesn't have two bios chips. It might have a recovery BIOS flashing available though, but I am not sure. Try looking for some BIOS related stuff in the service manual. Perhaps there is some info regarding this.
-
clevo p870tm/tm1-g Official Clevo P870TM-G Thread
srs2236 replied to ViktorV's topic in Sager & Clevo
Yeah, when I said I call BS on some of those benchmarks I meant that the 4080/4090 is still much better than 3080. IDK what the hell is going on but there is no chance that the 3080 is better than 4080. Again, just my opinion, I don't own 40 series nor have fully studied the benchmarks.. Just purely by the specs its just superior in everyway unless maybe 4K performance because of the 12GB ram limitation but idk... -
clevo p870tm/tm1-g Official Clevo P870TM-G Thread
srs2236 replied to ViktorV's topic in Sager & Clevo
I also agree with the latter statement and call BS on some of those benchmarks. I might be wrong just my opinion. -
Hello! I use generic BIOS that is provided from Clevo directly (latest one). It does not need to be modified more for the video card to work out of the box. It DOES however need to be modified if you want drivers to install automatically and without any issues (like Driver Signature Disabling etc). AFAIK not Prema or dsanke BIOS will help you with that. My BIOS has that fixed (for P775TM1, P751TM1 only). However do not ask me here or in DM's to share my BIOS as I will not do that. I have done many modifications to it and spent lot of my time trying to make it work on lots of things not just the 3080. So I do not want to give it away just like that. I would like to make a small tutorial on how to do it but for now I haven't found the time for it yet. It is actually not hard at all, all that is required to do is to extract a specific module from BIOS and change some values in the module to alter the Device ID in the BIOS. For those who are somewhat familiar with BIOS modding the module is called BoardIDpei. This module is absent in P870xx BIOS'es and that's why the same modifications to make driver installations work without inf mods on P870xx does not work on P775/P751TM motherboards. In the module you will find multiple references to 7708 or 0877 (sometimes in HEX in bios modules the ID's are written end first and beggining last or something) which correspond to default Device ID ending for P775TM1 and probably (just guessing) P751TM1 as they use same BIOS. This needs to be changed to 7715 or 1577 which corresponds to X170KM-G and after that you replace old BIOS module with new one. Flash new BIOS and you will see that drivers will install without any issues from GeForce website and GeForce experience. Automatic driver updates will work and basically it will be as it would be for X170KM-G. (Except dynamic boost and G-Sync) If I remember correctly i just changed the ID in multiple places, it probably need to be changed only in one spot but as it worked, and nothing else was broken I never went back to check which one specifically was used for the GPU Device ID. Hopefully this can help atleast someone who is somewhat familiar with modding to make it work for themselves. Maybe I will make a nicer tutorial in future but for now this is best I can say about it. The tools I used for replacing and extracting the BIOS module was AMI Tools (more specifically MMTool) if you search on google UBU Tools it will have the additional BIOS Modding tools all in that package. If you are familiar with UEFI TOOL that probably can do the same trick too. About heatsink I can't answer as I just bought custom from AliExpress and used that. Good luck!
-
P775 TM1G question about purchasing a heatsink from aliexpress
srs2236 replied to the jg89's topic in Sager & Clevo
I undervolt with BIOS, and if I am testing I personally use XTU. Both do the same thing but I use offset instead of constant voltage. In your case that would be Adaptive. I tested Override but it resulted in worse results. -
You have a 200W card shunt modded?!?!?! I'm sure at that point your X170SM-G can be used as a grill or something 😂 Do you know the actual wattage being drawn by your 2080S? Would be interesting to see if there would be benefits for you with same type POSCAP mod. Edit: Read your signature, it all makes sense now once I saw the AIO Liquid System! =D
-
This mod was not made with the intention to change power consumption in any way. It was just to try and mitigate the voltage drop occuring on Core and VRAM or make it more stable. Because of this I have an improvement in Core OC by 10MHz. I know that it is not a lot but this mod doesn't provide a promise of huge improvoment of OC in the first place. From my very limited knowledge I think it works like this: The voltage reported on software is always not the same on hardware. There is some losses and because of that there is a small voltage drop on Core and also Memory. By adding more Capacitors as in this case OR by just changing to better quality capacitors you can minimize this voltage drop. So the better the caps, the closer the actual voltage supplied to core is to the voltage set by NVIDIA. What I can get from this is that perhaps the voltage on core is a bit more stable now OR the voltage drop has been decreased or both really. And its a shame that I didn't "push" my VRAM before but I would like to believe that it brought improvements to VRAM aswell. Like I said, I havent seen any other benchmark that has passed with 2250MHz. I would like to believe the mod has helped VRAM too. For the core, as why its stable at Time Spy at 140MHz and not stable in other games I think comes down to Ray Tracing. As soon as I enable Ray Tracing it seems to crash pretty quickly so maybe it's only stable with basic DX12. Also VRAM so far seems stable at 2150MHz which is still massive! And this was tested under RE4 Remake aswell at 4K and VRAM pushed as far as 14GB-15GB used. Again, if I recall correctly it wasn't stable on 2050MHz on desktop that one time but unfortunately I can't confirm whether or not the POSCAP did help my VRAM OC or not. And like I said 10MHz on core is small yes, but perhaps with brand new POSCAPS with better specifications and maybe even higher capacitances the result could be 15MHz or 20MHz. And I am sure for the people running 200W cards this might be even more beneficiary. I am not an expert though and if there is someone who really understands the electronics and design behind all of this please feel free to correct me! I will try to find more info on the 4 additional empty spots and perhaps solder 4 more Caps but I think for them I will be ordering nice and fresh caps from Mouser or something. You can't really trust 12 year old Caps from some old broken motherboard all too much. The repeated desoldering and soldering already is kind of damaging the longevity of the cap so yeah..
-
Pictures: Donor board: Tools used: Desoldered POSCAPS: POSCAPS soldered on to RTX 3080 before cleaning: POSCAPS soldered on 3080 after cleaning: Comparison between normal 3080 and my POSCAP mod:
-
"2100MHz already seems like insanity to me so I didn't even bother trying more..." I ran out of MSI Afterburner slider XD Jokes aside, even though the score has increased, there was 1 flicker during 2225MHz test run and like 5 flickers during 2250MHz so they are not stable. There was though absolutely no flickers during 2200MHz so that is what I will try and daily for now on. I am absolutely shocked by the VRAM OC capabilities. I have no idea at this point whether or not the POSCAPS had something to do with it. I think however one or even two of them were soldered for VRAM aswell. You can be the judge once i upload the pictures. Damn. I am not even trying to go for records or something, but this already makes me 54 from the previous 98 (VRAM on 2100) on the Time Spy leaderboards for 3080 mobile. Keep in mind I am also not freezing it or anything, I just run max fans and that's it. https://www.3dmark.com/search#advanced?test=spy P&cpuId=&gpuId=1372&gpuCount=0&gpuType=ALL&deviceType=ALL&storageModel=ALL&memoryChannels=0&country=&scoreType=graphicsScore&hofMode=false&showInvalidResults=false&freeParams=&minGpuCoreClock=&maxGpuCoreClock=&minGpuMemClock=&maxGpuMemClock=&minCpuClock=&maxCpuClock= Also from the ranks, it seems only one person was able to complete Time Spy with 2225MHz and no one except me at 2250MHz. I got to say, I believe POSCAPS had something to do with this but I can't say for sure as I never really pushed my VRAM like this. Altough I do remember desktop glitching out one time when at 2050MHz or something and me pushing back to 2000. Anyways, the way I see it, I am just one shunt mod away from WR... Also, I plan to play through all of the Resident Evil 4 Remake. I believe this game will test my OC stability good enough.
-
Hello everyone! POSCAP update: I recently got my hands on an old HP G62 laptop that I thought I might be able to restore to make a quick buck. Well, turned out I couldn't restore it. I took it apart, and had a look on the motherboard. I noticed something very interesting, something that was on my mind for a long time. I realised, this old 2011 motherboard used EXACTLY the same POSCAPS as my RTX 3080!!! 330, d marking on the POSCAP. Same size and dimensions. It was even the same style, probably same factory. I had been thinking a lot about this before, wondering should I order from Mouser or some other electronics store some fresh new POSCAPS. But many questions aside and worries and cost issues I never bought them. This time, I thought, the board is scrap, this could work... So I did! The motherboard had 9 of these 330, d marking POSCAPS, I only used 5 of them on my 3080. 1 got damaged during desoldering, 3 left on my scrap MOBO. Let me tell you, desoldering them is hard but soldering them back on 3080 is TWICE as hard. I used two soldering stations at once both for soldering and desoldering purposes. I litterally had a friend help me through the whole process. And even with his help the job is not as pretty as I would have liked. The results: 1st of all it didn't explode, which was a plus..😃 2nd of all, 3dmark max core before was +130, now it is stable on +140. Memory before I had +250MHz (or +1000 in afterburner) and now I have +350MHz (or +1400 in afterburner). 2100MHz already seems like insanity to me so I didn't even bother trying more... This is the new 3dmark score, FINALLY broke 14000 and by a nice amount aswell: I will do further tests for stability. Before my daily absolutely rock solid stable was +100 Core on every game. Now I expect this value to rise by atleast 10MHz. Maybe even more. Seeing that before 3dmark was not stable on 140. I will do further testing on many games and report again. Now 10MHz might not seem like a lot, but keep in mind: The POSCAPS are from 2011 (meaning 12 years old now, the capacitance could be drastically reduced) I had to both desolder them using TWO soldering stations at 450c, and resolder them back to the 3080 (which can shorten the lifespan, +capacitance even more) So, who knows, maybe with a fresh new POSCAPS from Mouser with even better ESR values the benefit would be even better. I will send pictures from my phone. There was more space for I think 4 more POSCAPS, but because they weren't labeled as PC (meaning power capacitor) I didn't want to risk and solder them there as they might serve a completely different purpose. If someone knows that they are safe too please let me know and I will solder them there aswell to check for improvement on OC. I only soldered more POSCAPS where it was referred to as PC or power capacitor. 😃
-
clevo p870tm/tm1-g Official Clevo P870TM-G Thread
srs2236 replied to ViktorV's topic in Sager & Clevo
So it is a DIY GPU enclosure. Don't tell me you actually fit a desktop GPU somehow with according 12V power in the shell of a P870 all while cooling it. =D Also the reason your AMD card works is because it is not an MXM card. -
clevo p870tm/tm1-g Official Clevo P870TM-G Thread
srs2236 replied to ViktorV's topic in Sager & Clevo
It makes sense. It would be possible for P870xx to get x16 using a modified proprietary adapter. It has x16 lanes allocated using two slots. The only thing that someone would need to do is just wire the first slot to first Tx/Rx PCI-E lanes of the external graphics card (1x-8x) and the other slot to the other half of Tx/Rx PCI-E lanes of the external graphics card (8x-16x). The BIOS might already automatically recognize and configure itself to allocate full x16 lane in this scenario for the EGPU. There might be some small detail I am missing, but its 100% doable. It's all a matter of configuration. -
For me Intel XTU was even simpler to understand than ThrottleStop. Just try it. If it is disabled I believe it will stop half-way through the installation. And for ThrottleStop to work with undervolting you have to go to FIVR and check the box that says Unlock Adjustable Voltage. I know I missed it first time I tried using ThrottleStop. Good luck!
-
First try Intel XTU and ThrottleStop for these things. However, everything from overclocking to undervolting should be available in Intel XTU. The only thing you might need ThrottleStop for is C-States. Good luck! Edit: Are you sure it is locked? Because it is officially supported by Intel XTU. If Intel XTU indeed is not working then it just disabled in BIOS. If that is the case, try ThrottleStop for undervolting. It might still work.
-
I tried, didn't work at all. I am not saying it can't be done though. I wonder why OP thinks there is a mux on the board.
-
Clevo N960Kx (N960KR) Thread - BIOS Unlock, cooling mods, etc.
srs2236 replied to kaz26's topic in Sager & Clevo
Oh so I was wrong. I didn't know about strap resistors. Cool stuff.😎 -
Clevo N960Kx (N960KR) Thread - BIOS Unlock, cooling mods, etc.
srs2236 replied to kaz26's topic in Sager & Clevo
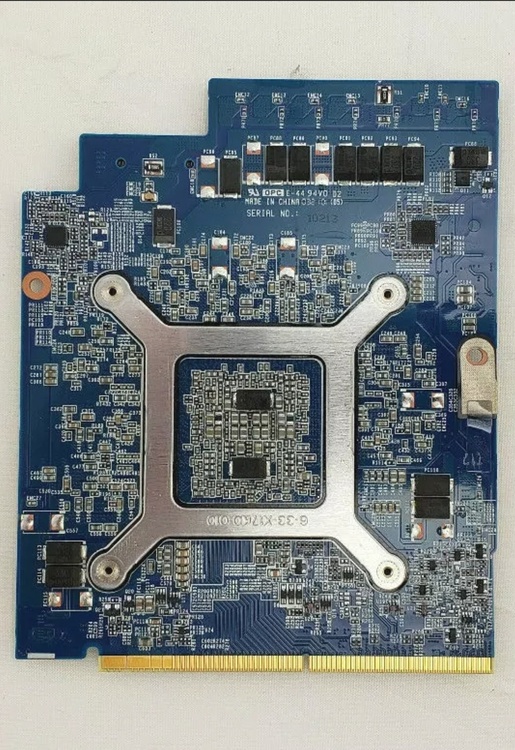
It is quite simple actually. 1) Get your hands on 8 x 16Gb Density Samsung GDDR6 chips (IC's). This can be wherever you can source them. I know AliExpress has them but there is probably other sites aswell. 2) Desoldering the old VRAM chips without damaging the board or in this case the motherboard. The old chips can be reused or scrapped depending on how good was the removal. 3) Soldering the new RAM chips in place of the old ones. Usually they come preballed so all you have to do is align them and solder them without causing damage to the motherboard. As far as I know, this shouldn't even require a VBIOS mod. I am 99% sure this worked right out of the box without any additional modifications but @ViktorV would know best. The pinout of the VRAM chips is exactly the same, that's why you can just change them in this kind of fashion. As to why it just works - my guess would be that NVIDIA doesn't just expect someone to do this kind of modification and has left support for multiple VRAM IC's in their VBIOS for compatibility reasons. It's similar how one card can support both Samsung and Micron memory chips etc. I could be completely wrong though and feel free to correct me if this is the case. But I think I am correct on this. Anyway, he definitely soldered new chips on the motherboard that's for sure. -
Clevo N960Kx (N960KR) Thread - BIOS Unlock, cooling mods, etc.
srs2236 replied to kaz26's topic in Sager & Clevo
That's very cool. Did they use higher speed chips? 2125MHz is pretty crazy speed. -
Clevo N960Kx (N960KR) Thread - BIOS Unlock, cooling mods, etc.
srs2236 replied to kaz26's topic in Sager & Clevo
Could it be because he has an i5 instead of your unlocked i7? I checked, his i5 is 65W while your i7 is 125W. Maybe that is giving him the extra power headroom he needs to achieve a higher score. Just my guess. -
That makes me wonder if I still have camera working... What Windows were you on?
-
clevo p870tm/tm1-g Official Clevo P870TM-G Thread
srs2236 replied to ViktorV's topic in Sager & Clevo
2080S is a 200W card. -
That is definately better than I would have expected. Nice. Was it a local sale or international?


