GuitarG
-
Posts
174 -
Joined
-
Last visited
-
Days Won
1
Content Type
Profiles
Forums
Events
Everything posted by GuitarG
-
Precision M6800 questions and upgrades
GuitarG replied to Jers6410's topic in Pro Max & Precision Mobile Workstation
Does M6800 have 50 pin LCD connector on motherboard with both edp and lvds ? Are there different versions of flex cable ? I heard someone said "edp mobo version" but you guys are more reliable I think 🙂 -
I saw this yesterday and now I want to buy M6800 so I can mod it and benchmark it hard, haha ^_^ I think with correct vbios it will work, for sure. Question is, can it be flashed under OS or only externally. What were your symptoms ?
- 11 replies
-
- 1
-

-
- hp
- zbook 17 g6
- (and 3 more)
-
Unfortunately, T1000 I ordered was bad, it needed vbios flash first, then it showed artifacts ;( Anyway, where did you looked for N19E heatsink ? I am located in Europe and nearest shop shipping to my country was.. Australia. HP parts page showed not available, quoted ~350$ for order.. Yes, RTX gen works nicely with Dell Precision M series I heard. Much better than Pascal quadros with API problem on windows, only recently solved.
- 11 replies
-
- 1
-

-
- hp
- zbook 17 g6
- (and 3 more)
-
With heating plate and hot air everything is possible 😄 It would be cool to replace mobile core with desktop one, like one guy did on NBR with 980. In China lately a lot of older GPU gets more memory upgrade, sometimes even up to 24GB I heard. Don't know about older, newer GPU needs correct strap resistors to set up memory vendor and capacity. Also force eDP output (and use mining GPUs with laptop). With steady hand and BGA soldering skill, every BGA CPU is socketed. ^_^ Beginning is harsh, with every try it get easier.
-
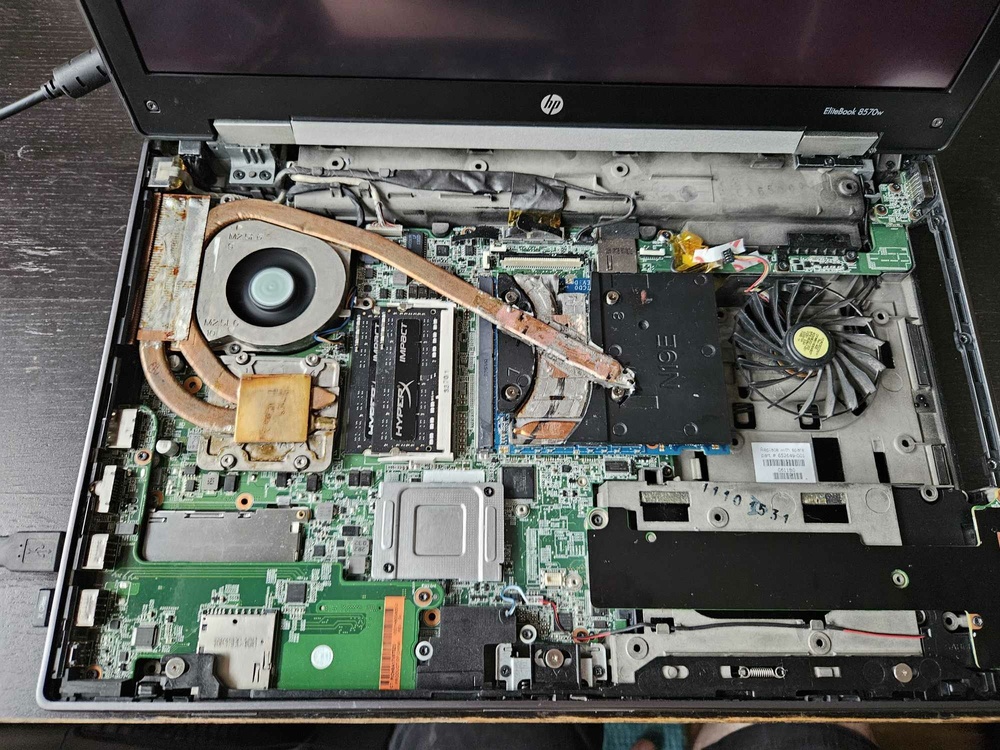
Yes, that HP model is very satysfying to open, I could try different MXM card but I don't have any at moment beside Quadro T1000. Biggest challenge using other cards is modding heatsink and mounting points on motherboard. That is G6. G5 is weird one, it have normal mount points, BUT it's graphics card does not have vBIOS chip on them. Means it may have *whitelist* of specific MXM cards (because main bios flash have only few gpu vbioses inside). I have no idea what could happen, when using external vbios, it may be programmed to look for vbios in different places - like embedded unix bootloader looking for "system" on lan port, emmc, spi rom, etc. As for mine, I plan to sell it after modyfing heatsink, I took rtx5000 with its heatsink block for my 8570w. So I will insert block from Zbook G2 🙂
- 11 replies
-
- 1
-

-
- hp
- zbook 17 g6
- (and 3 more)
-
HP Elitebook 8570W - is it still good ? Hardware modifications
GuitarG replied to GuitarG's topic in Custom Builds
Well, I solved problem with external graphics, just use 90.04.97.00.B5 MSI vBIOS and it will work. It's literally same amount of DP outputs, thermal management, etc. I think Dell's would also work, but none is on internet (from precision 7540/7740). I start to wonder why HP hardware don't go along with HP software haha 😄 -
HP Elitebook 8570W - is it still good ? Hardware modifications
GuitarG replied to GuitarG's topic in Custom Builds
Sure, 15 and 17 inch are like 99,5% same, biggest difference is in placement of components and PCB mask color. Only minor differences -
Until now I failed to see power button on G9 and G10 - it is on keyboard. I though it's more less than 500$ laptop thing, to cheap out on extra work and costs, but on workstation it is outrage (dell precision in same boat). Little liquid spill and can't power laptop, in worst case bigger IC dies (kbc, chipset or whatever 3.3v keyboard button they connected directly to). Feel free to correct me if I'm wrong, but that made me not to buy any laptop as that Fury G9/G10 was my last hope to buy fast & durable mobile rig in future.
-
HP Elitebook 8570W - is it still good ? Hardware modifications
GuitarG replied to GuitarG's topic in Custom Builds
I will buy next 8570w for test purpose! I want to make 8560/8570w easier to mod for everyone! My plan is to make detailed instruction how to customize LCD cable for EDP screens. On board is 50 pin connector, both LVDS and eDP. It is possible to connect up to 4K screen in our machines 🙂 No need to look for expensive and rare DC assembly. I will test it myself if theory is right. I'm also slowly progressing as I'm having not much free time on hands, but definitely getting there. Progress ! (tell me "yes", please ^ _^) Aaaaand I have found another problem - I can't pinpoint exactly why RTX don't want to show on Displayport. First thing in head is to change daughterboard (there is IC for DP control in schematics) to other or try other cable. Didn't tried yet, and I have only DP to HDMI (worked with P5200) and DVI to HDMI cables.. maybe bad NVClean driver setup (bad inf) or something.. If only there were some schematics for zbook g6 that would be solved quickly..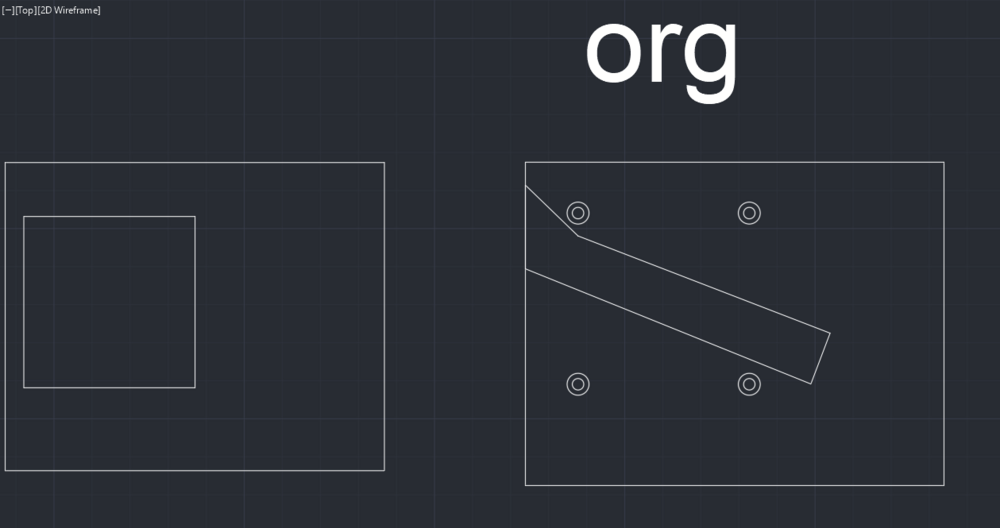
-
Anyone tried using external outputs with rtx 5000 ? Does it work ?
-
Try to reflash vbios chip using external programmer. And before soldering out flash chip check if it have 1,5v supply on its first or last pin. If no 1,5v then vrm is faulty
-
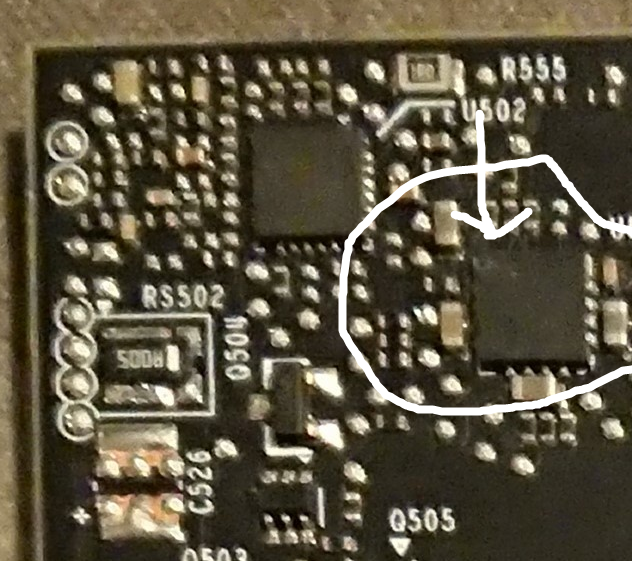
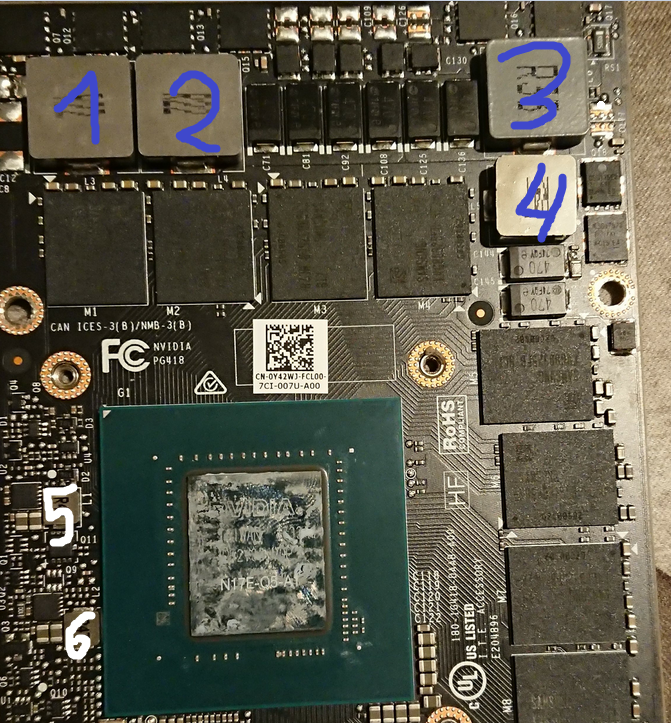
I wonder about 1-3 coils, theyre core supply voltage. Rest coils and caps are okay. gpu heatsink cold ?
-
Check it with probes on both end on ohm testing mode
-
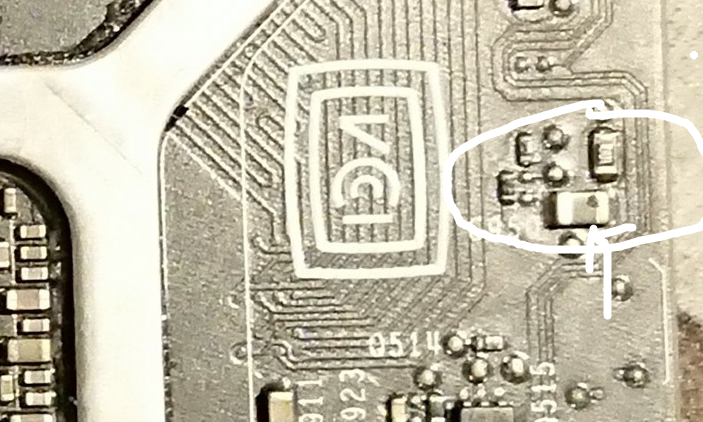
Can you show better photo of those places ? It may be just some dirt, but we have to be sure. Also try cleaning with isopropyl alcohol silicon die and see if it is chipped off somewhere. Check in continuity test those coils, I numbered them. One probe to ground (ex. those holes for X Clamp) and second probe to coils. Write number showing on multimeter. You can also double check by using ohm mode. Good luck!
-
Quadro P3000 (mxm type B) on HP Zbook 15 G2
GuitarG replied to Zeht's topic in Components & Upgrades
Same situation with RTX 5000, I think it may be Dynamic Boost 2.0, making GPU go little higher than advertised. -
Do you have multimeter ? Do continuity test on all coils on mxm board and we will see. One probe on ground, second touching one coil at time (don't forget to disconnnect battery and charger!) Then check voltages on all coils Also maybe some HQ photos from both sides ?
-
Hi! I don't know Alienwares, but check out BIOS settings - what graphics mode you use ? Maybe try updating it ? Do you have two MXM slots ? Maybe try other one (if present). Card is not shorted, otherwise your power supply would protect itself and turn off not letting you power up laptop.
-
HP Elitebook 8570W - is it still good ? Hardware modifications
GuitarG replied to GuitarG's topic in Custom Builds
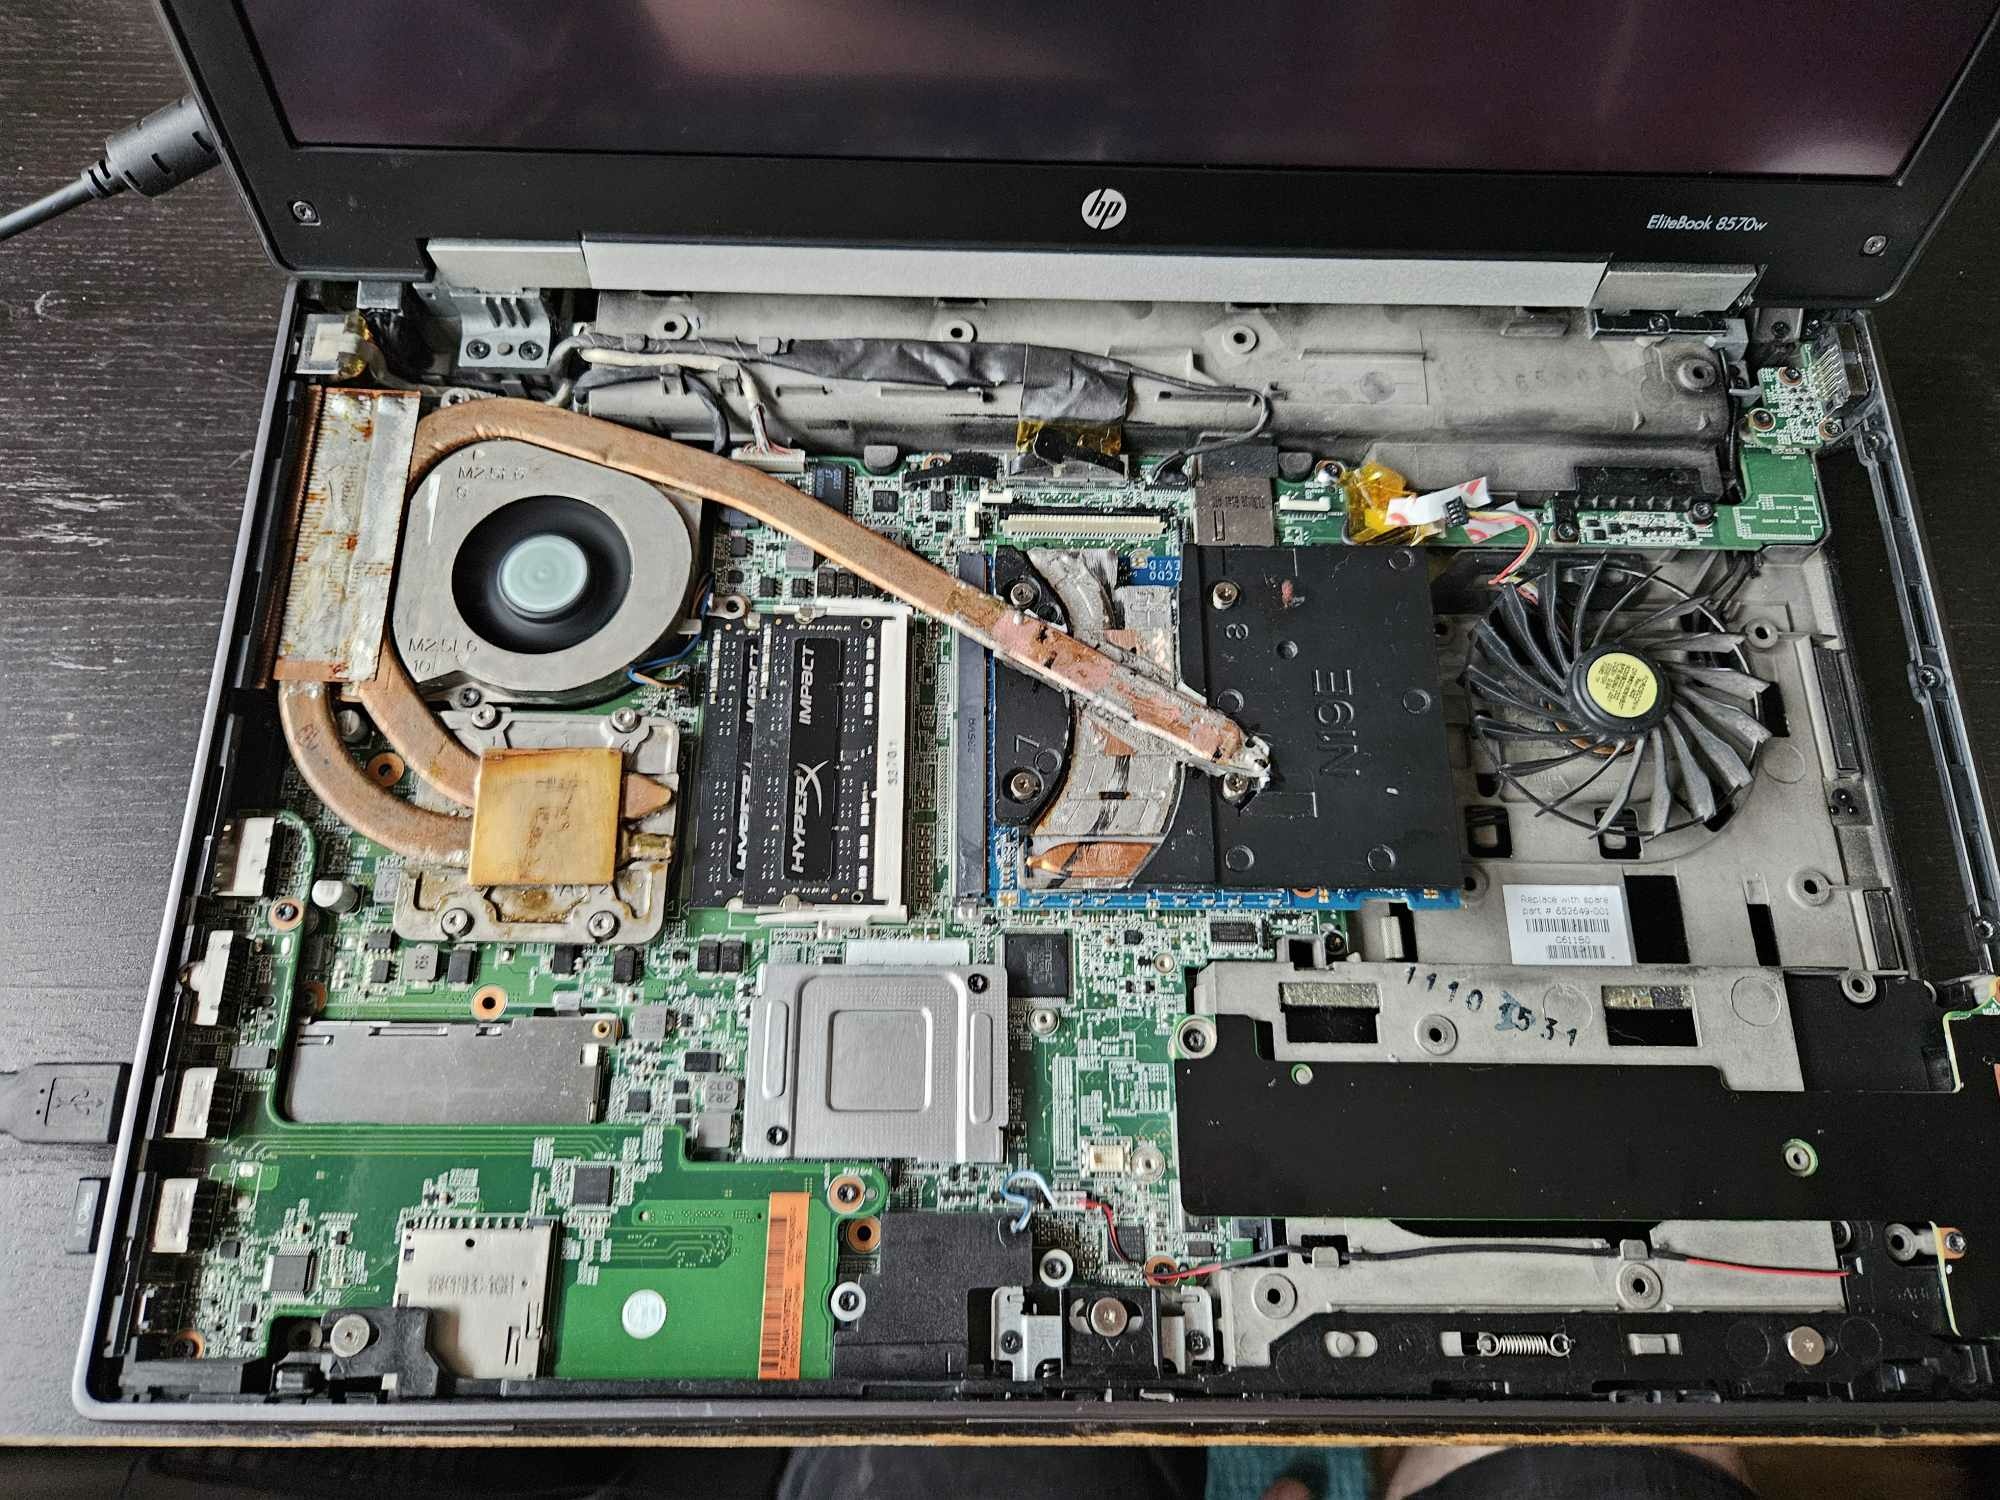
Hello! This time I go more *pr0* (less n00b way) - I measure which heatpipes and heatsink usage idea is the best! I need to know exact heatpipe dimensions I will use in my 3D model After few test Im totally shocked, common sense was worst way to work on this like I did before 😮 I also ordered other tools, so I can determine best fan for job.. 😁 I wonder if I had choosen best one..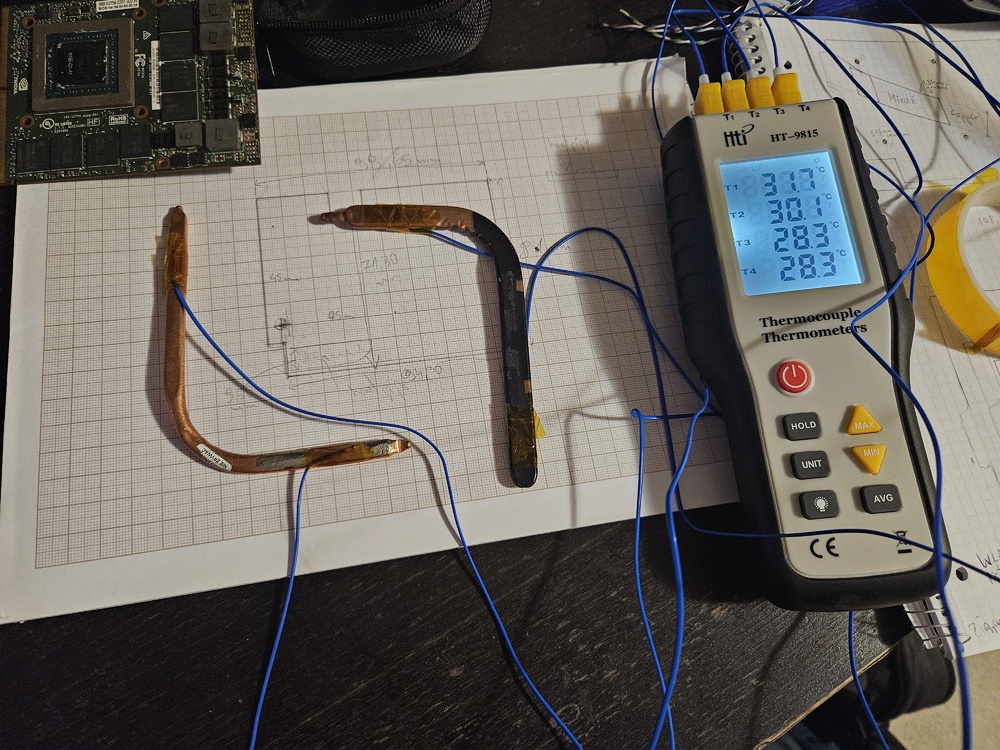
-
HP Elitebook 8570W - is it still good ? Hardware modifications
GuitarG replied to GuitarG's topic in Custom Builds
I have solved next problem: I have ordered Quadro T1000 for very cheap, now my template is complete. Heatsink will be perfectly aligned as from factory ^_^ Biggest challenge to yet be solved - making CAD file for jlcpcb manufacturer. Meantime, I've done a little bit benchmarks, in particular Timespy - GPU suffered heavy thermal throttle, so nothing to be proud and to show. There is still a lot performance to be gained. In meantime I figured out why AX200 Bluetooth don't work - no USB lanes attached to mPCIE. Fun fact, it would in older 8x60W - there are even 0ohm resistors near dvd sata port for Data+ and Data-. I will show how to do it later!
-
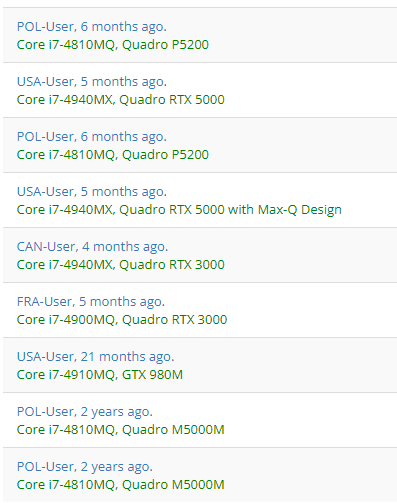
vbios look for rare vbios for P5200 graphics cards
GuitarG replied to MS-16L13's topic in Components & Upgrades
Every laptop will have different behaviour, even from same manufacturer. Depends on EC and power circuit it seems, in mine both cpu and gpu may throttle on battery only, on ac only it works on 100% power. MXM cards are powered straight from charger with 20V, EC controls numbers and how to behave for GPU power circuit controler. Only RTX versions that have additional power connector may behave differently. Also there are power spikes, battery will provide additional amps so charger won't shutdown. Like power surge. OEMs "abuse" so they can save $$ on overall laptop build. About 3D loads, you mean BSoD or just crash and freeze ? Can you turn on and off CAPS Lock or Num lock on keyboard when it crashes ? -
vbios look for rare vbios for P5200 graphics cards
GuitarG replied to MS-16L13's topic in Components & Upgrades
Yes, you need low voltage converter if you use CH341. I used both xgecu t48 and ch341 with converter, both works with low voltage chips. Higher voltage may or will fry bios chip. Btw. What MSI model are you using? I had to use external because vBIOS programs what connections GPU uses - internal (EDP, LVDS directly or using muxxer or other) and external (HDMI, VGA, DVI, DP and how many of them). Original 150W TDP limit I decreased to 100W so I could test that vBIOS without overheating/frying card. And now I remember better, that vBIOS didn't worked for me, I could only post and then I had some weird GPU glitch because it had no compability with my HP. Same was with Lenovo's bios. It may work for you, but remember to not use it with too much power. I recommend reading that topic: https://www.bilibili.com/read/cv10852330 -
vbios look for rare vbios for P5200 graphics cards
GuitarG replied to MS-16L13's topic in Components & Upgrades
Be careful flashing MSI vbios on that card, that is HP version and it is only rated for 110W max TDP, Msi vBIOS is from different version, rated for 150W (see attachment). You may try to use mobile pascal TDP tweaker, change wattage in vbios and flash it using external programmer. I may had even already uploaded such modded vbios to techpowerup vbios base, in mine HP it worked only with external output, though. It may work correctly for you (your MSI may use muxxer / optimus - iGPU used for internal LCD image, GPU for 3D tasks and external monitors) You can try newest nvflash, they had made some breakthroughs, when I used it few days ago it worked like charm. Not sure if it can bypass checksum check known as Falcon security. Can you show how card PCB looks under ? Fortunately you bought most patched D version : ) Cheers!
-
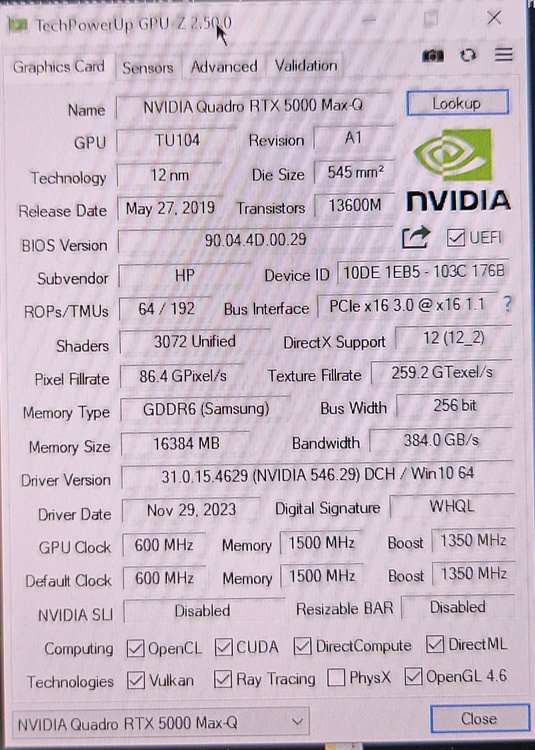
Hello ! I've been researching on subject and it seems my card works okay. Im using third gen i7 55W with rtx 5000 with 280W power supply, what displays in GPU-Z depends on nvidia control panel settings for power. When stressing on maximum performance or optimal/adaptive it clocks up to 1850mhz on core, 1500mhz memory. In PerfCap changes from Idle to PWR or Voltage or both - I guess that is normal ? So it won't extend 80W supply limit by vbios ? MXM 3.0 slot should be able to delive at least 100W of power, there are very wide copper traces on card - it's directly from power supply to GPU. Maybe experimenting with vbios or nvclean settings should help ? Before I made mine work, I had code 43 error and constant high wattage draw on GPU - it overheated until I've correctly installed driver. CPU is 100% not problem here, I would look into GPU directly and board BIOS/ KBC controller. Those are your culprits EDIT: When using constant performance in nvidia control panel GPU stays on 600 mhz core, 700 mhz ram, PerfCap is "IDLE", core draws from 25W to -50W max
-
HP Elitebook 8570W - is it still good ? Hardware modifications
GuitarG replied to GuitarG's topic in Custom Builds
Hello! And thank you for kind words! Today I made rough beta version, welded together heatsink so I could at least do little benchmarking. It is obvious GPU heatsink is not good enough, rest of laptop is working okay. Zbook G6 plate is much worse than 8770w, less copper, overall thermal mass. There is a much more performance to get, I also need to see why RAM clock is at half of full speed (6000mhz). Now I will try to make CAD file for heatsink so I can order customized plate for GPU and CPU, use fresh heatpipes and apply Honeywell PTM and go back to testing. Biggest problem is can't afford to find spare mxm card so I can make perfect heatsink. I have spare 8570w modified just for making perfectly working heatsink, but m3000m core and X clamp are offset, unfortunately : (
-
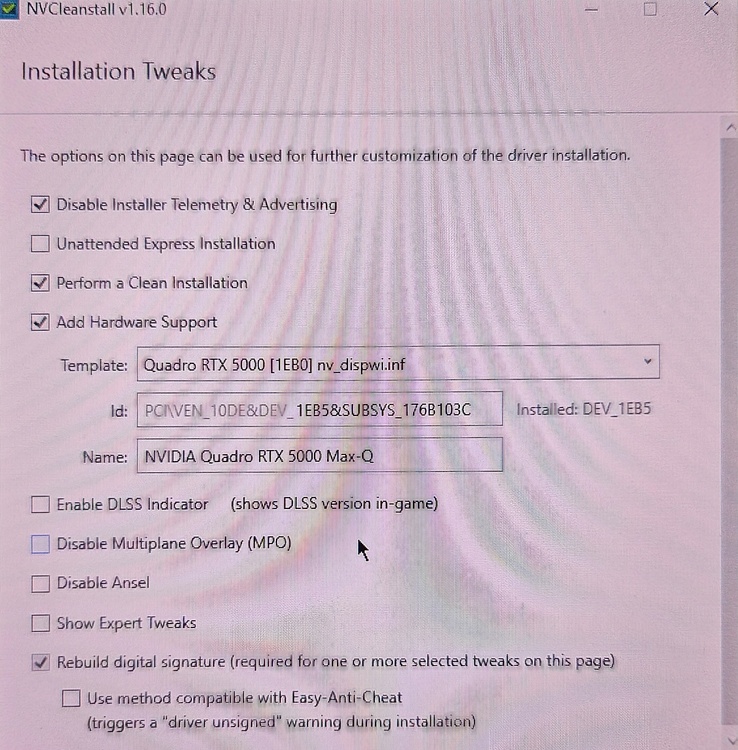
HP Elitebook 8570W - is it still good ? Hardware modifications
GuitarG replied to GuitarG's topic in Custom Builds
Settings in NVClean and GPU Z screen (had to add another post because of MB limit for post)